BrokeAss Gourmet

BrokeAss Gourmet

Tags

Results For : easy

curried broccoli stem-cashew soup

  • Prep Time 5 minutes
  • Cook Time 45-60 minutes
  • Estimated Cost $8.50
  • 97 Comments

Lunch is an important meal for everyone, but if, like me, you work from home, I think you’ll agree that an enjoyable midday meal is crucial to daily happiness.


This soup, which requires minimal prep, and which is made from scraps most people just toss out (broccoli and cilantro stems), has become a lunchtime staple for me. It’s kind of ugly, to be frank, that I almost didn’t post it, but the more I thought about it, the more I realized it really needs to be out in the world. First of all, it’s very healthy—tons of good fiber and micronutrients from the broccoli, and good fats from the cashews, which also add a bit of dairy-free creaminess and body. It’s also a wonderful, low-effort way to minimize what would otherwise be considered kitchen waste. And finally, it’s objectively delicious. I usually start thinking about it around 10 AM and don’t stop until I sit down for a bowl of it at noon.


The first step is to save your broccoli stems. Sure, you can absolutely roast, sauté or steam them along with the florets when you make broccoli, but this gives you a whole additional meal, plus it saves you the hassle of having to peel the tough exterior off of the stalks. Sometimes, I’ll cut the stems off as soon as I get my broccoli home from the market so they’re ready for this exact purpose.


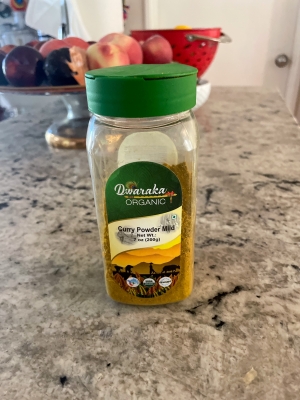
Then everything just goes into a pot with a little bit of neutral oil, and best of all, you can be seriously sloppy with your chopping because everything is just getting whizzed up in the blender anyway. Get some haphazardly diced onion, a clean but unpeeled piece of ginger (unpopular opnion: you almost never really need to bother peeling it—the peel is unoffensive and way too annoying to remove, and yes, I know about the spoon trick), some garlic, which you smash with the back of a knife but don’t do anything else to (seriously, don’t even bother removing the ends, they’re just goingt o get blitzed into oblivion anyway), and a bit of good curry powder. I’m fond of this one.


Then add the broccoli stems, a handful of raw cashews, and either water or chicken/veg broth.


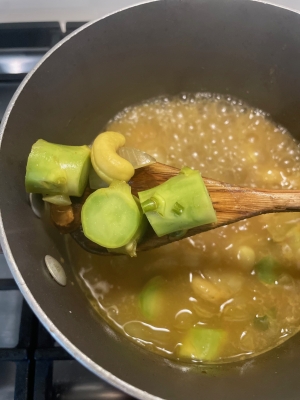
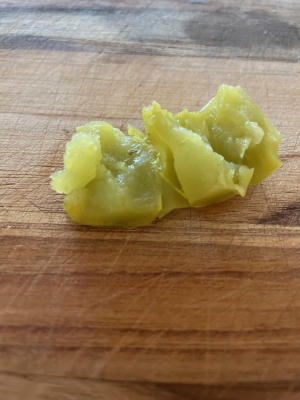
Give it a good stir, bring the mixture to a boil, then cover and let simmer over medium-low heat for 45 minutes to an hour, until the broccoli is squishably soft.


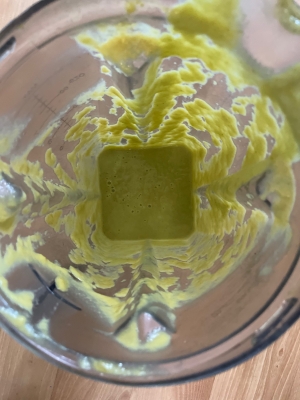
Then either use an immersian blender or dump the whole thing into a regular blender or food processor. I normally prefer an immersian blender for soups, since it’s so much neater and easier than bothering with transferring hot liquie to an actual vessel, but when I use cashews as a thickener, as I am here, I like to go with the big guns to ensure ultimate smoothness.


Season with sriracha and salt, then add the stems of one bunch of cilantro. No worries if they’ve seen better days. Again, we’re blending everything up.


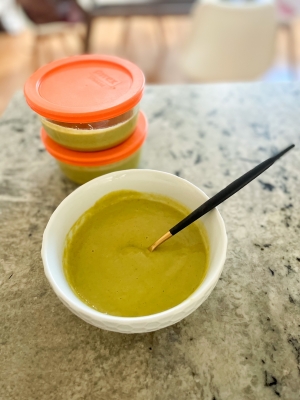
The result is, perhaps, not the single most gorgeous soup I’ve ever made, but boy is it good.


Depending on the size of the broccoli stems, I’m usually able to get about 3-4 small servings out of this recipe, or two large ones, if I’m serving it as an entree. Lately, I’ve been eating a cup of it with an English muffin topped with chicken salad, but it goes with just about any sandwich, salad, toast, wrap, or even leftover rice.


Depending on what I have on hand, I’ll sometimes swap in other veggies, or add them to the broccoli stems. It’s a great way to put anything aging or overgrown out of its misery. Think of it as kind of a home for wayward produce. The soup works nicely with carrots (just scrub them and chop roughly—no need to peel), cauliflower (you might need the cores/stems from a few heads of cauli to have enough to make soup), zucchini (especially when your garden is overflowing with it), and asparagus (ideal for those woody, overgrown asparagus bunches which seem destined for the bin). Whatever you’ve got, it’ll be good.

Ingredients

  • neutral oil, such as canola, vegetable, or avocado pantry
  • 1 medium white or yellow onion, chopped roughly $1.50
  • 1 1-inch piece ginger, scrubbed and chopped roughly pantry
  • 3 cloves garlic, smashed with the side of a knife pantry
  • 1 1/2 teaspoons curry powder pantry
  • stems from one large bunch of broccoli (about 5 long stems, florets removed) $3
  • 1/8 cup raw cashews $2.50 in the bulk aisle 
  • 3 cups water or chicken/vegetable broth
  • sriracha to taste (I used about a tablespoon) pantry
  • 1/2-3/4 teaspoon salt, depending on salinity of liquid used pantry
  • stems from one bunch of fresh cilantro, plus a few leaves for garnish $1.50 

Recipe Serves 2-4

Directions

  1. Heat the oil over medium heat in a heavy-bottomed soup pot.
  2. Add the chopped onion and let cook until translucent.
  3. Add the ginger, garlic, and curry powder, and let cook for 2-3 minutes, stirring occasionally, until very fragrant. Turn down the heat if it starts to smoke or scorch.
  4. Add the cashews and water or broth, and cover.
  5. Let simmer on medium-low for 45 minutes-1 hour, until the broccoli is very soft.
  6. Puree, either with an immersian/stick blender, or in a food processor or blender, until very smooth. Let the machine run for a little longer than seems necessary. You want the cashews to fully break down.
  7. Taste, then add sriracha and salt as needed, as well as sriracha stems.
  8. Puree again, just until the cilantro breaks down. The soup should have tiny green flecks.
  9. Serve hot, garnished with cilantro leaves if desired.

choose-your-own-adventure focaccia pizza with no-knead crust

  • Prep Time 15 minutes (plus 5 hours rising/resting time)
  • Cook Time 25-27 minutes
  • Estimated Cost $10
  • 62 Comments

If there’s one lesson I keep learning over and over again, and which seems to be increasingly relevant as I get older, it’s that patience is a virtue, and that good things come to those who wait…eventually, anyway.


Certainly this is true of my marriage. It took me 29 years and eleven months to find Evan, plus another 4 to marry him, and, as anyone who dated me between 1999 and 2012 can attest, I was not remotely ready for that kind of commitment one millisecond earlier. So, too when it comes to children. I get sad sometimes when I think about the fact that I’m kind of an old mom, and everything that means, but when I remember that it also means my kids get a much happier, calmer, more secure mother than I personally would have been if I’d had them younger, I tend to think that tradeoff is not without value. 


I’m not a naturally patient person when it comes to most things. In general, I like stuff to happen quickly or I start to get bored and lose interest, but I’ve been working on it. I’ve learned that being able to coniure patience comes in handy pretty often, whether it’s so I can finish a book manuscript, grow out unruly bangs, navigate mid-life career shifts, or offer my full attention when my kid gives her car seat dissertation defense on which Pokémon is the coolest for the four-hundredth-and-eleventh time (fyi it’s Espeon). I’ve also learned, in a shocking turn of events, that patience is pretty helpful when it comes to cooking, too.


Most of my recipes come together quickly. I like to think of myself as someone who writes recipes for real life, rather than the equally valid category of lengthier cooking projects which need to be designated to a day without other responsibilities to fulfill. But sometimes, time really is the secret ingredient to good flavor, and also, when that flavor develops while you’re sleeping and/or doing other things, you hardly notice the wait.


I’m talking specifically about the no-knead yeasted dough I’m using to make this focaccia pizza. The dough itself is incredibly versatile. You can shape it into a ball, let it rise, then bake it in a preheated Dutch oven for a rustic orb of crusty, delicious peasant bread. You can also throw it into a buttered loaf pan for a sandwich loaf that holds up enough for the sauciest burger/French dip/grilled cheese and also makes the best morning toast. 


The fluffiest, most ethereal pita, too.


You can also—as we’re doing today—lovingly stretch and dimple it in a well-oiled, rimmed baking sheet for deliciously tender yet sturdy base for focaccia pizza (if you wanted, you could just drizzle it with oil, top it with herbs/parmesan/sun-dried tomatoes or sliced onions, and have regular old focaccia, but since you’ve come this far, why not make pizza?).


The dough itself could not be easier. You mix flour (I prefer higher protein bread flour for extra chew, but AP will also work), yeast, salt, and room temperature water in a large bowl.


Mix with a wooden spoon or spatula until it comes together (it’ll be shaggy at first, then cohesive—don’t worry about overmixing), then cover the bowl tightly. In terms of kneading, there is none. You’re done.


Now here’s where you get to do some self-evaluation and figure out exactly how patient you want to be. If you want to serve the pizza (or bread/pita/focaccia) on the same day you make the dough, let it rise for four hours in a warm place (I’ve found that my turned-off microwave is the perfect spot for dough rising, but an oven that’s been heated briefly then turned off will work too—if you’re making this in July, as I am, your kitchen counter might also be plenty warm). If, however, you’re willing to wait for 8-12 hours, put the covered bowl into your refrigerator and forget about it until a couple of hours before you’re ready to bake it, at which point you’ll take it out of the fridge and let it come to room temperature. It’ll be puffed and bubbly.


When you’re ready to prep the crust for pizza, carefully deflate the dough with two forks—one in each hand—and gently pulling the dough from the edge of the bowl toward the center, repeating for 3 quarter turns until the dough folds into itself to form a ball.


Then oil a rimmed baking sheet generously.


If you want to make two or more different kinds of pizza, carefully split the dough and place each portion in a smaller prepared pan, or make it all in one big pan, as I did.


Don’t fuss with it. Just let it rest in a draft-free place, oiled and covered for 20 minutes, then stretch it gently. As soon as it starts to resist, give it another 20 minutes to rest (you want to ease the dough into place, not force it), then drizzle with a little bit of oil (not too much—you’re eventually going to top it with sauce, cheese, and possibly other stuff).


Lightly dimple it with your fingertips (we’re making little nooks and crannies to hold all that sauce and cheese).


Cover the dough again,and let it rest for about 20 minutes. It should be a little puffy. Then top your pizza however you like. I usually make a few different flavors in one big sheet pan. This one has a margherita portion, made with the fresh tomatoes for pizza from Didi Emmons’ book Entertaining for a Veggie Planet (I halve the recipe and make it with 1.5 cups chopped ripe tomatoes, 4 garlic cloves, 2 tablespoons plus 1.5 teaspoons olive oil, a handful of fresh basil, sliced into ribbons, and salt and pepper to taste—just stir in a bowl and let sit for 10 minutes before spooning over pizza)…


…as well as buffalo mozz and basil. I also did green olives and paper-thin caramelized lemons with low-moisture mozzarella in one section, and a garlicky white portion, too because a certain member of my household announced that she “hates tomatoes.”


Bake for 25-27 minutes at 475 degrees F as close to the bottom of the oven as possible. This will help ensure a crispy undercarriage.


You’re looking for browned, bubbly cheese and a crust which comes easily away from the side of the pan.


Then just slice it up and put it on the table. I threw together a garlicky yogurt ranch salad with Persian cucumbers and the ripest, sweetest sungold tomatoes (the supposed tomato hater ate at least 12 of them).


Pizza is obviously a perennial food, but making and eating it with summer’s delicious bounty is worth having patience for.


Ingredients

  • 3 cups (500 grams) all-purpose or bread flour pantry
  • 1.5 teaspoons instant yeast pantry
  • 1 teaspoon kosher salt pantry
  • 1.5 cups room temperature water
  • extra virgin olive oil pantry
  • 1-2 cups preferred sauce (see above for the tomato sauce I mentioned, but any tomato, pesto, other pizza sauce will work) $5
  • 8 ounces whole milk low-moisture mozzarella or preferred cheese, grated or sliced $5
  • other toppings as desired 

Recipe Serves 6-8

Directions

  1. Combine the flour, yeast, salt, and water in a bowl. Mix well until a dough forms.
  2. Cover the bowl tightly (with plastic wrap or a lid) and let sit in a draft-free place (I like the turned-off microwave) for 4 hours. Alternately, refrigerate for up to 12 hours.
  3. After four house, the risen dough should be bubbly and puffy. Remove the covering and carefully deflate the dough with two forks—one in each hand—gently pulling the dough from the edge of the bowl toward the center with the forks, then repeating for 3 quarter turns until the dough folds into itself to form a ball.
  4. Oil a sheet pan generously with the olive oil (3-4 tablespoons), then transferthe dough to the center of the pan.
  5. Cover the dough again and let it rest for 20 minutes.
  6. After 20 minutes, gently stretch the dough, oiling your fingers and the dough as necessary to avoid sticking. 
  7. As soon as the dough starts to resist being stretched, cover again and let rest for another 15-20 minutes and try again. Repeat until the dough easily fills the pan. Gently dimple the top of the dough with your fingertips.
  8. Let the dough rest uncovered for 20 minutes before topping. It should be puffy and bubbly. While it rests, arrange a rack as close to the bottom of the oven as possible, and preheat to 475 degrees F.
  9. Spoon the sauce over the top of the dough (no need to leave a border for crust), then top evenly with the cheese and any other toppings you like.
  10. Bake for 25-27 minutes (or longer, depending how liberally you topped it).
  11. Once the cheese is bubbly and browned in spots, remove from the oven and let cool for 5 minutes before gently removing from the pan and transfering to a cutting board. 
  12. Cut into squares at serve hot or at room temperature. 
     

Marinated Goat Cheese and a Young & Hungry Preview

Bacon-Spinach Soup with Parmesan

Candied Bacon

Stupidly Simple Banana Sorbet

Roasted Chicken Breast with Root Vegetables

BBQ Pork Burgers

  • Prep Time 0:10
  • Cook Time 0:15
  • Estimated Cost $11
  • 13 Comments

I love summer grilling, but I get tired of the same old hot dogs and hamburgers over and over again. With this in mind, I set out to create a simple-to-make, yet unique burger. These ultra-easy ones satisfy a craving for pulled pork, but can be made in the same amount of time it takes to assemble a ground beef burger patty.

Note: The burgers can also be rolled into smaller balls and baked as individual meatballs.

Ingredients

  • 1 lb ground pork $3.50
  • 2 cloves garlic. minced Pantry
  • 3 scallions, chopped $1 for a bunch
  • 4 tbsp prepared barbeque sauce, plus more for serving $4 for an 18 oz. bottle
  • 1/2 cup panko breadcrumbs $2.50 for 12 oz.
  • vegetable or canola oil for grill/grill pan Pantry

Recipe Serves 4

Directions

  1. Combine pork, garlic, scallions and BBQ sauce and bread crumbs in a mixing bowl. Use hands to combine well, then form into 4 patties.
  2. Lightly oil a grill or grill pan over medium-high heat. Cook burgers to desired doneness, brushing with extra BBQ sauce once or twice during cooking.
  3. Serve on buns, over mixed greens or plain.

Oven-Fried Sriracha Chicken

Brussels Sprouts Chips

Chicken TIkka Masala with Wilted Spinach

Spaghetti with Green Olive Pesto

Apple, Cheddar and Bacon Quesadillas with Caramelized Shallots

Quick Fresh Tomato Sauce

Spicy Glazed Walnuts

Hoisin-Sesame Grilled Chicken Breasts

Perfect Stir Fry Over Toasted Coconut Rice

Vegan Apple-Beet Soup

Chicken Fingers

Salad of Spinach, Figs, Raw Cheddar and Shaved Red Onions

Lemon-Leek Chicken Legs

Spinach-Feta Lasagna

Capellini with Easiest Garlic-Basil Cream Sauce

Mango Slaw

Yogurt-Ginger Chicken

Veggie Bin Noodle Soup

Steak Banh Mi with Chili Aioli

Pork Pho

Easy Mini Key Lime Pies