BrokeAss Gourmet

BrokeAss Gourmet

Tags

Results For : summer

loaf pan shawarma

  • Prep Time 10 minutes plus 3 hours marinating
  • Cook Time 40-45 minutes
  • Estimated Cost $15.50
  • 73 Comments

The kids just had their last day of camp before school starts in a few weeks, and we are entering that weird phase of summer where some parts of the world feel like they’ve stopped, but others are spinning, and you don’t really ever know what time it is, and you know there’s a lot that needs to be done before the leaves start changing color, and autumn seems simultaneously lightyears away and rapidly approaching.


I remember the feeling vividly from when I was a kid, back when summer meant popsicles, sleepaway camp, and reading Judy Blume by the town pool (and later on, sprinkles-covered cones at TCBY, month-long babysitting gigs, and first kisses at beach bonfire parties). It’s different on this side of things, as the one responsible for making sure the forms, appointments, reading lists, registrations, and goals set two months earlier when we had a whole summer before us are completed in a timely fashion, whilst also making sure we soak up as much outdoors time, and make as many sunscreen-scented memories as we possibly can before we’re all suddenly cast back into real life.


This clever shawarma-cooking technique, which I first learned about from the delightful Nadiya of GBBO fame feels to me like it nicely straddles both real life and the timeless magic of summer. Shawarma, a rotisserie meat dish which originated in the Ottoman Empire and is popular across the Middle East, is perfect warm-weather food—deliciously grilled, spice-laden and loaded with flavor, and, when served wrapped in a pita, extremely portable, making it ideal for outdoor eating. Traditionally, shawarma is cooked on a rotating spit, resulting in meat which is tender and juicy on the inside and nicely crisped on the outside, but you can get a pretty darn similar result by packing marinated chicken breasts or thighs into an 8-cup loaf pan.


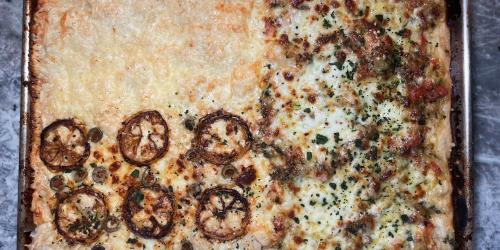
You roast in the oven for 35-40 minutes, then finish off with a quick trip under the broiler for extra texture and browning. It’ll shrink up a fair amount. 


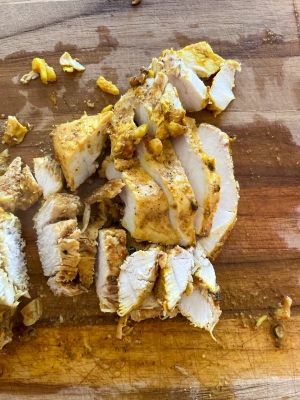
The meat rests in the pan for 10 minutes after roasting (this is crucial to retain those juices), then turn it out onto a cutting board and slice away.


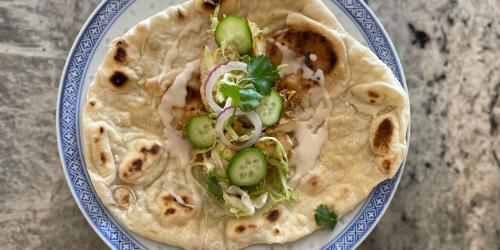
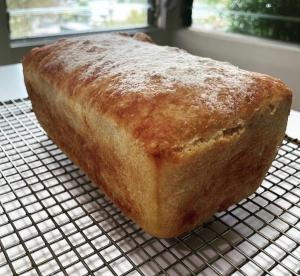
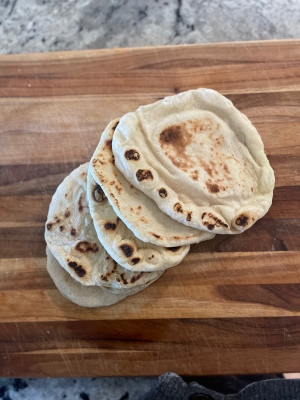
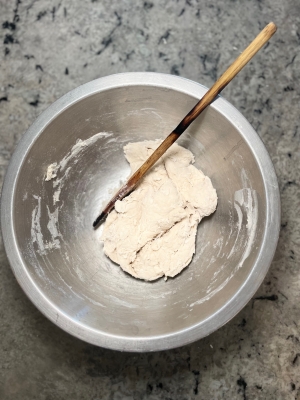
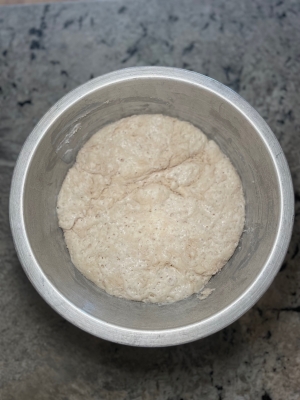
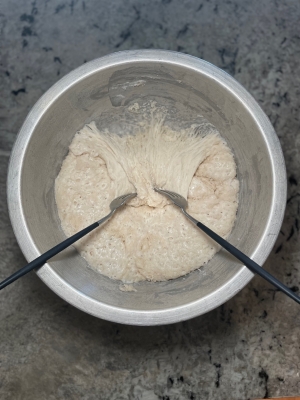
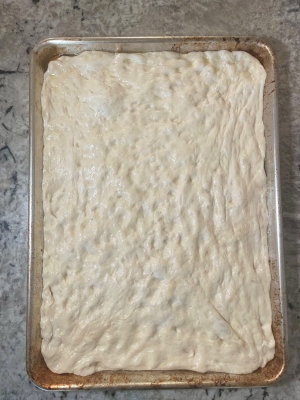
I served it on homemade flatbread (just pizza dough I rolled into rounds and cooked in a dry frying pan over medium-high heat until they puffed), with some garlicky tahina, cilantro, red onion and pickled cabbage.


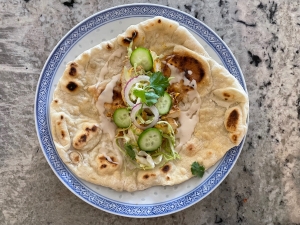
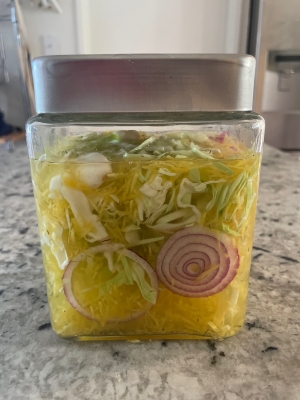
I’m obsessed with this pickled cabbage btw. I make a huge batch of almost every week and eat it with every meal. It’s so simple and so good, and having a jar of it in the fridge spares me having to make a vegetable side, which I love.


Here’s to making the final stretch of summer as delicious as possible.

Ingredients

  • juice of 1 large or 2 small lemons $0.50
  • 1/4 cup extra virgin olive oil pantry
  • 10-12 garlic cloves, minced pantry
  • 1 tablespoon kosher salt pantry
  • 1/2 teaspoon red pepper flakes pantry
  • 1 1/2 teaspoons ground cardamom pantry
  • 1 1/2 teaspoons ground turmeric pantry
  • 1/2 teaspoon ground cinnamon pantry
  • 1 teaspoon ground coriander pantry
  • 3 pounds boneless, skinless chicken thighs or breasts (or a combination) $15
  • pita, pickles, tahini and/or labne or garlic-yogurt sauce for serving

Recipe Serves 4

Directions

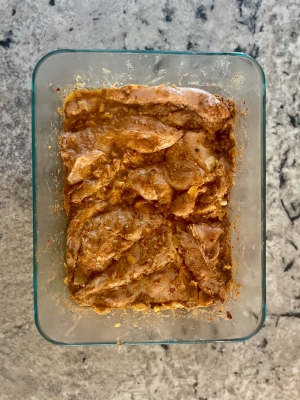
  1. In a large bowl, combine the lemon juice, olive oil, garlic, salt, and spices with the chicken.
  2. Mix well to coat, then transfer to a zip-top bag or airtight container and marinate for at least 3 hours, up to 24.
  3. Preheat the oven to 400 degrees F and position a rack in the middle of the oven.
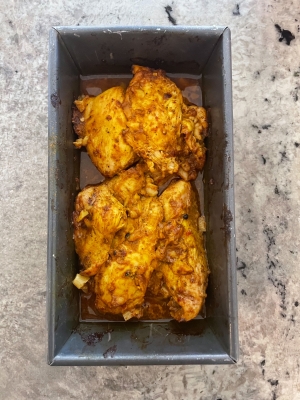
  4. Tightly pack the marinated chicken and its juice into an 8-cup loaf pan, preferably one made of metal. If the chicken goes all the way to the top of your loaf pan, place the pan inside a larger pan to catch any excess juices during cooking.
  5. Bake for 35-40 minutes, until the chicken is cooked through but juicey (it should register 160 degrees F on a meat thermometer).
  6. Keeping the pan on the middle rack, turn on the broiler and broil the chicken for 3-5 minutes, until nicely browned (keep an eye on it).
  7. Once the chicken has finished cooking, let rest for 10 minutes.
  8. Carefully pour the juices into a bowl.
  9. Turn the loaf pan over onto a wooden cutting board, preferably one with a moat to catch juices.
  10. Use a sharp knife to slice the chicken thinly across the grain. Pour as much of reserved juices onto the sliced shawarma as you would like.
  11. Serve the sliced chicken with soft pita (or other flatbread) or rice, with pickles and tahini sauce, labne or garlic-yogurt sauce

choose-your-own-adventure focaccia pizza with no-knead crust

  • Prep Time 15 minutes (plus 5 hours rising/resting time)
  • Cook Time 25-27 minutes
  • Estimated Cost $10
  • 51 Comments

If there’s one lesson I keep learning over and over again, and which seems to be increasingly relevant as I get older, it’s that patience is a virtue, and that good things come to those who wait…eventually, anyway.


Certainly this is true of my marriage. It took me 29 years and eleven months to find Evan, plus another 4 to marry him, and, as anyone who dated me between 1999 and 2012 can attest, I was not remotely ready for that kind of commitment one millisecond earlier. So, too when it comes to children. I get sad sometimes when I think about the fact that I’m kind of an old mom, and everything that means, but when I remember that it also means my kids get a much happier, calmer, more secure mother than I personally would have been if I’d had them younger, I tend to think that tradeoff is not without value. 


I’m not a naturally patient person when it comes to most things. In general, I like stuff to happen quickly or I start to get bored and lose interest, but I’ve been working on it. I’ve learned that being able to coniure patience comes in handy pretty often, whether it’s so I can finish a book manuscript, grow out unruly bangs, navigate mid-life career shifts, or offer my full attention when my kid gives her car seat dissertation defense on which Pokémon is the coolest for the four-hundredth-and-eleventh time (fyi it’s Espeon). I’ve also learned, in a shocking turn of events, that patience is pretty helpful when it comes to cooking, too.


Most of my recipes come together quickly. I like to think of myself as someone who writes recipes for real life, rather than the equally valid category of lengthier cooking projects which need to be designated to a day without other responsibilities to fulfill. But sometimes, time really is the secret ingredient to good flavor, and also, when that flavor develops while you’re sleeping and/or doing other things, you hardly notice the wait.


I’m talking specifically about the no-knead yeasted dough I’m using to make this focaccia pizza. The dough itself is incredibly versatile. You can shape it into a ball, let it rise, then bake it in a preheated Dutch oven for a rustic orb of crusty, delicious peasant bread. You can also throw it into a buttered loaf pan for a sandwich loaf that holds up enough for the sauciest burger/French dip/grilled cheese and also makes the best morning toast. 


The fluffiest, most ethereal pita, too.


You can also—as we’re doing today—lovingly stretch and dimple it in a well-oiled, rimmed baking sheet for deliciously tender yet sturdy base for focaccia pizza (if you wanted, you could just drizzle it with oil, top it with herbs/parmesan/sun-dried tomatoes or sliced onions, and have regular old focaccia, but since you’ve come this far, why not make pizza?).


The dough itself could not be easier. You mix flour (I prefer higher protein bread flour for extra chew, but AP will also work), yeast, salt, and room temperature water in a large bowl.


Mix with a wooden spoon or spatula until it comes together (it’ll be shaggy at first, then cohesive—don’t worry about overmixing), then cover the bowl tightly. In terms of kneading, there is none. You’re done.


Now here’s where you get to do some self-evaluation and figure out exactly how patient you want to be. If you want to serve the pizza (or bread/pita/focaccia) on the same day you make the dough, let it rise for four hours in a warm place (I’ve found that my turned-off microwave is the perfect spot for dough rising, but an oven that’s been heated briefly then turned off will work too—if you’re making this in July, as I am, your kitchen counter might also be plenty warm). If, however, you’re willing to wait for 8-12 hours, put the covered bowl into your refrigerator and forget about it until a couple of hours before you’re ready to bake it, at which point you’ll take it out of the fridge and let it come to room temperature. It’ll be puffed and bubbly.


When you’re ready to prep the crust for pizza, carefully deflate the dough with two forks—one in each hand—and gently pulling the dough from the edge of the bowl toward the center, repeating for 3 quarter turns until the dough folds into itself to form a ball.


Then oil a rimmed baking sheet generously.


If you want to make two or more different kinds of pizza, carefully split the dough and place each portion in a smaller prepared pan, or make it all in one big pan, as I did.


Don’t fuss with it. Just let it rest in a draft-free place, oiled and covered for 20 minutes, then stretch it gently. As soon as it starts to resist, give it another 20 minutes to rest (you want to ease the dough into place, not force it), then drizzle with a little bit of oil (not too much—you’re eventually going to top it with sauce, cheese, and possibly other stuff).


Lightly dimple it with your fingertips (we’re making little nooks and crannies to hold all that sauce and cheese).


Cover the dough again,and let it rest for about 20 minutes. It should be a little puffy. Then top your pizza however you like. I usually make a few different flavors in one big sheet pan. This one has a margherita portion, made with the fresh tomatoes for pizza from Didi Emmons’ book Entertaining for a Veggie Planet (I halve the recipe and make it with 1.5 cups chopped ripe tomatoes, 4 garlic cloves, 2 tablespoons plus 1.5 teaspoons olive oil, a handful of fresh basil, sliced into ribbons, and salt and pepper to taste—just stir in a bowl and let sit for 10 minutes before spooning over pizza)…


…as well as buffalo mozz and basil. I also did green olives and paper-thin caramelized lemons with low-moisture mozzarella in one section, and a garlicky white portion, too because a certain member of my household announced that she “hates tomatoes.”


Bake for 25-27 minutes at 475 degrees F as close to the bottom of the oven as possible. This will help ensure a crispy undercarriage.


You’re looking for browned, bubbly cheese and a crust which comes easily away from the side of the pan.


Then just slice it up and put it on the table. I threw together a garlicky yogurt ranch salad with Persian cucumbers and the ripest, sweetest sungold tomatoes (the supposed tomato hater ate at least 12 of them).


Pizza is obviously a perennial food, but making and eating it with summer’s delicious bounty is worth having patience for.


Ingredients

  • 3 cups (500 grams) all-purpose or bread flour pantry
  • 1.5 teaspoons instant yeast pantry
  • 1 teaspoon kosher salt pantry
  • 1.5 cups room temperature water
  • extra virgin olive oil pantry
  • 1-2 cups preferred sauce (see above for the tomato sauce I mentioned, but any tomato, pesto, other pizza sauce will work) $5
  • 8 ounces whole milk low-moisture mozzarella or preferred cheese, grated or sliced $5
  • other toppings as desired 

Recipe Serves 6-8

Directions

  1. Combine the flour, yeast, salt, and water in a bowl. Mix well until a dough forms.
  2. Cover the bowl tightly (with plastic wrap or a lid) and let sit in a draft-free place (I like the turned-off microwave) for 4 hours. Alternately, refrigerate for up to 12 hours.
  3. After four house, the risen dough should be bubbly and puffy. Remove the covering and carefully deflate the dough with two forks—one in each hand—gently pulling the dough from the edge of the bowl toward the center with the forks, then repeating for 3 quarter turns until the dough folds into itself to form a ball.
  4. Oil a sheet pan generously with the olive oil (3-4 tablespoons), then transferthe dough to the center of the pan.
  5. Cover the dough again and let it rest for 20 minutes.
  6. After 20 minutes, gently stretch the dough, oiling your fingers and the dough as necessary to avoid sticking. 
  7. As soon as the dough starts to resist being stretched, cover again and let rest for another 15-20 minutes and try again. Repeat until the dough easily fills the pan. Gently dimple the top of the dough with your fingertips.
  8. Let the dough rest uncovered for 20 minutes before topping. It should be puffy and bubbly. While it rests, arrange a rack as close to the bottom of the oven as possible, and preheat to 475 degrees F.
  9. Spoon the sauce over the top of the dough (no need to leave a border for crust), then top evenly with the cheese and any other toppings you like.
  10. Bake for 25-27 minutes (or longer, depending how liberally you topped it).
  11. Once the cheese is bubbly and browned in spots, remove from the oven and let cool for 5 minutes before gently removing from the pan and transfering to a cutting board. 
  12. Cut into squares at serve hot or at room temperature. 
     

Personal Peach Pies

Lemon-Blueberry Sparklers

Kale Salad with Figs

Backyard Barbecue, Vegetarian Style

Watermelon Salad Pizza

Strawberry Balsamic Jam

Spiced Plantain Tacos

Guacamole Salad

Zucchini Ribbons with Feta

Fresh Fig and Goat Cheese Sandwiches

Grilled Corn Salad With Feta

Pumpkin Soup with Basil Oil

Chilled Yellow Tomato Soup with Mint and Yogurt

Sriracha Burgers with Guacamole and Caramelized Onions

Coconut Shortcakes with Peaches and Cream

Grilled Steak Salad with Watermelon and Macadamia Nuts

Roasted Green Pepper Soup

Garden Vegetable Guacamole

Strawberry Gazpacho Shooters

BBQ Pork Burgers

  • Prep Time 0:10
  • Cook Time 0:15
  • Estimated Cost $11
  • 13 Comments

I love summer grilling, but I get tired of the same old hot dogs and hamburgers over and over again. With this in mind, I set out to create a simple-to-make, yet unique burger. These ultra-easy ones satisfy a craving for pulled pork, but can be made in the same amount of time it takes to assemble a ground beef burger patty.

Note: The burgers can also be rolled into smaller balls and baked as individual meatballs.

Ingredients

  • 1 lb ground pork $3.50
  • 2 cloves garlic. minced Pantry
  • 3 scallions, chopped $1 for a bunch
  • 4 tbsp prepared barbeque sauce, plus more for serving $4 for an 18 oz. bottle
  • 1/2 cup panko breadcrumbs $2.50 for 12 oz.
  • vegetable or canola oil for grill/grill pan Pantry

Recipe Serves 4

Directions

  1. Combine pork, garlic, scallions and BBQ sauce and bread crumbs in a mixing bowl. Use hands to combine well, then form into 4 patties.
  2. Lightly oil a grill or grill pan over medium-high heat. Cook burgers to desired doneness, brushing with extra BBQ sauce once or twice during cooking.
  3. Serve on buns, over mixed greens or plain.

Baked Coconut Shrimp

Corn, Avocado and Black Bean Salad with Raspberries

Coconut Ice Cream

Chicken-Mango Sausage

Peach-Feta Flatbread with Balsamic Onions and Fresh Basil

Grilled Peaches with Mozzarella and Basil

Grilled Chicken-Avocado Caprese Salad

Shrimp with Spicy Pesto and Mango Relish

Cold Soba Noodle-Vegetable Salad with Tempeh

Israeli Couscous Salad with Feta

Pesto Pizza with Buffalo Mozzarella and Arugula

Brown Sugar-Peach Semifreddos

Peachy Summer Gazpacho

Salad of Spinach, Figs, Raw Cheddar and Shaved Red Onions

Minted Cookies-and-Cream Ice Cream

Chilled Watermelon-Yogurt Soup

Summer Shrimp Risotto

Watermelon-Feta Salad

Corn and Shrimp Dumplings

Grilled Flatbread with Fire-Roasted Eggplant, Tomatoes and Mint

Herb Pesto Pizza with Shaved Asparagus and Fresh Eggs

Pickled Cauliflower with Chilis and Cilantro

Angel Hair with Wasabi, Peas and Mint

Basil-Feta Turkey Burgers with Avocado

Grilled Peaches over Mixed Greens with Ricotta, Avocado and Sweet Onion Dressing