BrokeAss Gourmet

BrokeAss Gourmet

curried broccoli stem-cashew soup

  • Prep Time 5 minutes
  • Cook Time 45-60 minutes
  • Estimated Cost $8.50
  • 97 Comments

Lunch is an important meal for everyone, but if, like me, you work from home, I think you’ll agree that an enjoyable midday meal is crucial to daily happiness.


This soup, which requires minimal prep, and which is made from scraps most people just toss out (broccoli and cilantro stems), has become a lunchtime staple for me. It’s kind of ugly, to be frank, that I almost didn’t post it, but the more I thought about it, the more I realized it really needs to be out in the world. First of all, it’s very healthy—tons of good fiber and micronutrients from the broccoli, and good fats from the cashews, which also add a bit of dairy-free creaminess and body. It’s also a wonderful, low-effort way to minimize what would otherwise be considered kitchen waste. And finally, it’s objectively delicious. I usually start thinking about it around 10 AM and don’t stop until I sit down for a bowl of it at noon.


The first step is to save your broccoli stems. Sure, you can absolutely roast, sauté or steam them along with the florets when you make broccoli, but this gives you a whole additional meal, plus it saves you the hassle of having to peel the tough exterior off of the stalks. Sometimes, I’ll cut the stems off as soon as I get my broccoli home from the market so they’re ready for this exact purpose.


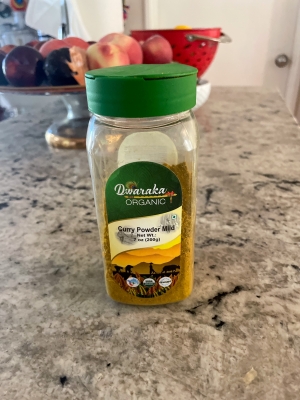
Then everything just goes into a pot with a little bit of neutral oil, and best of all, you can be seriously sloppy with your chopping because everything is just getting whizzed up in the blender anyway. Get some haphazardly diced onion, a clean but unpeeled piece of ginger (unpopular opnion: you almost never really need to bother peeling it—the peel is unoffensive and way too annoying to remove, and yes, I know about the spoon trick), some garlic, which you smash with the back of a knife but don’t do anything else to (seriously, don’t even bother removing the ends, they’re just goingt o get blitzed into oblivion anyway), and a bit of good curry powder. I’m fond of this one.


Then add the broccoli stems, a handful of raw cashews, and either water or chicken/veg broth.
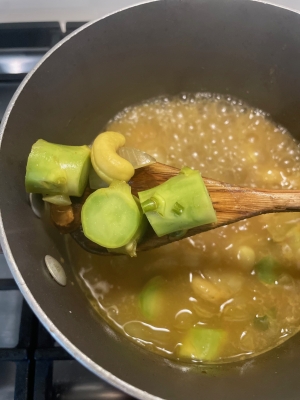


Give it a good stir, bring the mixture to a boil, then cover and let simmer over medium-low heat for 45 minutes to an hour, until the broccoli is squishably soft.
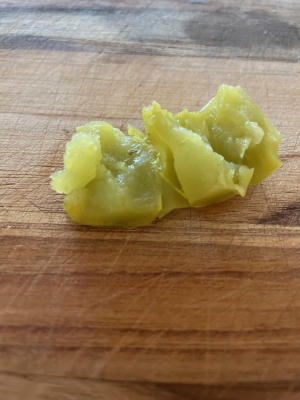


Then either use an immersian blender or dump the whole thing into a regular blender or food processor. I normally prefer an immersian blender for soups, since it’s so much neater and easier than bothering with transferring hot liquie to an actual vessel, but when I use cashews as a thickener, as I am here, I like to go with the big guns to ensure ultimate smoothness.
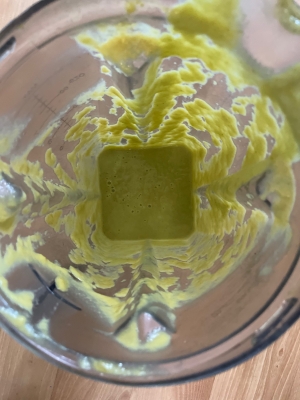


Season with sriracha and salt, then add the stems of one bunch of cilantro. No worries if they’ve seen better days. Again, we’re blending everything up.
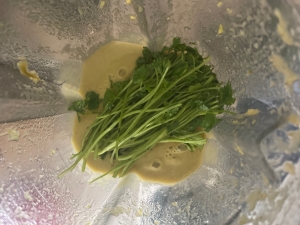


The result is, perhaps, not the single most gorgeous soup I’ve ever made, but boy is it good.



Depending on the size of the broccoli stems, I’m usually able to get about 3-4 small servings out of this recipe, or two large ones, if I’m serving it as an entree. Lately, I’ve been eating a cup of it with an English muffin topped with chicken salad, but it goes with just about any sandwich, salad, toast, wrap, or even leftover rice.
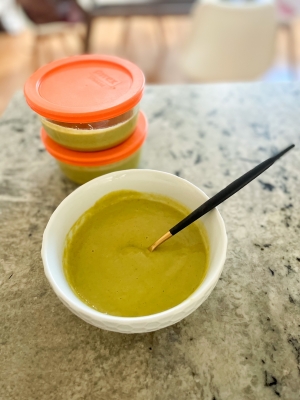


Depending on what I have on hand, I’ll sometimes swap in other veggies, or add them to the broccoli stems. It’s a great way to put anything aging or overgrown out of its misery. Think of it as kind of a home for wayward produce. The soup works nicely with carrots (just scrub them and chop roughly—no need to peel), cauliflower (you might need the cores/stems from a few heads of cauli to have enough to make soup), zucchini (especially when your garden is overflowing with it), and asparagus (ideal for those woody, overgrown asparagus bunches which seem destined for the bin). Whatever you’ve got, it’ll be good.

Ingredients

  • neutral oil, such as canola, vegetable, or avocado pantry
  • 1 medium white or yellow onion, chopped roughly $1.50
  • 1 1-inch piece ginger, scrubbed and chopped roughly pantry
  • 3 cloves garlic, smashed with the side of a knife pantry
  • 1 1/2 teaspoons curry powder pantry
  • stems from one large bunch of broccoli (about 5 long stems, florets removed) $3
  • 1/8 cup raw cashews $2.50 in the bulk aisle 
  • 3 cups water or chicken/vegetable broth
  • sriracha to taste (I used about a tablespoon) pantry
  • 1/2-3/4 teaspoon salt, depending on salinity of liquid used pantry
  • stems from one bunch of fresh cilantro, plus a few leaves for garnish $1.50 

Recipe Serves 2-4

Directions

  1. Heat the oil over medium heat in a heavy-bottomed soup pot.
  2. Add the chopped onion and let cook until translucent.
  3. Add the ginger, garlic, and curry powder, and let cook for 2-3 minutes, stirring occasionally, until very fragrant. Turn down the heat if it starts to smoke or scorch.
  4. Add the cashews and water or broth, and cover.
  5. Let simmer on medium-low for 45 minutes-1 hour, until the broccoli is very soft.
  6. Puree, either with an immersian/stick blender, or in a food processor or blender, until very smooth. Let the machine run for a little longer than seems necessary. You want the cashews to fully break down.
  7. Taste, then add sriracha and salt as needed, as well as sriracha stems.
  8. Puree again, just until the cilantro breaks down. The soup should have tiny green flecks.
  9. Serve hot, garnished with cilantro leaves if desired.

loaf pan shawarma

  • Prep Time 10 minutes plus 3 hours marinating
  • Cook Time 40-45 minutes
  • Estimated Cost $15.50
  • 102 Comments

The kids just had their last day of camp before school starts in a few weeks, and we are entering that weird phase of summer where some parts of the world feel like they’ve stopped, but others are spinning, and you don’t really ever know what time it is, and you know there’s a lot that needs to be done before the leaves start changing color, and autumn seems simultaneously lightyears away and rapidly approaching.


I remember the feeling vividly from when I was a kid, back when summer meant popsicles, sleepaway camp, and reading Judy Blume by the town pool (and later on, sprinkles-covered cones at TCBY, month-long babysitting gigs, and first kisses at beach bonfire parties). It’s different on this side of things, as the one responsible for making sure the forms, appointments, reading lists, registrations, and goals set two months earlier when we had a whole summer before us are completed in a timely fashion, whilst also making sure we soak up as much outdoors time, and make as many sunscreen-scented memories as we possibly can before we’re all suddenly cast back into real life.


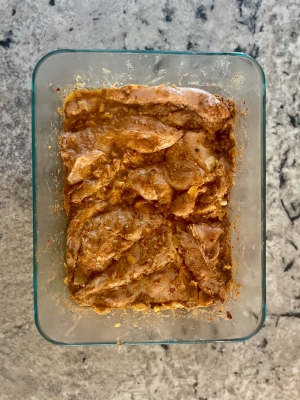
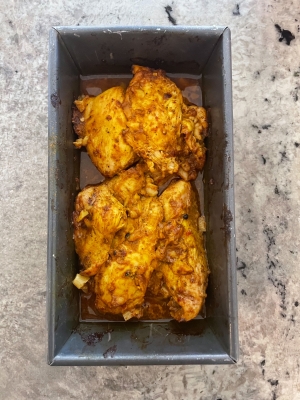
This clever shawarma-cooking technique, which I first learned about from the delightful Nadiya of GBBO fame feels to me like it nicely straddles both real life and the timeless magic of summer. Shawarma, a rotisserie meat dish which originated in the Ottoman Empire and is popular across the Middle East, is perfect warm-weather food—deliciously grilled, spice-laden and loaded with flavor, and, when served wrapped in a pita, extremely portable, making it ideal for outdoor eating. Traditionally, shawarma is cooked on a rotating spit, resulting in meat which is tender and juicy on the inside and nicely crisped on the outside, but you can get a pretty darn similar result by packing marinated chicken breasts or thighs into an 8-cup loaf pan.


You roast in the oven for 35-40 minutes, then finish off with a quick trip under the broiler for extra texture and browning. It’ll shrink up a fair amount. 


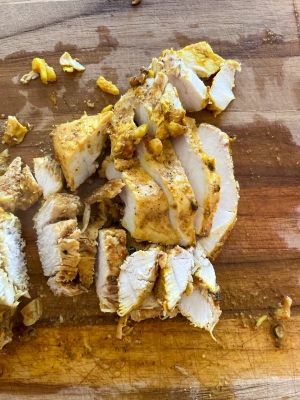
The meat rests in the pan for 10 minutes after roasting (this is crucial to retain those juices), then turn it out onto a cutting board and slice away.


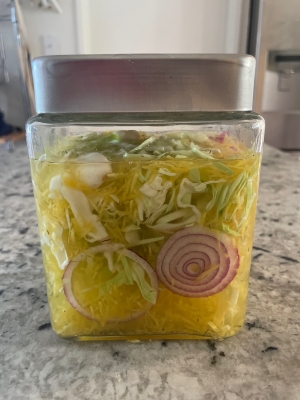
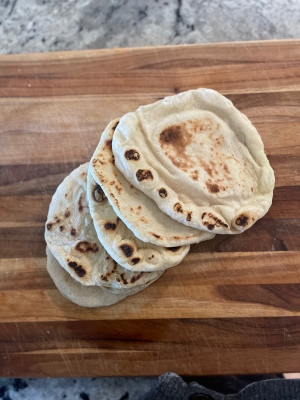
I served it on homemade flatbread (just pizza dough I rolled into rounds and cooked in a dry frying pan over medium-high heat until they puffed), with some garlicky tahina, cilantro, red onion and pickled cabbage.


I’m obsessed with this pickled cabbage btw. I make a huge batch of almost every week and eat it with every meal. It’s so simple and so good, and having a jar of it in the fridge spares me having to make a vegetable side, which I love.


Here’s to making the final stretch of summer as delicious as possible.

Ingredients

  • juice of 1 large or 2 small lemons $0.50
  • 1/4 cup extra virgin olive oil pantry
  • 10-12 garlic cloves, minced pantry
  • 1 tablespoon kosher salt pantry
  • 1/2 teaspoon red pepper flakes pantry
  • 1 1/2 teaspoons ground cardamom pantry
  • 1 1/2 teaspoons ground turmeric pantry
  • 1/2 teaspoon ground cinnamon pantry
  • 1 teaspoon ground coriander pantry
  • 3 pounds boneless, skinless chicken thighs or breasts (or a combination) $15
  • pita, pickles, tahini and/or labne or garlic-yogurt sauce for serving

Recipe Serves 4

Directions

  1. In a large bowl, combine the lemon juice, olive oil, garlic, salt, and spices with the chicken.
  2. Mix well to coat, then transfer to a zip-top bag or airtight container and marinate for at least 3 hours, up to 24.
  3. Preheat the oven to 400 degrees F and position a rack in the middle of the oven.
  4. Tightly pack the marinated chicken and its juice into an 8-cup loaf pan, preferably one made of metal. If the chicken goes all the way to the top of your loaf pan, place the pan inside a larger pan to catch any excess juices during cooking.
  5. Bake for 35-40 minutes, until the chicken is cooked through but juicey (it should register 160 degrees F on a meat thermometer).
  6. Keeping the pan on the middle rack, turn on the broiler and broil the chicken for 3-5 minutes, until nicely browned (keep an eye on it).
  7. Once the chicken has finished cooking, let rest for 10 minutes.
  8. Carefully pour the juices into a bowl.
  9. Turn the loaf pan over onto a wooden cutting board, preferably one with a moat to catch juices.
  10. Use a sharp knife to slice the chicken thinly across the grain. Pour as much of reserved juices onto the sliced shawarma as you would like.
  11. Serve the sliced chicken with soft pita (or other flatbread) or rice, with pickles and tahini sauce, labne or garlic-yogurt sauce

choose-your-own-adventure focaccia pizza with no-knead crust

  • Prep Time 15 minutes (plus 5 hours rising/resting time)
  • Cook Time 25-27 minutes
  • Estimated Cost $10
  • 62 Comments

If there’s one lesson I keep learning over and over again, and which seems to be increasingly relevant as I get older, it’s that patience is a virtue, and that good things come to those who wait…eventually, anyway.


Certainly this is true of my marriage. It took me 29 years and eleven months to find Evan, plus another 4 to marry him, and, as anyone who dated me between 1999 and 2012 can attest, I was not remotely ready for that kind of commitment one millisecond earlier. So, too when it comes to children. I get sad sometimes when I think about the fact that I’m kind of an old mom, and everything that means, but when I remember that it also means my kids get a much happier, calmer, more secure mother than I personally would have been if I’d had them younger, I tend to think that tradeoff is not without value. 


I’m not a naturally patient person when it comes to most things. In general, I like stuff to happen quickly or I start to get bored and lose interest, but I’ve been working on it. I’ve learned that being able to coniure patience comes in handy pretty often, whether it’s so I can finish a book manuscript, grow out unruly bangs, navigate mid-life career shifts, or offer my full attention when my kid gives her car seat dissertation defense on which Pokémon is the coolest for the four-hundredth-and-eleventh time (fyi it’s Espeon). I’ve also learned, in a shocking turn of events, that patience is pretty helpful when it comes to cooking, too.


Most of my recipes come together quickly. I like to think of myself as someone who writes recipes for real life, rather than the equally valid category of lengthier cooking projects which need to be designated to a day without other responsibilities to fulfill. But sometimes, time really is the secret ingredient to good flavor, and also, when that flavor develops while you’re sleeping and/or doing other things, you hardly notice the wait.


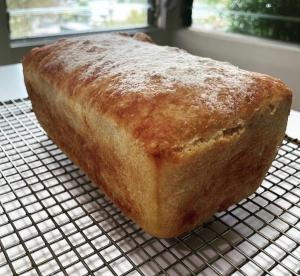
I’m talking specifically about the no-knead yeasted dough I’m using to make this focaccia pizza. The dough itself is incredibly versatile. You can shape it into a ball, let it rise, then bake it in a preheated Dutch oven for a rustic orb of crusty, delicious peasant bread. You can also throw it into a buttered loaf pan for a sandwich loaf that holds up enough for the sauciest burger/French dip/grilled cheese and also makes the best morning toast. 


The fluffiest, most ethereal pita, too.


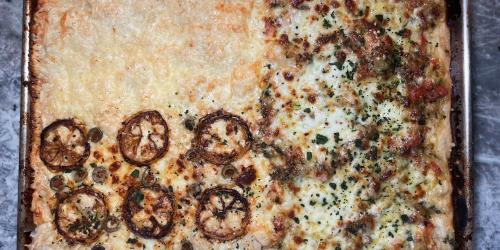
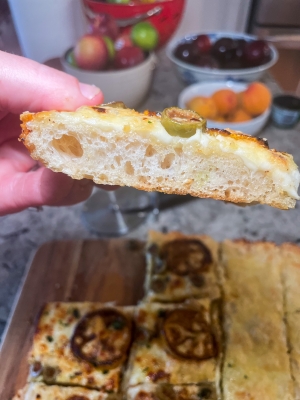
You can also—as we’re doing today—lovingly stretch and dimple it in a well-oiled, rimmed baking sheet for deliciously tender yet sturdy base for focaccia pizza (if you wanted, you could just drizzle it with oil, top it with herbs/parmesan/sun-dried tomatoes or sliced onions, and have regular old focaccia, but since you’ve come this far, why not make pizza?).


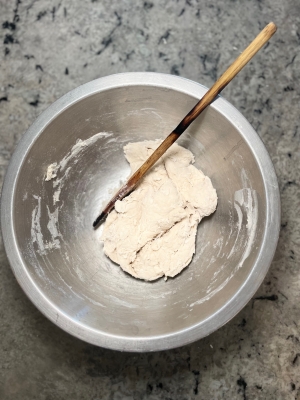
The dough itself could not be easier. You mix flour (I prefer higher protein bread flour for extra chew, but AP will also work), yeast, salt, and room temperature water in a large bowl.


Mix with a wooden spoon or spatula until it comes together (it’ll be shaggy at first, then cohesive—don’t worry about overmixing), then cover the bowl tightly. In terms of kneading, there is none. You’re done.


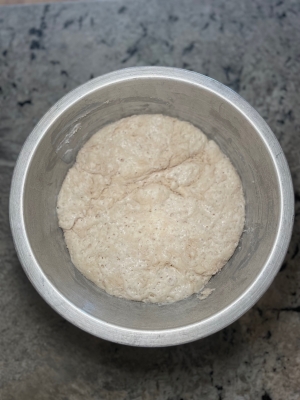
Now here’s where you get to do some self-evaluation and figure out exactly how patient you want to be. If you want to serve the pizza (or bread/pita/focaccia) on the same day you make the dough, let it rise for four hours in a warm place (I’ve found that my turned-off microwave is the perfect spot for dough rising, but an oven that’s been heated briefly then turned off will work too—if you’re making this in July, as I am, your kitchen counter might also be plenty warm). If, however, you’re willing to wait for 8-12 hours, put the covered bowl into your refrigerator and forget about it until a couple of hours before you’re ready to bake it, at which point you’ll take it out of the fridge and let it come to room temperature. It’ll be puffed and bubbly.


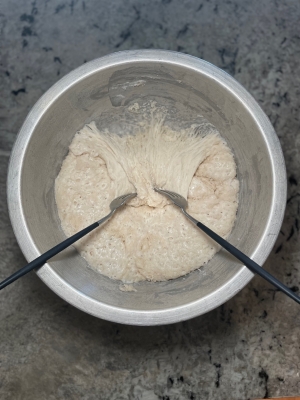
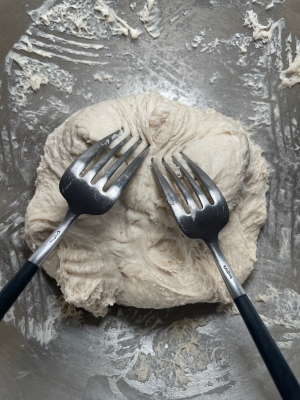
When you’re ready to prep the crust for pizza, carefully deflate the dough with two forks—one in each hand—and gently pulling the dough from the edge of the bowl toward the center, repeating for 3 quarter turns until the dough folds into itself to form a ball.


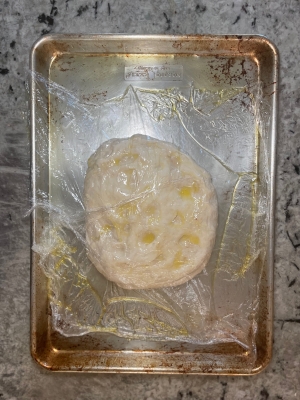
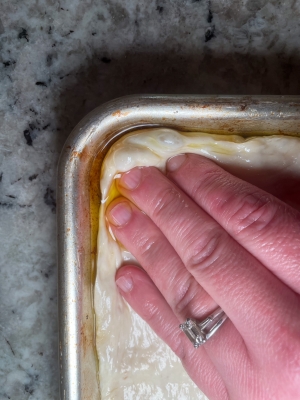
Then oil a rimmed baking sheet generously.


If you want to make two or more different kinds of pizza, carefully split the dough and place each portion in a smaller prepared pan, or make it all in one big pan, as I did.


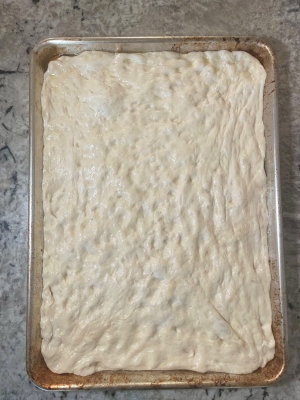
Don’t fuss with it. Just let it rest in a draft-free place, oiled and covered for 20 minutes, then stretch it gently. As soon as it starts to resist, give it another 20 minutes to rest (you want to ease the dough into place, not force it), then drizzle with a little bit of oil (not too much—you’re eventually going to top it with sauce, cheese, and possibly other stuff).


Lightly dimple it with your fingertips (we’re making little nooks and crannies to hold all that sauce and cheese).


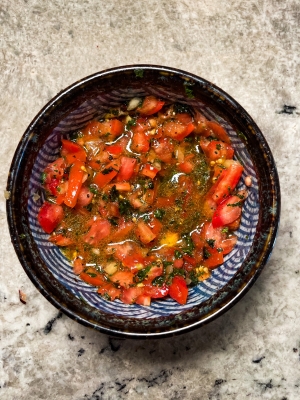
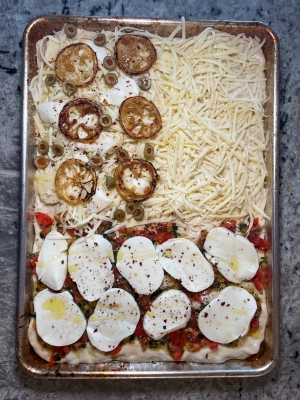
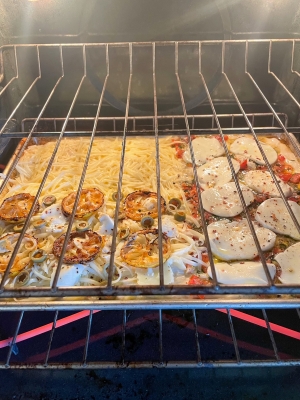
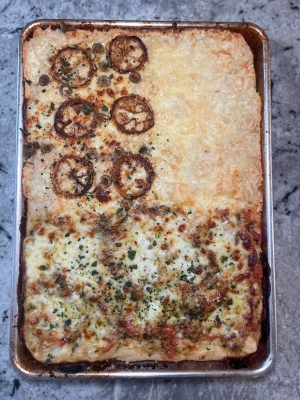
Cover the dough again,and let it rest for about 20 minutes. It should be a little puffy. Then top your pizza however you like. I usually make a few different flavors in one big sheet pan. This one has a margherita portion, made with the fresh tomatoes for pizza from Didi Emmons’ book Entertaining for a Veggie Planet (I halve the recipe and make it with 1.5 cups chopped ripe tomatoes, 4 garlic cloves, 2 tablespoons plus 1.5 teaspoons olive oil, a handful of fresh basil, sliced into ribbons, and salt and pepper to taste—just stir in a bowl and let sit for 10 minutes before spooning over pizza)…


…as well as buffalo mozz and basil. I also did green olives and paper-thin caramelized lemons with low-moisture mozzarella in one section, and a garlicky white portion, too because a certain member of my household announced that she “hates tomatoes.”


Bake for 25-27 minutes at 475 degrees F as close to the bottom of the oven as possible. This will help ensure a crispy undercarriage.


You’re looking for browned, bubbly cheese and a crust which comes easily away from the side of the pan.


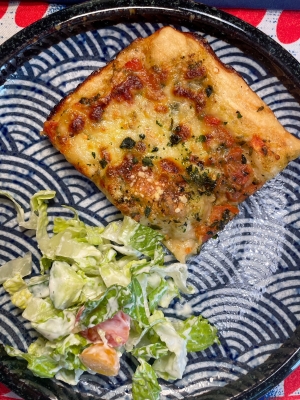
Then just slice it up and put it on the table. I threw together a garlicky yogurt ranch salad with Persian cucumbers and the ripest, sweetest sungold tomatoes (the supposed tomato hater ate at least 12 of them).


Pizza is obviously a perennial food, but making and eating it with summer’s delicious bounty is worth having patience for.


Ingredients

  • 3 cups (500 grams) all-purpose or bread flour pantry
  • 1.5 teaspoons instant yeast pantry
  • 1 teaspoon kosher salt pantry
  • 1.5 cups room temperature water
  • extra virgin olive oil pantry
  • 1-2 cups preferred sauce (see above for the tomato sauce I mentioned, but any tomato, pesto, other pizza sauce will work) $5
  • 8 ounces whole milk low-moisture mozzarella or preferred cheese, grated or sliced $5
  • other toppings as desired 

Recipe Serves 6-8

Directions

  1. Combine the flour, yeast, salt, and water in a bowl. Mix well until a dough forms.
  2. Cover the bowl tightly (with plastic wrap or a lid) and let sit in a draft-free place (I like the turned-off microwave) for 4 hours. Alternately, refrigerate for up to 12 hours.
  3. After four house, the risen dough should be bubbly and puffy. Remove the covering and carefully deflate the dough with two forks—one in each hand—gently pulling the dough from the edge of the bowl toward the center with the forks, then repeating for 3 quarter turns until the dough folds into itself to form a ball.
  4. Oil a sheet pan generously with the olive oil (3-4 tablespoons), then transferthe dough to the center of the pan.
  5. Cover the dough again and let it rest for 20 minutes.
  6. After 20 minutes, gently stretch the dough, oiling your fingers and the dough as necessary to avoid sticking. 
  7. As soon as the dough starts to resist being stretched, cover again and let rest for another 15-20 minutes and try again. Repeat until the dough easily fills the pan. Gently dimple the top of the dough with your fingertips.
  8. Let the dough rest uncovered for 20 minutes before topping. It should be puffy and bubbly. While it rests, arrange a rack as close to the bottom of the oven as possible, and preheat to 475 degrees F.
  9. Spoon the sauce over the top of the dough (no need to leave a border for crust), then top evenly with the cheese and any other toppings you like.
  10. Bake for 25-27 minutes (or longer, depending how liberally you topped it).
  11. Once the cheese is bubbly and browned in spots, remove from the oven and let cool for 5 minutes before gently removing from the pan and transfering to a cutting board. 
  12. Cut into squares at serve hot or at room temperature. 
     

chinese steamed eggs

  • Prep Time 5 minutes
  • Cook Time 13-15 minutes
  • Estimated Cost $4.50
  • 58 Comments

You know what should be illegal? The way logging onto Facebook now means being accosted by a “memory” of something I thought was fit for public consumption in 2008. It’s like a stress dream; I click that blue app, and it’s all, “Hello! Welcome to this slowly dying platform comprised mostly of your mom’s friends. Sure, it’s 6 AM and you haven’t even finished your coffee yet, but would you like to see something embarrassing you posted when you were a) trying to get the attention of some guy you most certainly did not end up with, b) craving attention for yourself that absolutely did not serve you the way you thought it would, or c) just wildly naïve about the world and—wow—it showed? No? Well, too bad. Here it is anyway. Take a good long gander. Are you thoroughly ashamed? Yes? Great. Now, on to vacation photos of someone you barely knew in high school!”

Yeah, yeah, I know. I could eliminate the problem by deleting the app and/or my account. I’m well-aware that Facebook is rife with problems, from its potential contribution to the destruction of democracy as we knew it, to the fact that, for some reason, in 2023, it’s still possible to dole out virtual pokes. Yet, every morning, after checking Twitter (a fiery hellscape as of late, but still a place where people I like hang out), Instagram (usually pretty fun, but why do I keep getting posts from people I don’t follow??), and TikTok (my current favorite, if a little addictive—I always feel like I learn something useful), I open up Facebook and drag myself, yet again, down memory lane.

Maybe it’s because I remember how much more fun Facebook used to be, back in its heyday in the mid-aughts and early 2010s, back when it was the way we all shared, connected, and communicated. Back when it still felt like a cool clubhouse, where we seemingly conducted all business. A few weeks ago, I was served a memory of a conversation between a friend and myself, in which we literally made dinner plans, down to the restaurant and meeting time, right there on my “wall.” It could have easily been the transcript of a text or email chain, and yet, for some reason, this friend (a perfectly reasonable person) and I (reasonability unclear, apparently) felt compelled to have this conversation IN PUBLIC, for all to see.

Logic reminds me that this was just how it was back then, just the way we all used to communicate online, gleefully dancing along the line of public and private, making plans in front of an audience, sharing every single photo taken on a night out, no matter how badly lit, awkwardly posed, or, in some cases, obviously drunk its subjects appeared. Back when we posted vague song lyrics to imply our feelings about some mysterious conundrum to the world, like a three-line mix tape, intended to simultaneously confuse and intrigue the listener, and when clicking “unfriend” was the ultimate slammed door at the conclusion of a relationship (unless you reconnected, and sheepishly re-clicked “add friend” a few weeks later). I know this, along with my emotional development between then and now, should also explain the reason things I posted when I was younger, less conscious, less conscientious, (not to mention attempting to make a name for myself amid the rocky terrain of what was then the somewhat new landscape of social media) don’t exactly land when I reread them now. The internet was younger, but I was too. I wouldn’t be upset that my two-year-old cannot yet read, nor would I blame my five-year-old for her inability to understand algebra. (I wouldn’t even blame her future teenage self for that). Why then, is it so hard for my current self to give my younger, greener self a break for having been flawed?

One of the lessons parenting keeps teaching me is that, when we see traits we dislike in ourselves embodied by our children, it forces us to finally question why we were so committed to hating them in ourselves for so long. I was a deeply sensitive, emotionally intense little kid, and whenever I felt tears coming on—which was often—I knew there would be no stopping them. They overtook me, bigger and badder than any fight I had against them, and the shame I felt from the way other kids backed away from me, when I detected in the faces of adults that they felt totally out of their depth as I sobbed over a teasing comment or a B- still rattles around inside of me.

But when my own kids lose it, it’s completely different. I seek to know why, even if I already know it’s simply because I put their morning toast on the wrong plate or because they just remembered that the dinosaurs are extinct. I hug them, do my best to speak soothingly, and encourage them to talk about it. Sometimes I succeed in getting them to problem solve with me, and sometimes their tears just go on and on, the way little kids’ tears sometimes do, and it makes me feel a lot of things, but none of them is shame, because how could I fault this little person who trusts me with everything she has, for losing a little bit of grace as she battles the big feelings coursing through her? So, what makes me think my own little self was undeserving of such understanding, and, for that matter, why wouldn’t it also apply to my awkward, needy teenage self? Or my green, chaotic, Facebook-posting twenty-something self? Or my taking-adulthood-by-the-balls-with-mixed-success thirty-something self? Or, even my forty-one-year-old grown-up mom self who, try as she might, doesn’t always get things right?

These steamed eggs took me a little while to get right. I first fell in love with Chinese steamed eggs on TikTok, where they were trending about a year ago. I stumbled through my first few attempts at them, yielding results which, while tasty, didn’t look as good as the ones on my FYP. The first time I made it, I rushed, skipping the crucial step of straining the egg mixture. The second time, I cranked the heat up too high as I hurried to get dinner on the table, and the whole thing puffed up then sank down. It still tasted good, but I lost the silky, custardy texture the dish is supposed to have. Trial, error, and patience with myself, however, eventually brought me to success, and now I can’t stop making it. It’s become my go-to family dinner when I don’t really feel like cooking, but still want the payoff of a nourishing meal, or I’ll make a single-serve portion for a fast, high-protein lunch. For dinner, I’ll cook a pot of rice in the Instant Pot (not much is actually instant about it, but it’s great for stock and rice), throw a salad together (I’m currently obsessed with smashed cucumbers), and whisk together eggs and water (1/3 cup for every egg), plus a little bouillon powder (I’ve tried making it with homemade broth and it just doesn’t work as well).

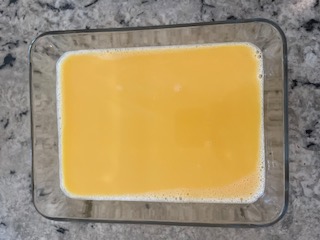
I strain the mixture into a heat-proof glass dish, like a Pyrex storage container (handy in case there are ever leftovers, which, admittedly, is rare).

1940.jpg (320 × 240)

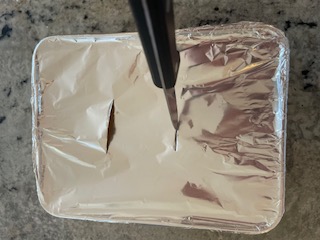
I skim off as many tiny bubbles as possible, then let it cook low and slow (we don’t want them to puff), and cover tightly with foil, which I vent with a knife.

1930.jpg (320 × 240)

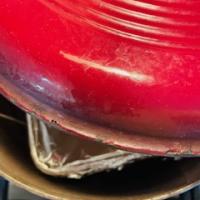
Then I steam it in a large pot with a few inches of water and a metal steaming rack you could approximate the rack with a few pieces of rolled foil—the idea is just to keep the eggs off the bottom of the pot as they cook).

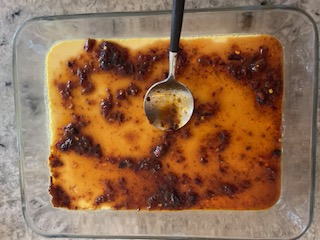
I make a sauce in the meantime. This is totally optional—you could just do a drizzle of soy—but I love to mix up soy sauce, chili crisp, a few drops of maple or honey, and Chinese black vinegar. I've used rice vinegar before, which also works, but if you can find Chinese black vinegar (chinkiang), snap it up. It's delicious.

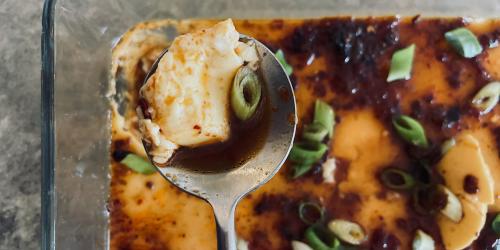
Once the eggs are perfectly steamed—set but still jiggly—I cover the top generously with the sauce,

1935.jpg (320 × 240)

and top it with a handful of sliced green onion.

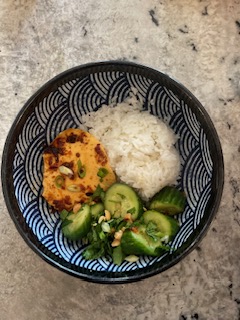
I scoop it into bowls with the rice and salad and we pass more sauce at the table.

1938.jpg (240 × 320)

Each time I dip my spoon into its lusciously smooth surface, slicked with chili oil and perfectly jiggly, I think back on all the times I mangled the steps, screwed up the ratios, rushed the preparation, all of which led me to this perfect bite, and I don’t feel guilt or shame. All I feel is grateful.

Ingredients

  • 2 cups water 
  • 1 teaspoon chicken or vegetable bouillon powder or 1/2 teaspoon kosher salt pantry
  • 6 eggs $3
  • 2 teaspoons soy sauce pantry
  • 2 teaspoons chili crisp optional
  • 1/2 teaspoon honey or maple syrup pantry
  • 2 teaspoons chinese black vinegar (chinkiang) or rice vinegar pantry
  • 1 green onion, thinly sliced $1.50 for a bunch

Recipe Serves 3-4

Directions

1. Fill a large pot with a fitted lid with 2-3 inches of water and place a steaming rack or a few pieces of rolled up foil on the bottom. Cover and bring to a boil.

2. Stir the water and bouillon together to make a broth.

3. Whisk the eggs into the broth until completely combined (no streaks of whites or yolks).

4. Strain the mixture into a medium-sized heatproof container that will fit in the bottom of your pot, like a Pyrex. Skim off as many of the tiny bubbles on the surface with a spoon or small fine mesh sieve. 

5. Cover the top of the container tightly with foil and puncture a few times with a knife to vent.

6. Lower the heat on the pot to medium-low, then carefully lower the foil-covered dish into the pot, setting it atop the steaming rack.

7. Cover the pot with the lid, then allow to cook for 13-15 minutes, until the eggs are set but still jiggly. Start checking for doneness around 10 minutes.

8. While the eggs cook, whisk together the soy sauce, chili crisp, honey or maple, and vinegar.

9. Serve the eggs topped with the sauce and the green onions, preferably with rice.

30-minute bagels

  • Prep Time 15 minutes
  • Cook Time 17-20 minutes
  • Estimated Cost $4
  • 43 Comments

About five years ago, I ran into an old boyfriend at a restaurant in my hometown. I was finishing lunch with my mother and then eleven-month-old daughter Anna, when I glimpsed him, sitting across from a man I didn't recognize, eating a salad. It was simultaneously jarring--we hadn't spoken in years, and I had no idea he was living in town--but it was also nice, because he was someone I had always genuinely liked, which neither distance nor the passage of time could diminish. 

I blurted his name out, and he turned to face me, seemingly as stunned as I was. He and I chatted awkwardly for a few minutes, I introduced him to my daughter, and then we were on our way, leaving him and his friend to their meal. We went on with our day, but it was hard to stop thinking of the strange, seemingly-out-of-nowhere brush with the past. We were teenagers when we were together, long before I was anywhere close to fully-formed or actualized, if that's even a thing one can ever be. My not particularly self-compassionate memory of my teenage self is as an overdramatic, self-absorbed bottomless well of need for attention. There was no way that, in the three minutes I fumbled through niceties while my daughter gnawed on the leftover crusts of her grilled cheese and my mother and his friend stood by, that I had succeeded in demonstrating how far I had come since the days I used to cry on the phone on a semiweekly basis. 

As I nursed my daughter before putting her to bed that night, replaying the lunchtime run-in over and over again in my mind, I realized that, in the years that had passed, I had come to think of him as the sort of keeper of everything I hated about myself when I was younger, not necessarily because they were all I ever was when we were together, but because we had largely cut off contact with one another by the time we were twenty, and so, to my mind, everything I evenutally outgrew, and the ways I eventually grew up didn't factor in to his understanding of me. I had this image of him walking around with memories of me exclusively as a depressed, dramatic, attention-craving seventeen-year-old, and it made me feel crazy. I was different now! Didn't he know that? I was actually pretty successful in life! I had written four books, produced a five-season TV comedy based on my life and writing, not to mention gotten married to a great guy and had a kid? You might be asking yourself, "Gabi, why did it matter what someone you weren't even in touch with thought about you--if he ever thought about you at all?" Don't worry, I'm getting there.

I obsessed about it for maybe a month, and then I did something that was either the best or worst possible next move, depending on your perspective: I dug up his email address and wrote to him to see if he wanted to get together for coffee to catch up sometime. Perhaps with an hour of his attention and a couple of lattes, I reasoned to myself, I could convince him of how much I had grown in the past two decades, and he'd update the Gabi Moskowitz file he surely keeps in his mind, and finally, I would be redeemed.

Reader, he did not respond, and instead of reminding myself that I was a thirty-seven-year-old married woman with a baby, and not a dejected high school senior, my feelings were hurt. I had, quite literally, reached out to my past, and my past couldn't even be bothered to make up a face-saving lie about how "things are super busy right now, but I'll let you know when I have time." Maybe all my worst fears about my high school self were true after all, and he hadn't forgotten. Maybe he'd seen my name pop up in his inbox, and thought to himself, "no, thank you," and promptly clicked delete. 

I've been thinking a lot about this encounter lately as I've been pondering what my return to blogging might look like after spending the past five-plus years mostly focusing on parenting, podcasting, and revising the manuscript of my first novel, but publishing almost nothing. A lot has changed since I first started blogging, when I was a twenty-seven-year-old, perpetually single city dweller, hell-bent on becoming a professional writer. Now, almost thirteen years later, I've somehow become a forty-one-year-old married suburban mother of two, struggling to reconnect to the part of me that started this journey, back when I had all day to myself to shop, cook, photograph, and write. Back when drinking four glasses of wine at a press event didn't absolutely destroy me for the next three days, and I didn't have preschool tuition, or pediatrician appointments, or the needs of literally anyone else to worry about.

I keep reaching for her, every time I sit down to write, trying to conjure her confidence and willingness to throw anything at the sauce-splattered kitchen wall and see what sticks to it, but time after time, she leaves me on read. Is she still somewhere inside me, buried beneath all the mental labor and mom anxiety overtaking my brain, or did she leave me for somewhere cooler, maybe where Cocomelon and Raffi don't start blaring every third song when the music on my phone is set to shuffle? Is she ever coming back? 

I managed to get over the ghosted ex-boyfriend email pretty quickly. All it took was a little self-reflection and a smidgen of therapy to conclude that I was, as was, admittedly, sometimes my tradition, being a little bit overdramatic. He was not, in fact, the keeper of everything bad about me, because a) that's not a thing, and b) even if it were, who cares? He's not the owner of a company I'm trying to work for or The New York Times' book editor. His opinion has no bearing on my actual life, but furthermore, whatever reason he had for not responding to my email was none of my business. 

I keep wondering if the same logic applies to the other person not taking my calls: the writer I was before I went barrelling toward middle age. She doesn't appear to be coming back any time soon, but maybe that's okay. Maybe she doesn't even exist anymore, at least not in the form she used to occupy. Certainly this is true of the way I cook now. I still cook for my own tastes, yes, but the needs of the husband and tiny snack monsters I've acquired in the past decade factor in too, and some of them--and I am not naming names--are still not completely sold on vegetables. Maybe instead of trying to cajole my twenty-something writer self into reemerging, I should just let her go and work on getting to know my forty-something writer self. Who knows? Maybe she has some good ideas.

Here's what I know:

I still like to write longmeandering headnotes often more about feelings than the food. If you're one of those people who likes to Tweet about how food bloggers should just get to the recipe without yammering so much, first of all, stop making that joke, it's tired and disrespectful. Second, listen to this song. Third, if you're still not convinced recipes go well with long stories, then I'm probably not the blogger for you.

I still love developing and photographing recipes, even if my photos aren't the aesthetic ideal when you think food blog (there are so many bloggers who do that bit better than I do and I love that for them).

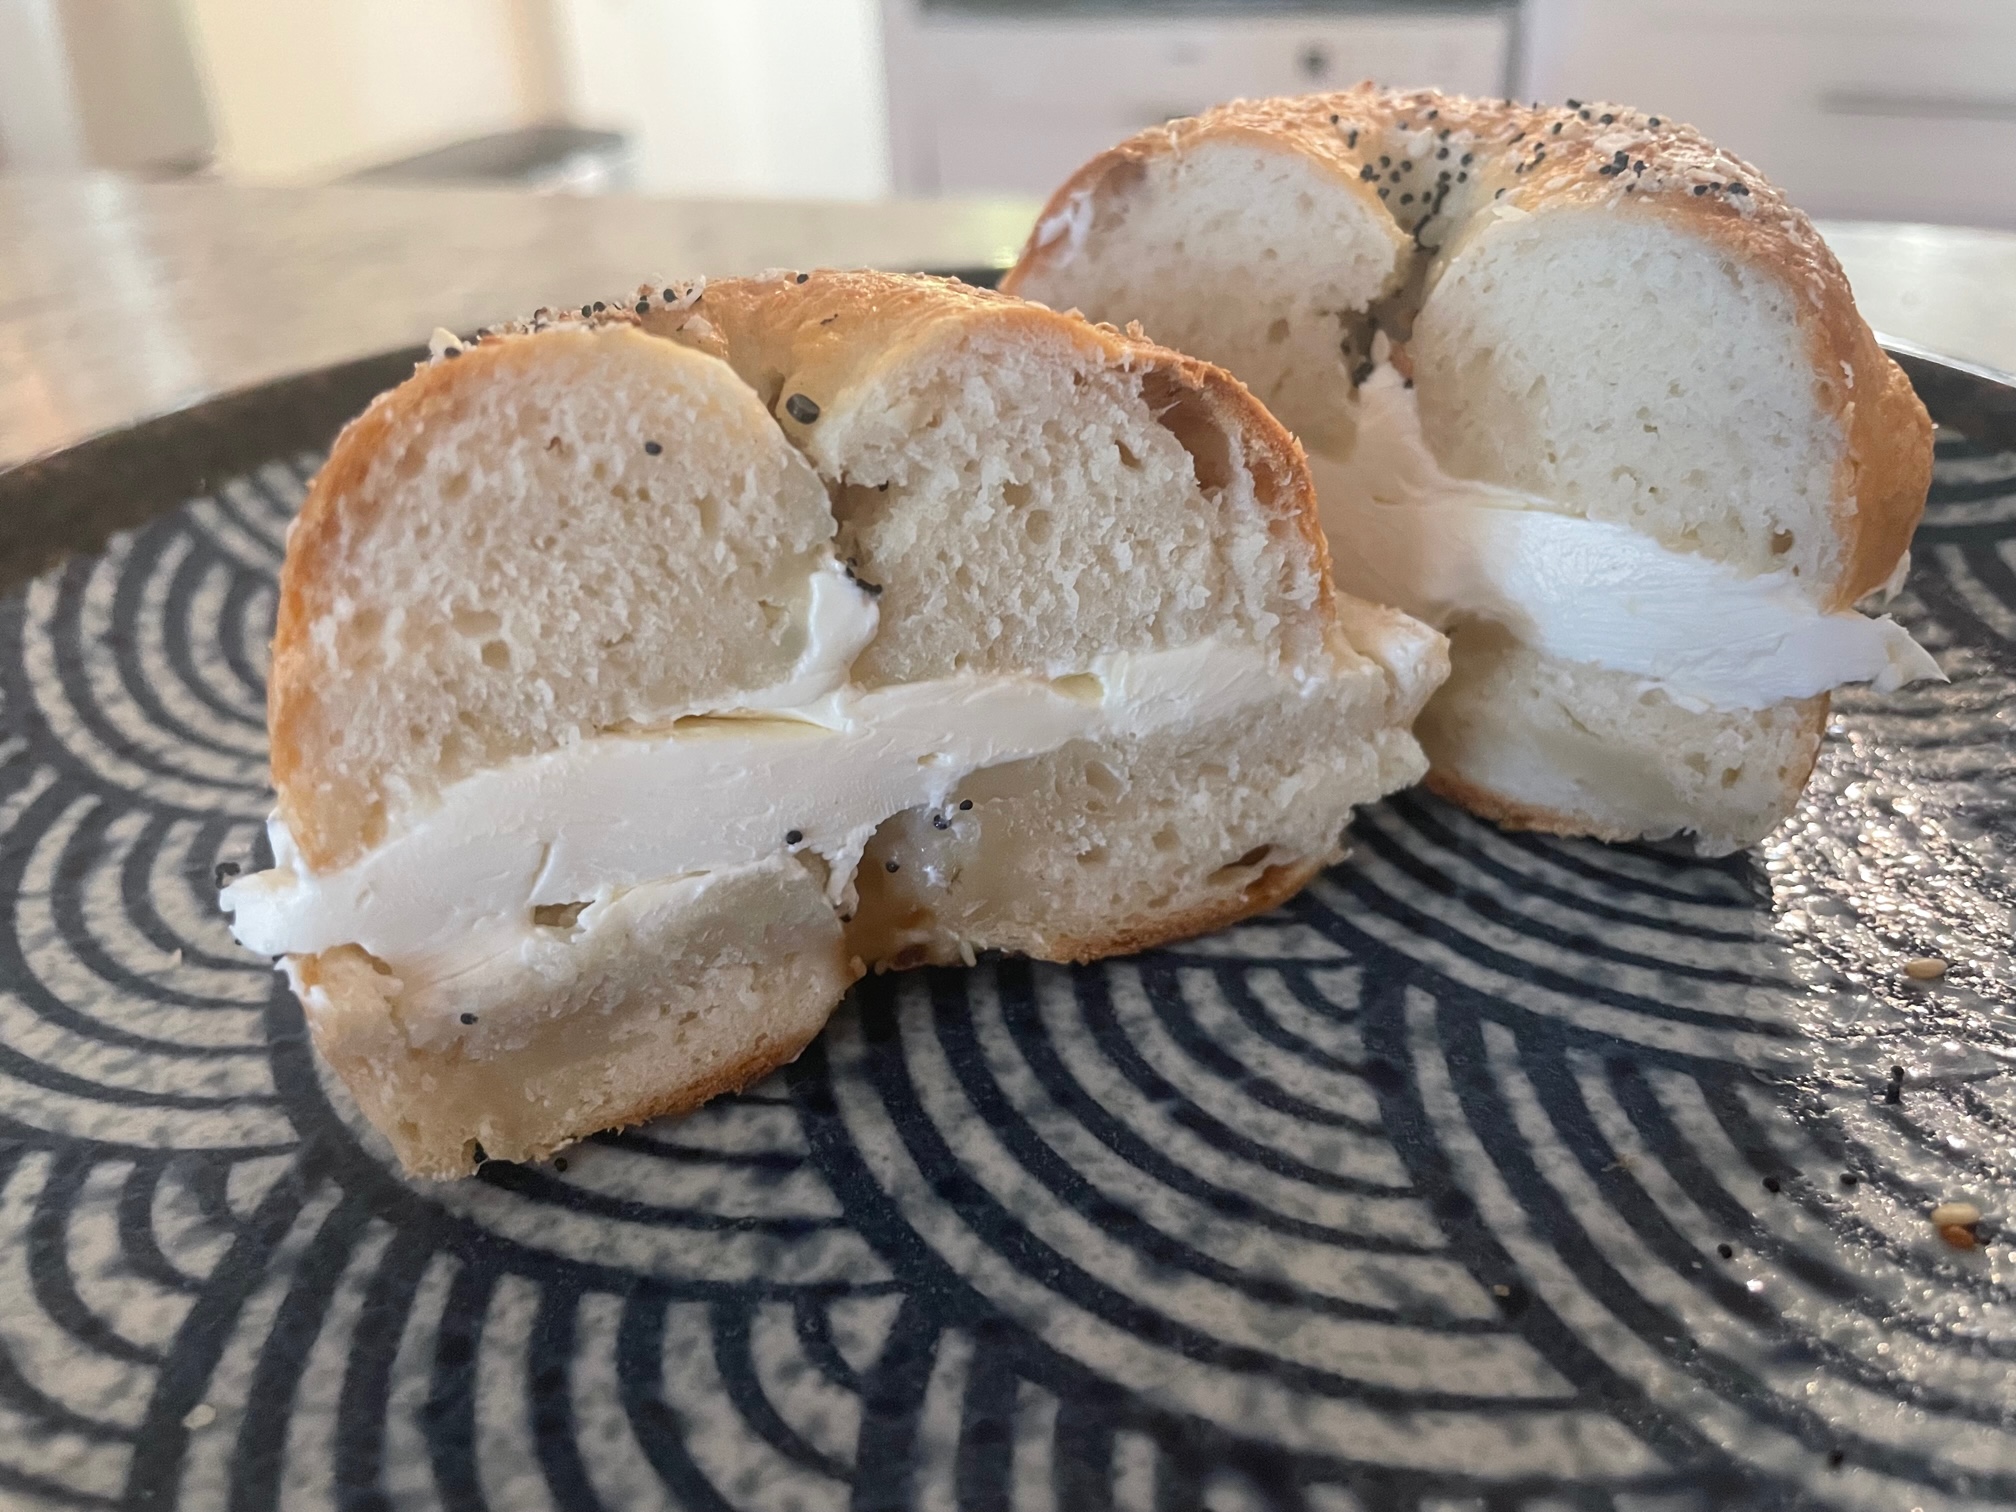
These bagels (Aha! There's IS a recipe in this post! I told you my headnotes are meandering.), which contain no yeast and require zero rising time--just four ingredients which you very likely already have on hand--and can be on your plate, spread thickly with cream cheese, ready to be devoured within 30 minutes of realizing you're hungry, are one of the best things I've made in a long time. Not only are they delicious, they're so easy, wildly cheap, and a favorite of every person I live with (no easy task). 

I don't say this lightly: in the time it would take you to put on shoes, drive to a bagel shop, wait in line, and order, you could be eating these hot out of the oven, and they will genuinely be better. Here's how to do it.

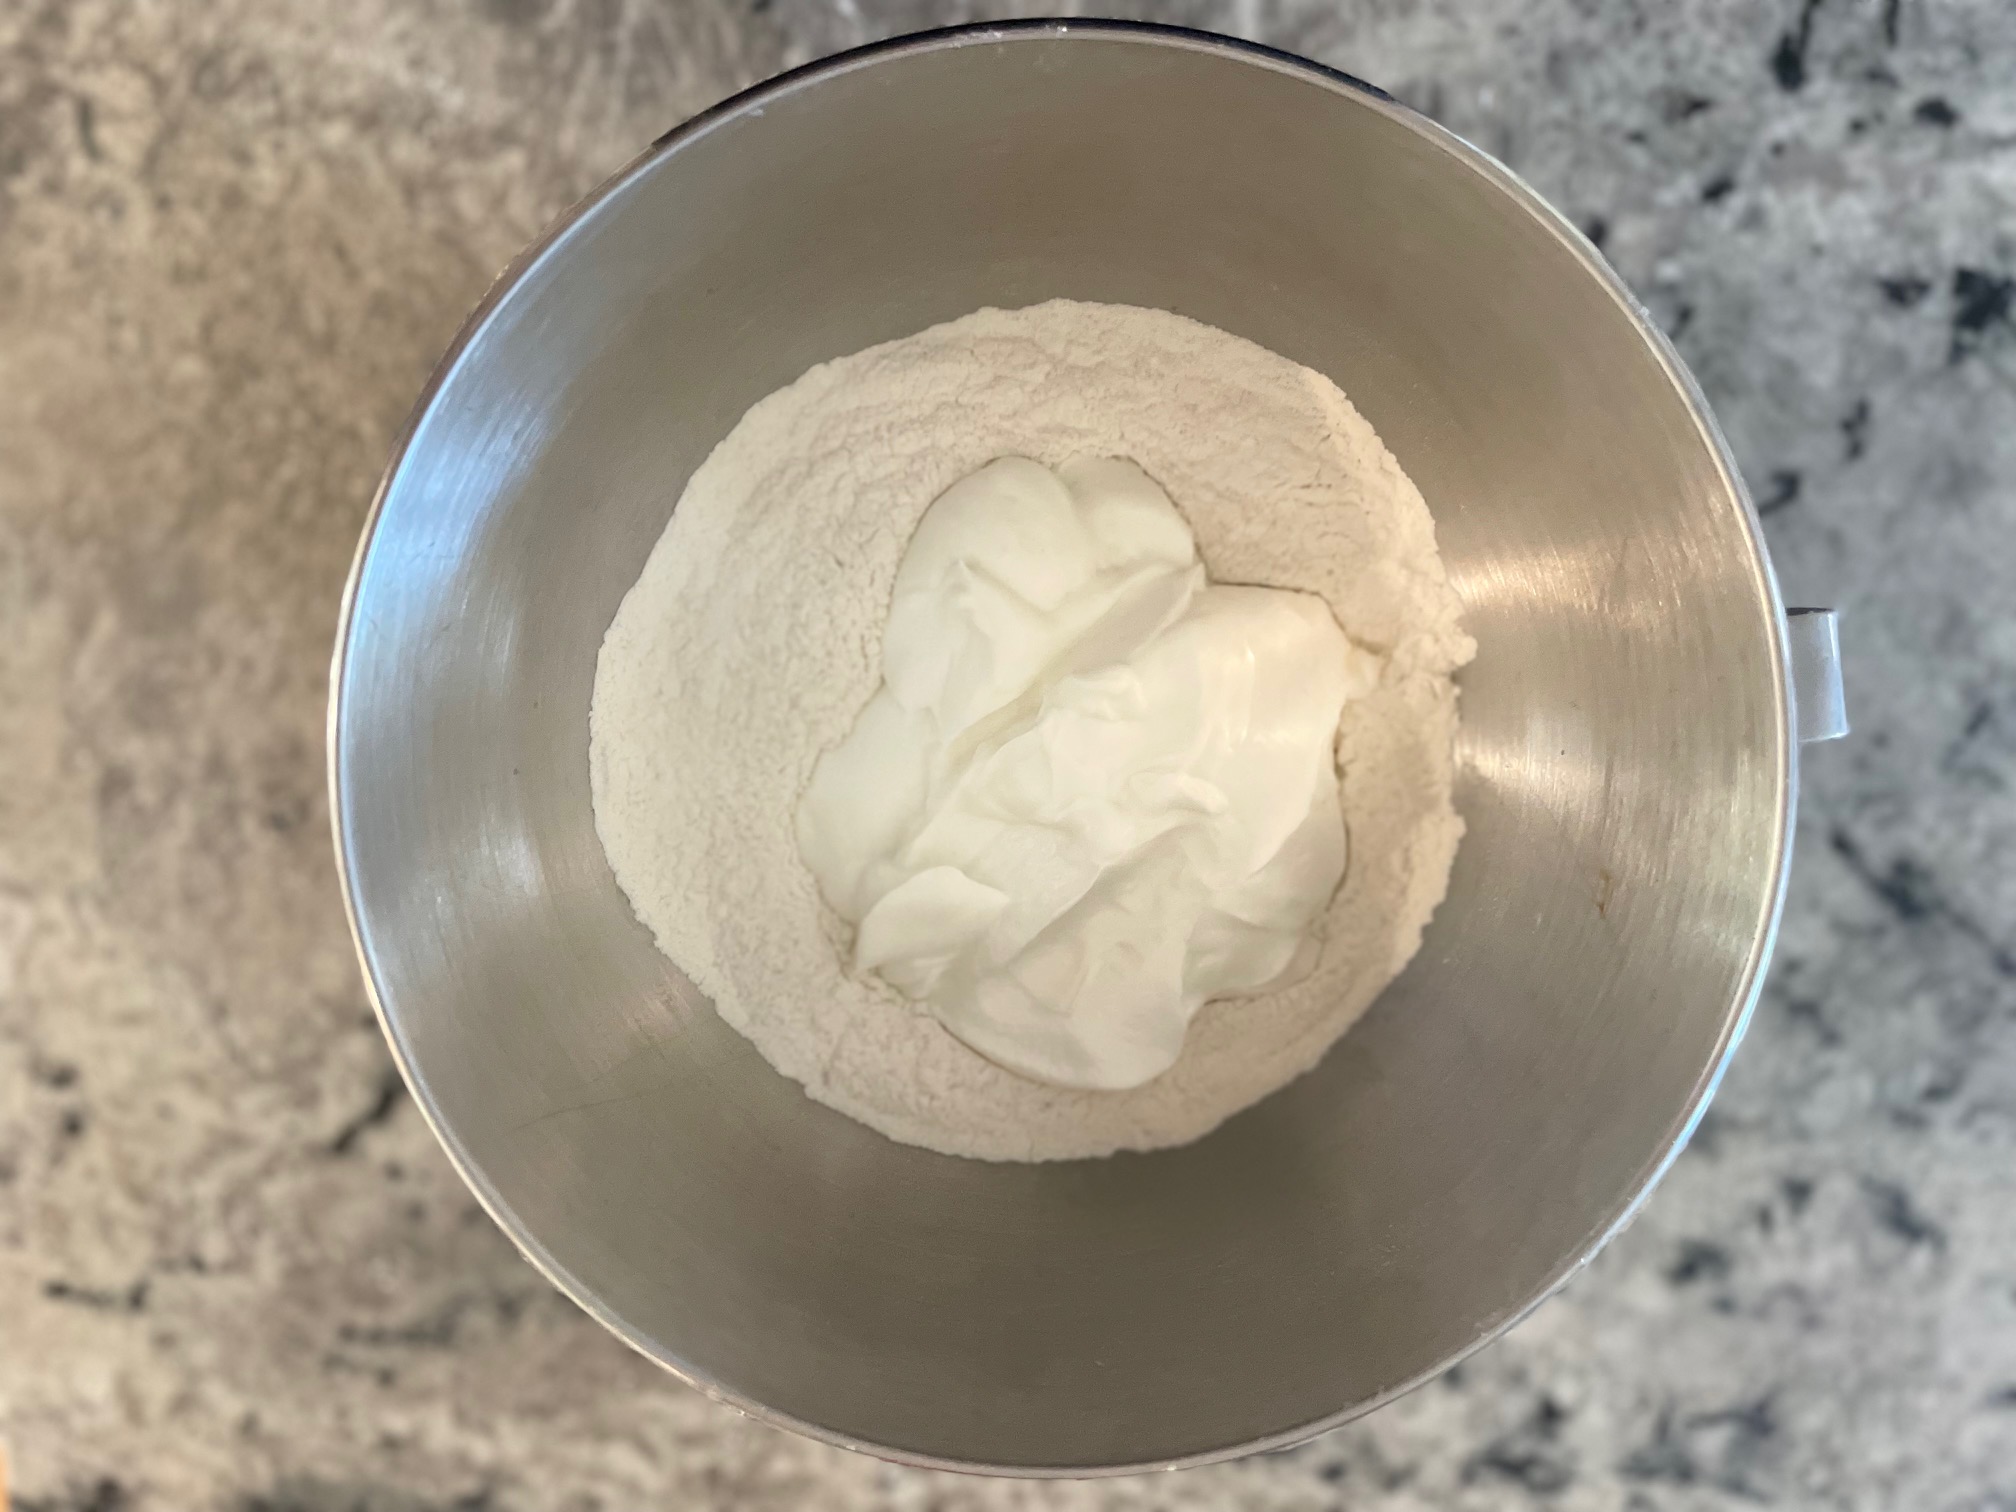
Combine flour (either bread flour or AP flour -- bread flour will yield a chewier bagel, but AP is good too), baking powder, salt and nonfat Greek yogurt (make sure to use nonfat, not for diet reasons, but because even though this is a super nontraditional bagel recipe, bagel dough is typically fatless, and using nonfat yogurt will help them rise nicely) in a large bowl or stand mixer.

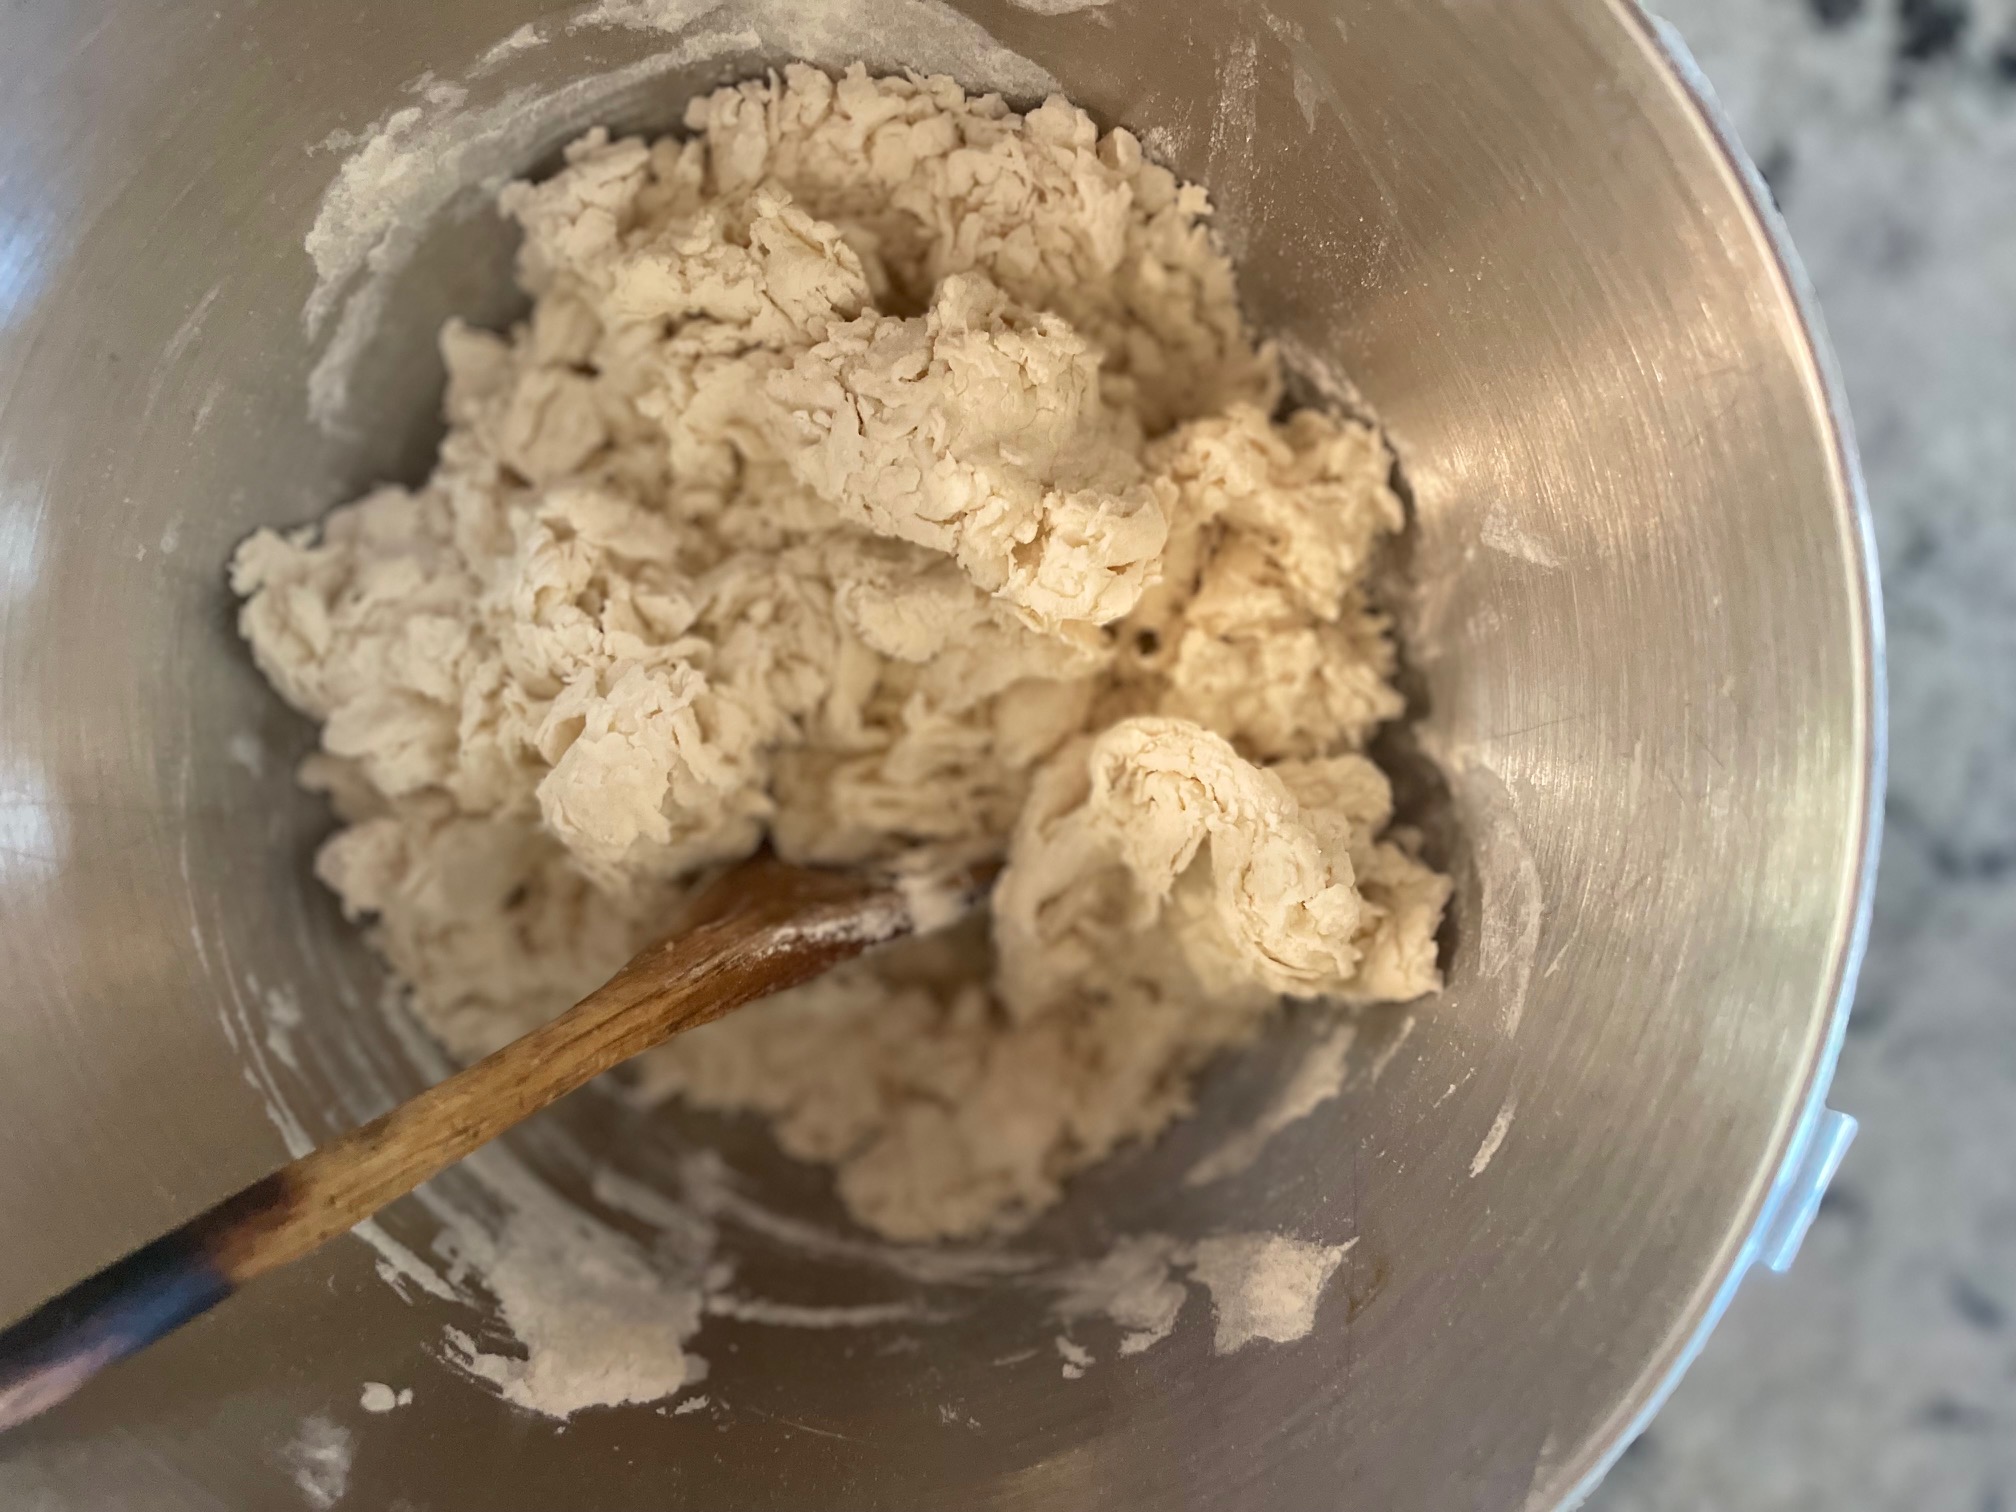
Mix it (I like to do this by hand, even if I'm using a mixer). It will be very shaggy, almost like biscuit or pie dough, but keep going. It'll come together eventually.

Once you have a cohesive ball of dough, knead it for 8-10 minutes, until very smooth and elastic.

Cut the dough into 6 equal pieces (or 8-10 for smaller bagels).

Shape the pieces into balls, then poke a hole in the center and stretch into bagels. 

Boil the bagels for 1 1/2 minutes on each side.

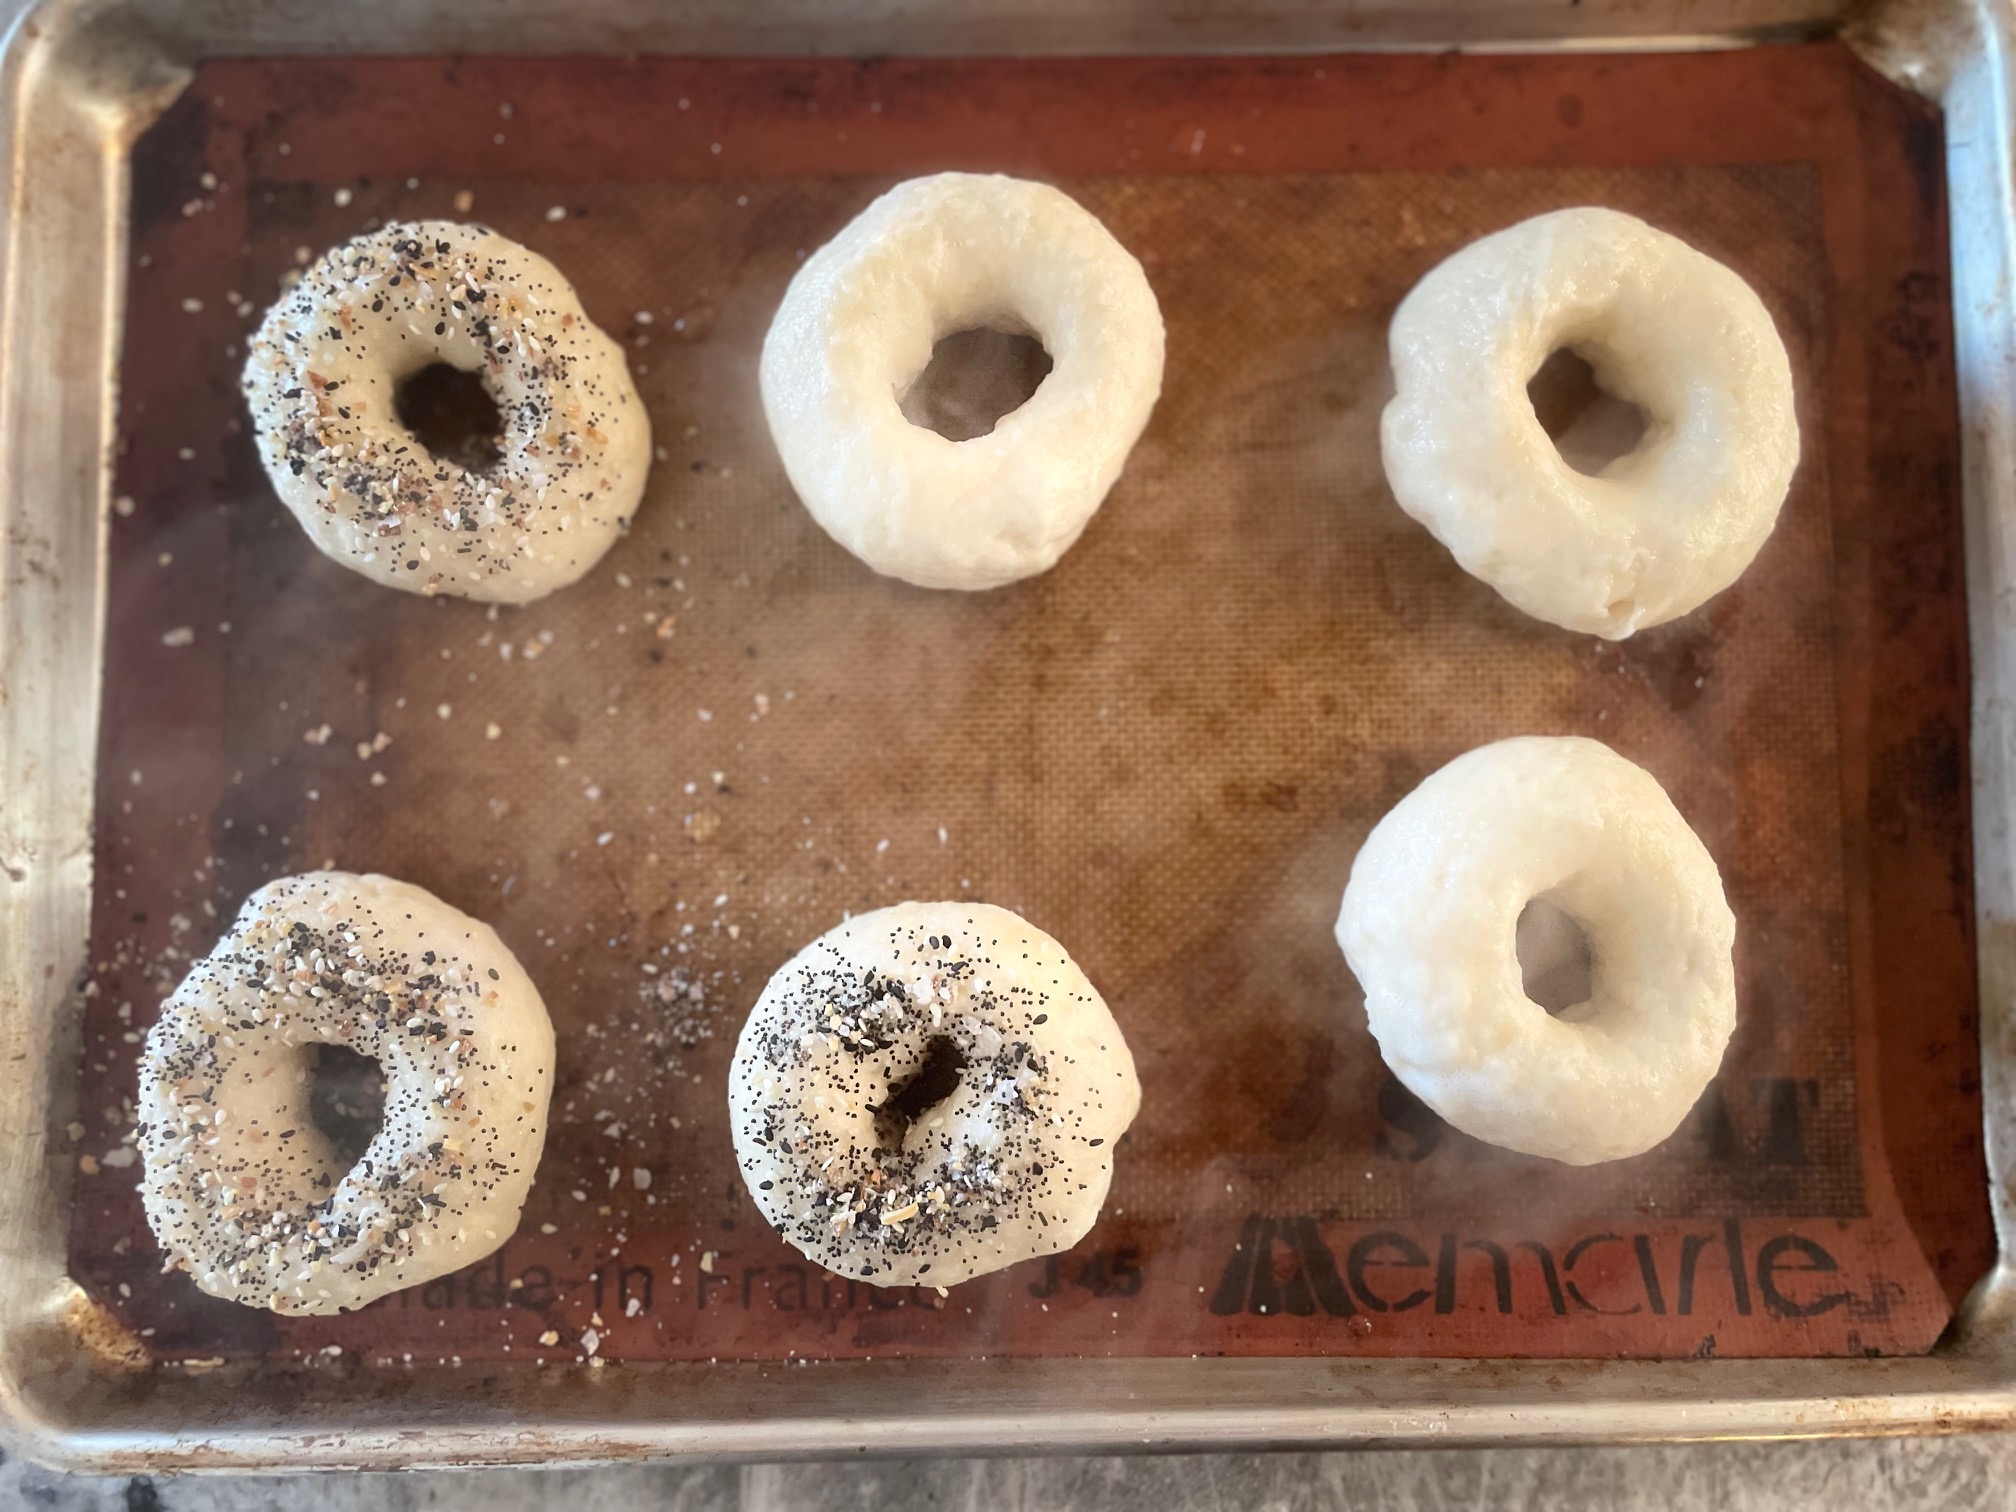
Arrange the boiled bagels on a lined rimmed baking sheet. Top if desired (no need for egg wash).

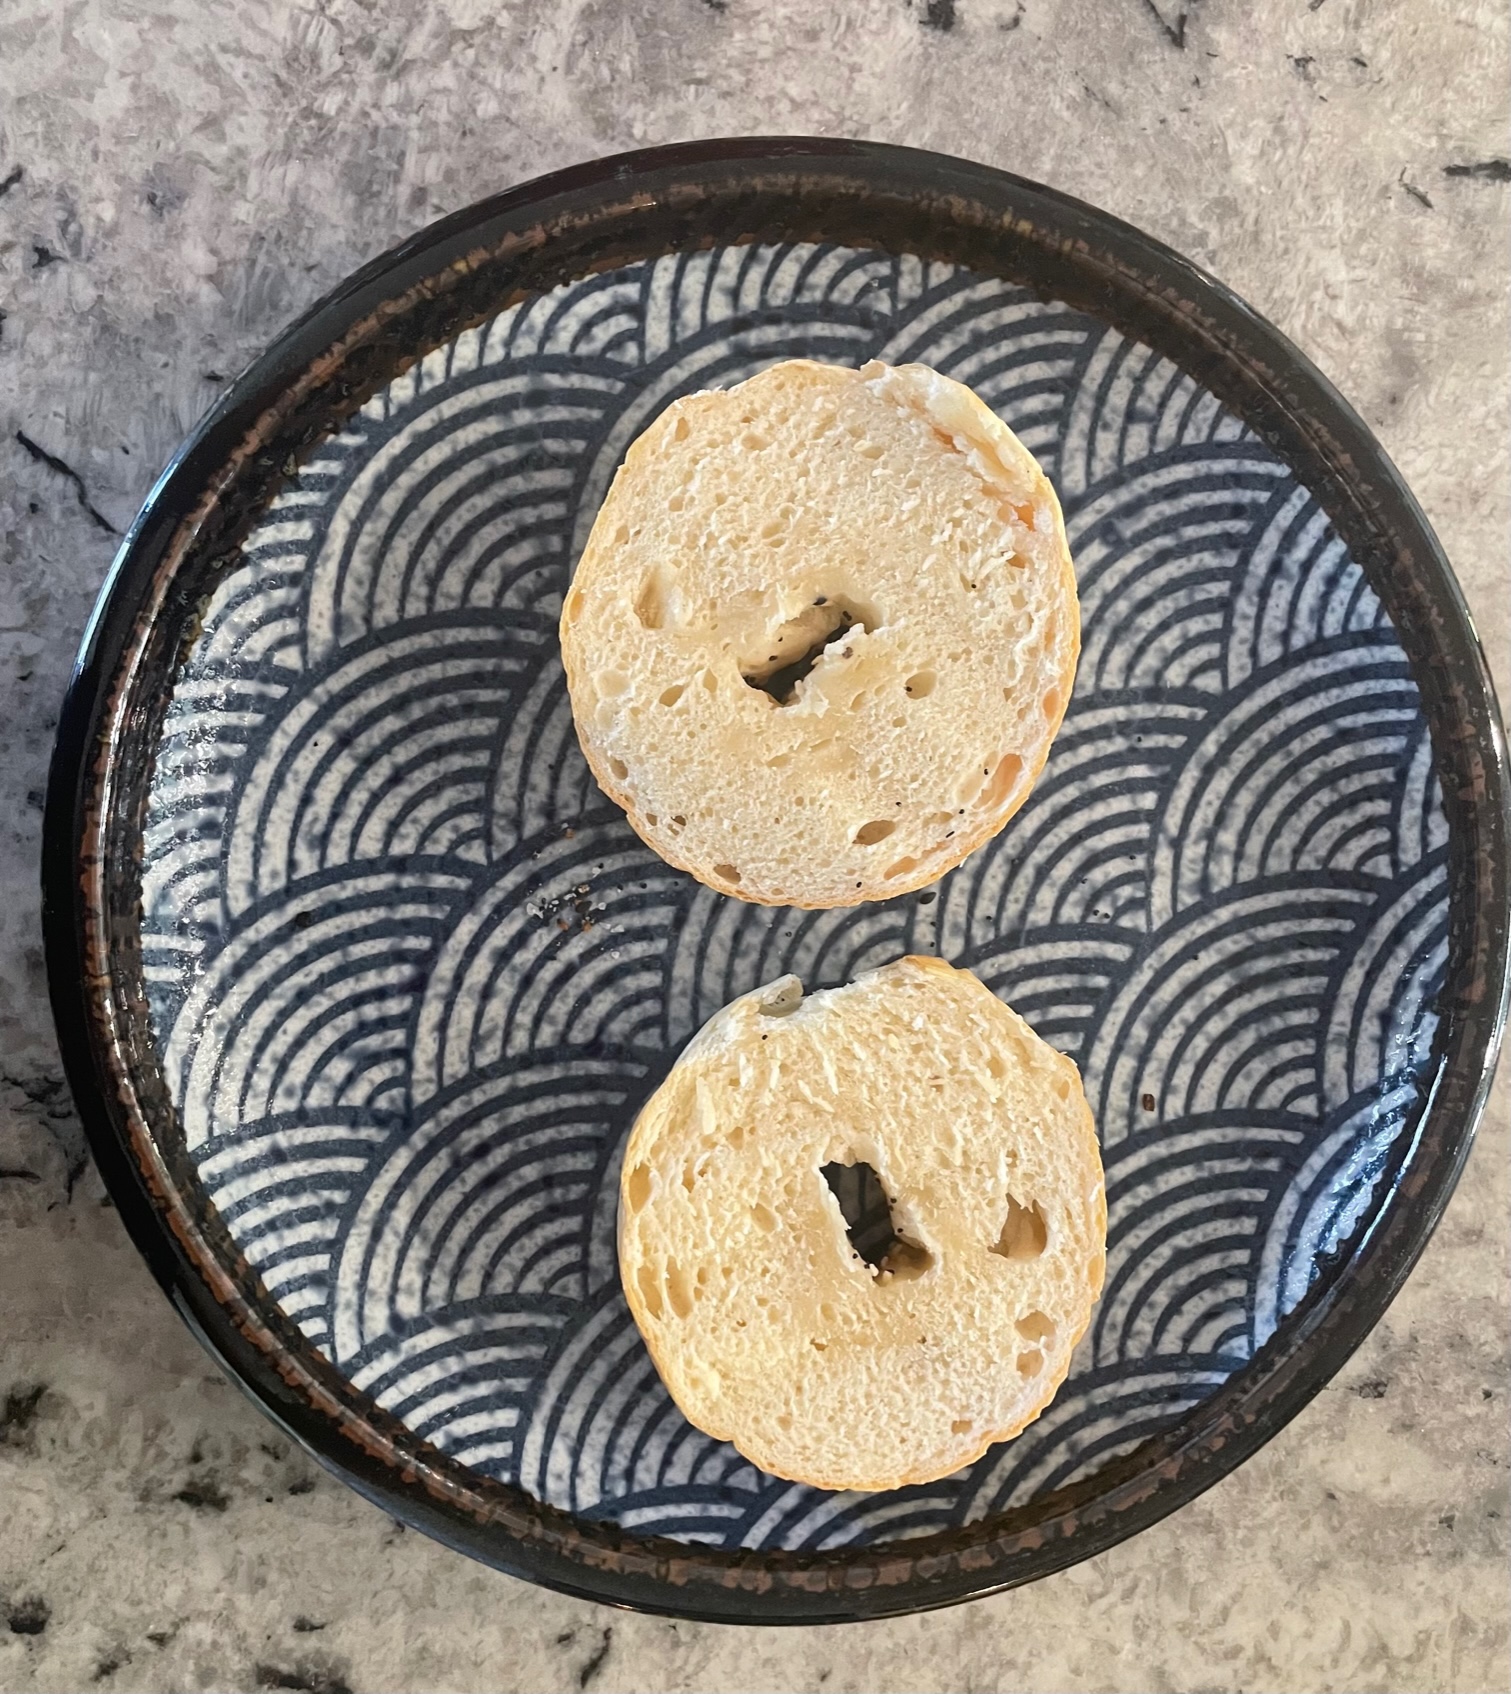
Bake at 475 for 17-20 minutes, then do your best to let them cool for 10 minutes before diving in.

\

They may not be the same as traditional bagels, but they're pretty damn close. Think of them as a twist on an old classic: that familiar taste you know and love, just...updated.

Ingredients

  • 3 cups (400 grams) bread flour or 3 cups (360 grams) all-purpose flour Pantry
  • 2 tablespoons baking powder Pantry
  • 1/3 teaspoon kosher salt Pantry
  • 1 1/2 cups nonfat Greek yogurt $4 for 16 ounces

Recipe Serves 6

Directions

  1. Preheat oven to 475 degrees F.
  2. Line a rimmed baking sheet with parchment, a silpat, or grease lightly with cooking spray or olive oil.
  3. Fill a large, wide pot (like a dutch oven) with water and bring it to a boil.
  4. While the water boils, whisk the dry ingredeints together in a large bowl or the bowl of a stand mixer.
  5. Add the yogurt and mix. At first, the dough will be very shaggy, but as you continue to mix, the yogurt will hydrate the flour. 
  6. Knead for ten minutes, either by hand or in a stand mixer, until the dough is smooth and elastic. This step is necessary to achieve bagels with that classic chewy texture.
  7. Optionally, allow the dough to rest at room temperature for up to an hour. This helps relax the gluten in the dough, making it easier to roll out, but is not required.
  8. Cut the dough into 8 equal portions (6 for large bagels, 10 for smaller ones).
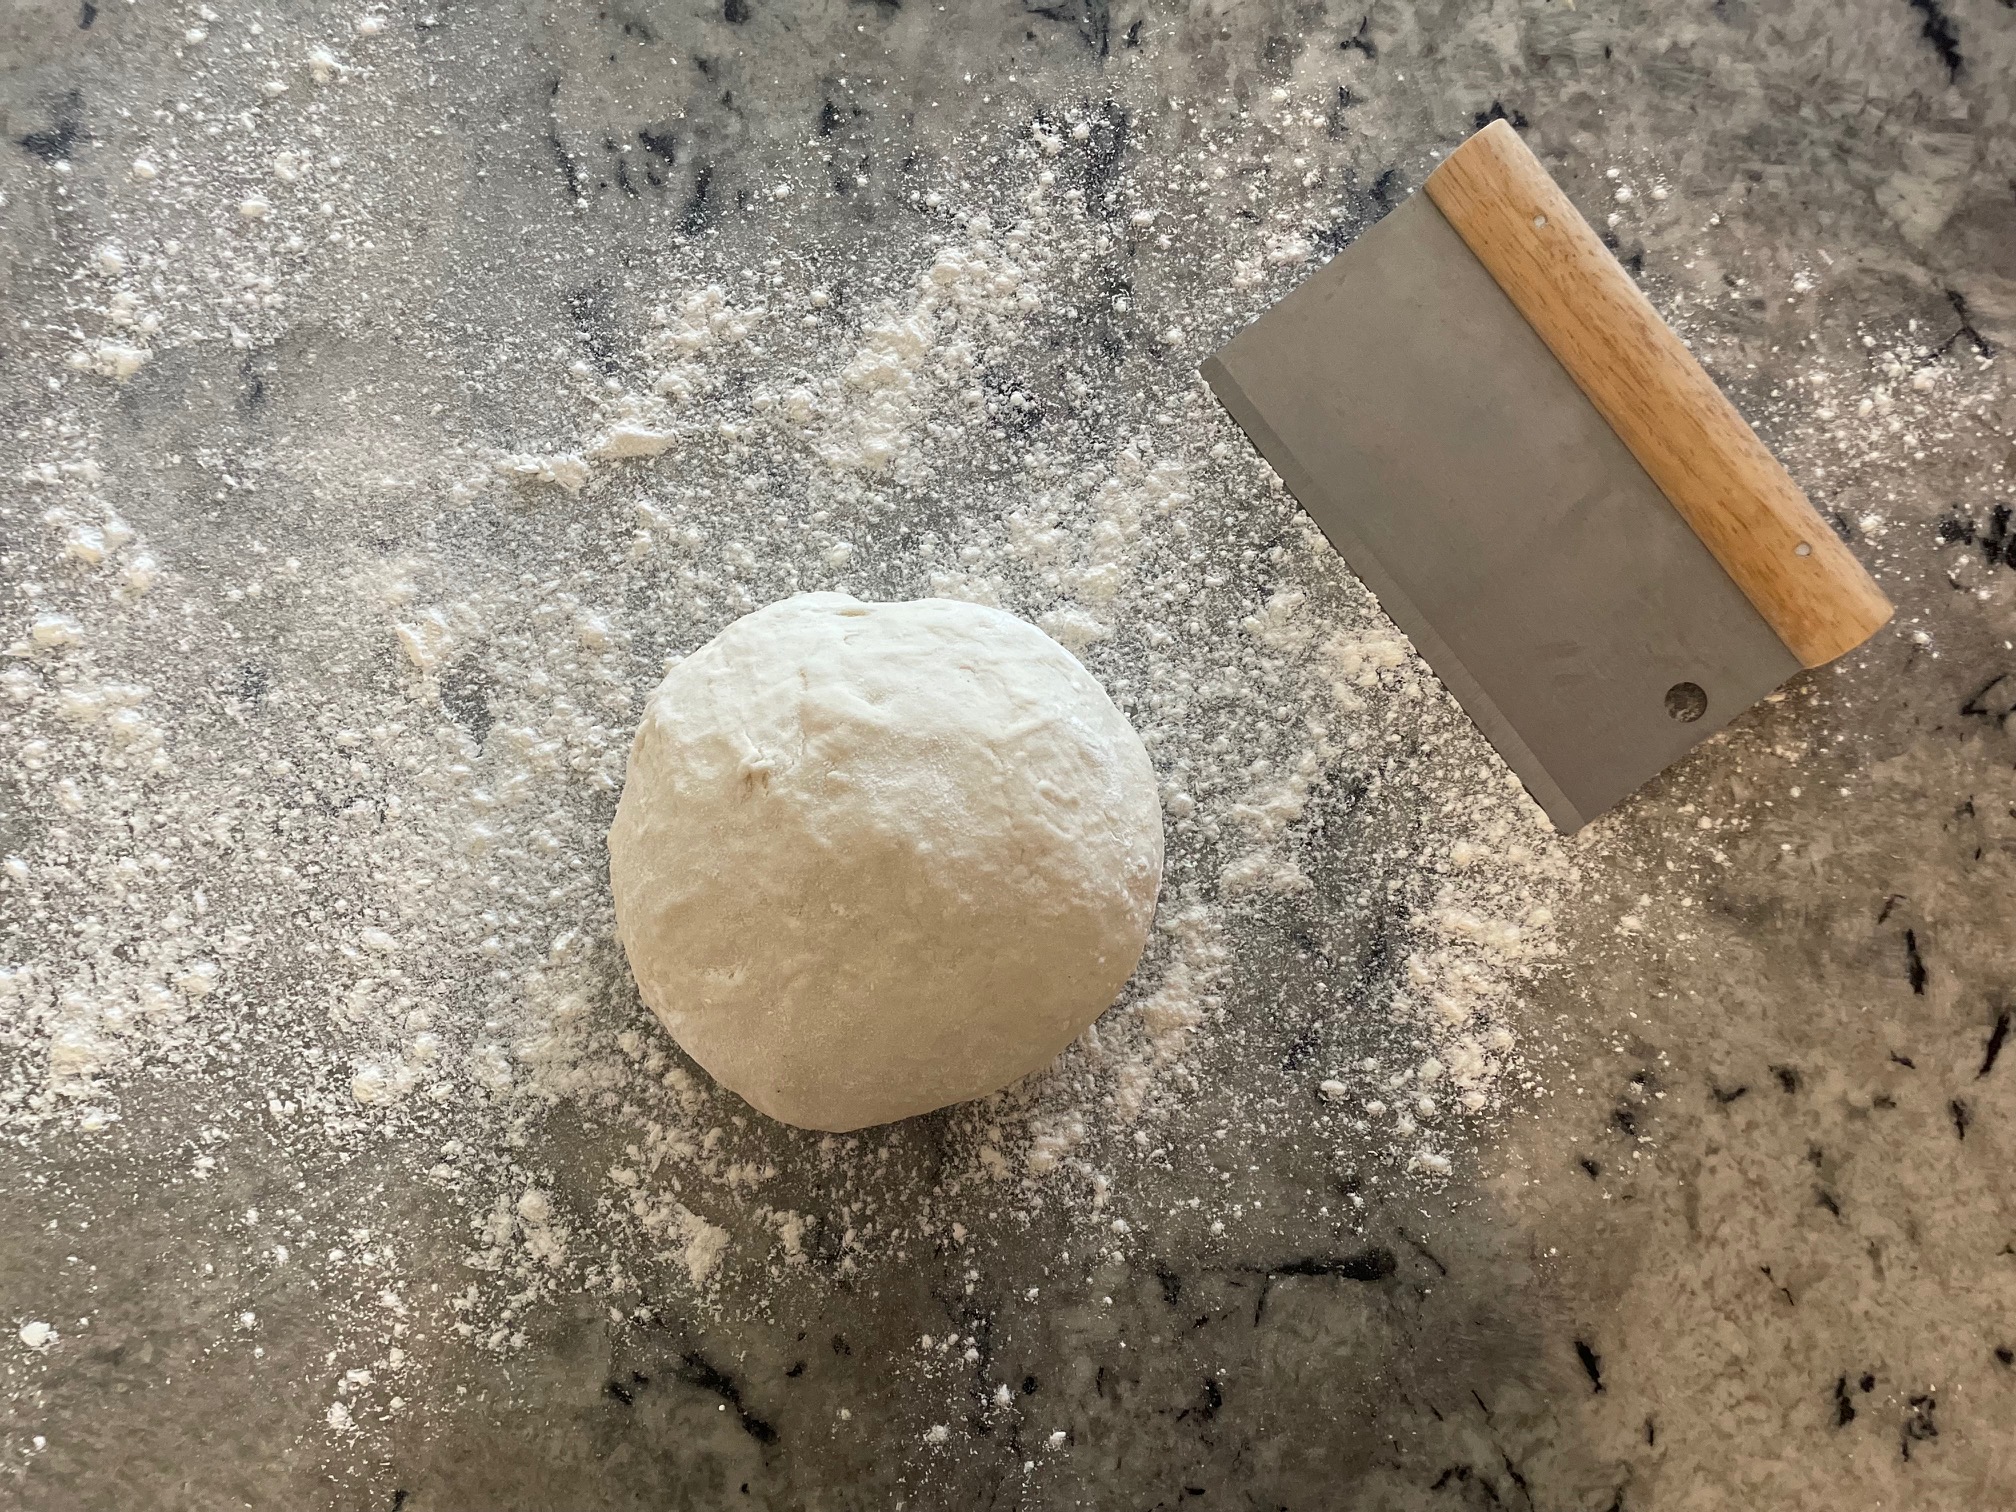
  9. Roll each piece into a ball and gently poke your finger through the center, stretching each piece until it resembles a bagel.
  10. Bring the pot down to a simmer, then, working in batches, drop a few dough rings into the simmering water.
  11. Simmer for one minute on each side, then transfer to the prepared baking sheet. If you want to add toppings, now is the time (no egg was is necessary, just top the wet bagels with your preferred ingredients).
  12. Repeat until all the bagels have been boiled, and bake for 17-20 mintutes, until bagels are nicely browned with a thick crust, and sound hollowed when tapped gently on the bottom.
  13. Let cool on the baking sheet for 10 minutes, then slice and serve. 
  14. Store leftovers in an airtight container in the fridge for up to a week. 

Category: Articles

Share this Recipe: Share on Facebook Tweet This! Pin it on Pinterest