BrokeAss Gourmet

BrokeAss Gourmet

Gluten-Free Pizza Dough

  • Prep Time 1:15
  • Cook Time 0:17 (for pizza)
  • Estimated Cost $10.50
  • 40 Comments

But I wasn't going to post any old dough recipe, just because it happened to be gluten-free. No, I was going to find the tastiest, chewiest, crispiest-edged pizza dough recipe--one that can also be prepared without buying seven different flours and chemical dough elasticizers. Because if it's not affordable and simple, it's not for this website. 

If you know me, you know I don't like being told what to do.

If you know me well, you know that, not only do I not like it, but it's a totally ineffective way to get me to jump on your bandwagon. I hate bandwagons. I don't understand the Cult of Mac. I will never say "YOLO." I don't see what's so special about Ryan Gosling.

And so, when an onslaught of people started telling me to make a gluten-free version of my signature pizza dough recipe, I rolled my eyes. "This isn't a gluten-free blog! JEEZ!" I would have snapped at them, if I weren't so afraid of confrontation.

I made a habit of nicely redirecting those in search of glutenless pastures to the plethora of excellent gluten-free blogs on the internet, specifically the fantastic Sauna Ahern's Gluten Free Girl And the Chef--she knows what she's doing in the gluten-free department.

But then, I started working on my second cookbook, all about pizza dough (due out Fall 2013), and reached out to my friends and readers, as bloggers-turned-cookbook-writers are wont to do, and I started hearing it over and over again:

Ooh! I've missed pizza, ever since I went gluten-free.

Hey Gabs, any chance you can de-gluten-ify that pizza dough for me? 

Me like pizza. Me no like gluten.

Stupid gluten. 

Ooookaaaay. So, it sounds like this gluten-free thing is perhaps bigger than I had anticipated. From Celiac disease to slight gluten intolerance, more and more people were learning to live without gluten. And what is a life without pizza? 

But I wasn't going to post any old dough recipe, just because it happened to be gluten-free. No, I was going to find the tastiest, chewiest, crispiest-edged pizza dough recipe--one that can also be prepared without buying seven different flours and chemical dough elasticizers. Because if it's not affordable and simple, it's not for this website. 


Gluten-free pizza dough

Anyway, after a week of recipe testing and experimentation, I learned a few things:

  • Gluten-free dough neither behaves, nor tastes exactly like regular wheat dough. It's not going to be kneadable, rise in the same way, or stretch, but that doesn't make it any less delicious.
  • Pre-baking is your friend. Pre-baking the crust means you can load it up with extra-toppings without worrying about it getting soggy.
  • It's all about the olive oil. Gluten-free doughs can dry out easily. Counteract with a liberal brushing of delicious olive oil.
  • There is no reason to advertise the fact that your pizza is gluten-free. Because if you say, "Hey, try this pizza I just made!" they'll gobble it up without asking questions. 

Ingredients

  • 1 packet yeast $1.50 for 3
  • 1/4 cup warm (about 110 degrees F) water
  • 2 tsp sugar or honey Pantry
  • 1 1/2 cups gluten-free all-purpose flour (my favorite is the Gluten Free Pantry kind from Glutino--it's also the cheapest available) $3.50 for 16 oz.
  • 2 tbsp whole psyllium husks (available in the supplement aisle) $5.50 for 16 oz.
  • 1 tsp salt Pantry
  • 1/4 cup extra virgin olive oil, plus more for brushing Pantry
  • cornmeal (optional)

Recipe Serves 4

Directions

  1. Combine the yeast, water and sugar or honey in a small bowl. Stir gently, then let sit for 2-3 minutes, to activate.
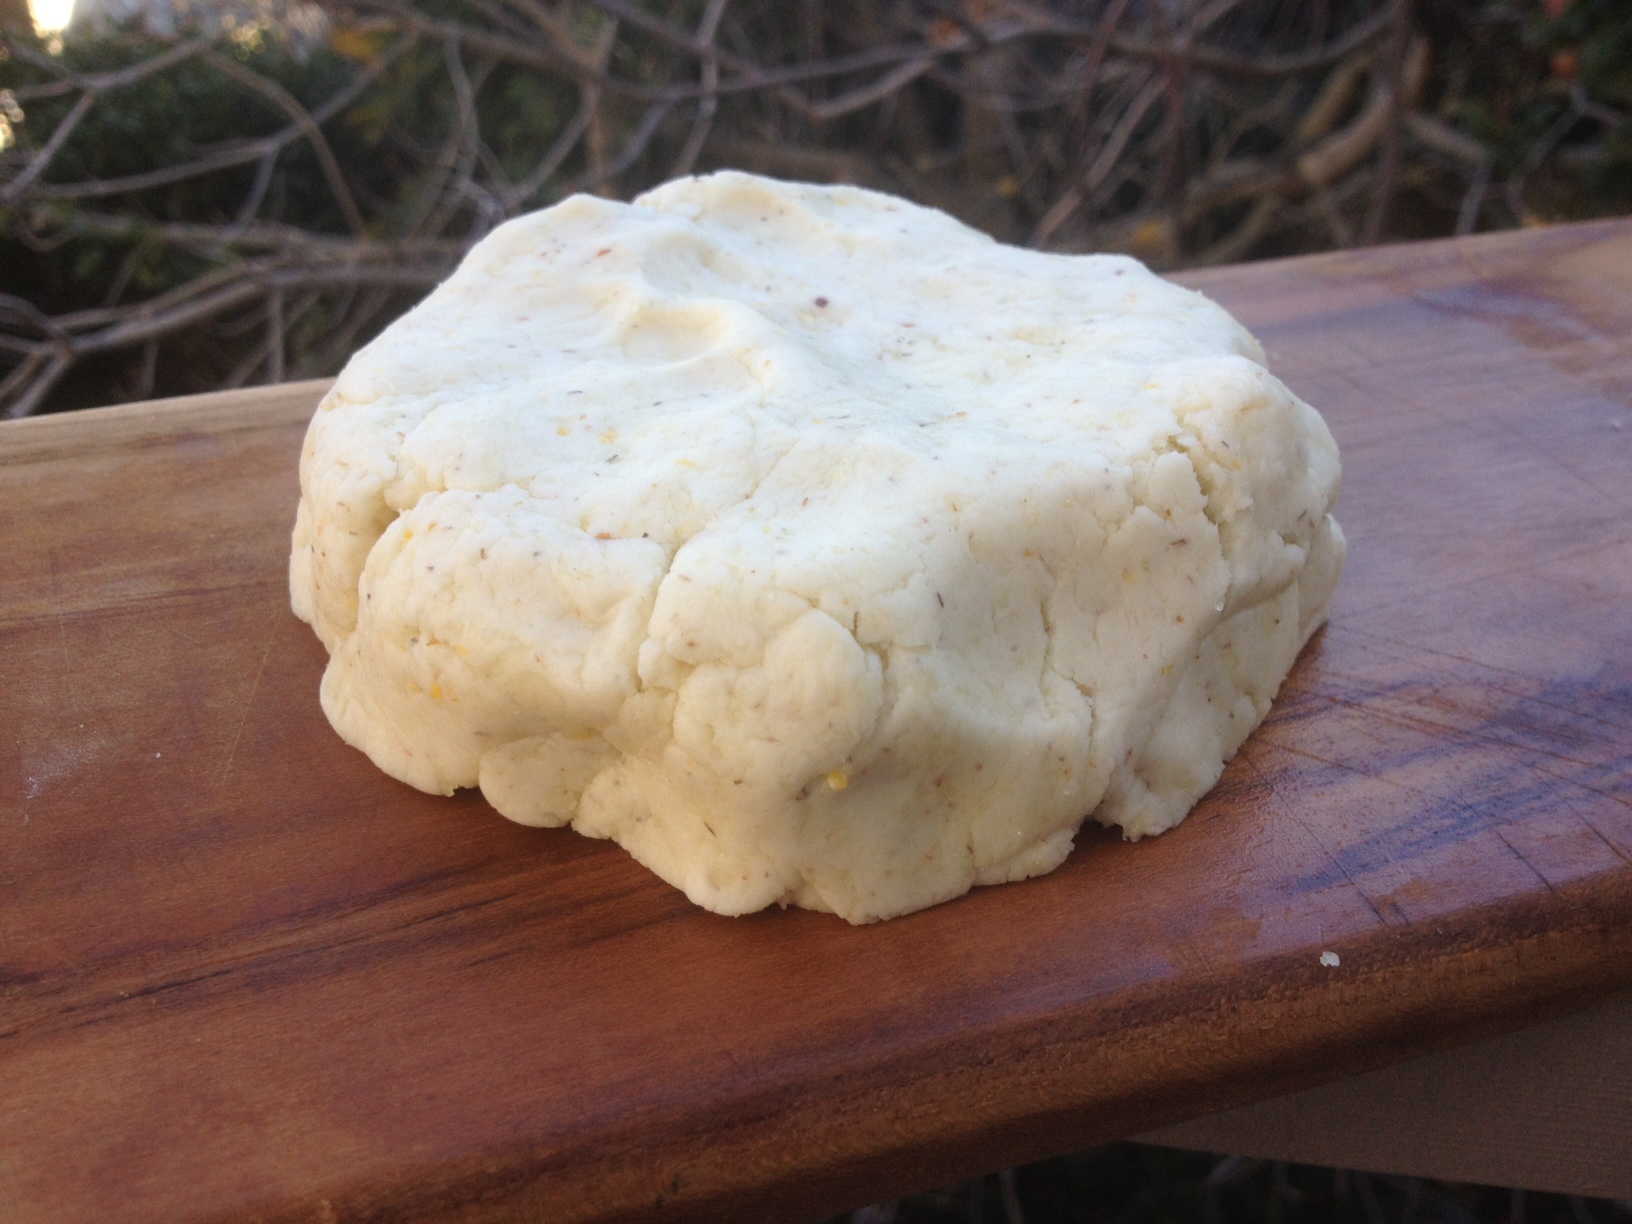
  2. Combine the flour, psyllium and salt in a mixing bowl, or the bowl of a stand-up mixer. Gently stir in the olive oil and the yeast mixture. You may need to add a more warm water, a little bit at a time, until a soft dough forms. It should be about the consistency of traditional biscuit dough.
  3. Gather the dough into a ball and put it back in its mixing bowl. Cover with a clean dish towel, and let rise for an hour (it won't increase in size much, but the flavor will develop immensely and the texture will improve).
  4. If you plan to make pizza at a later time, put the dough in a lightly-oiled zip-top bag, squeeze the air out of it, and put it in the refrigerator where it will keep for up to a week.
  5. If you want to make pizza now, preheat the oven to 450 degrees F, and sprinkle cornmeal over the bottom of a large baking sheet or pizza pan (or line with parchment).
  6. With lightly oiled hands, press the dough out on the prepared baking sheet into 1 14" circle or 2 7" circles.
  7. Use a pastry brush to coat lightly with olive oil.
  8. Bake for 10 minutes or until the crust is firm.
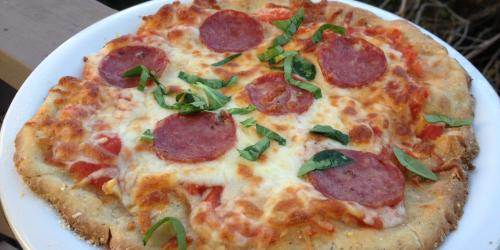
  9. Put on toppings (check out my pizza recipes for topping combination ideas).
  10. Bake for 14-17 minutes, or until the cheese is bubbly and lightly browned.
  11. Let cool for a few minutes, then cut into wedges.

Category: Meals

Tags: , ,

Share this Recipe: Share on Facebook Tweet This! Pin it on Pinterest

Chicken Pho

  • Prep Time 0:30
  • Cook Time 0:60
  • Estimated Cost $14
  • 43 Comments

I spent this Thanksgiving weekend drinking wine, eating, laughing, snuggling, eating, hugging, reminiscing, lounging, eating, and also eating. 

We all ate and ate: mass amounts of creamy Brown Butter-Pumpkin Mac and Cheese, rich stuffing, velvety pumpkin pie and a million different kinds of crispy, creamy, browned, meaty comfort-food-y things. I wouldn't trade it for the world.

That said, this week's approach to food is going to have to be a little lighter, if I am hoping to continue to wear my pants through the holiday season. With that in mind, I decided to make pho--the spicy, deeply flavorful, soul-hugging soup of Vietnamese origin, in which noodles swim (I used low-calorie shirataki noodles--usually found near the tofu in most grocery stores--to make further atone for last week's caloric intake, but rice vermicelli is what is traditionally called for), and atop which fresh, toppings, like scallions, bean sprouts and cilantro dance, waiting to be stirred in.

Note: This soup also happens to be a fantastic way to use up that leftover turkey you've been plowing through for the past few days. Simply use the turkey carcass to make the broth, and shred cooked turkey meat to use in place of the chicken meat called for.

Ingredients

  • 1 tbsp vegetable or coconut oil Pantry
  • 2 tsp Chinese 5-spice $1.50 for 1 oz.
  • 2 chicken legs (drumsticks and thighs), skin-on $4
  • 5 cloves whole garlic, (peel-on), smashed Pantry
  • 1 1" piece ginger, finely minced $0.50
  • 1 whole onion, (peel-on), quartered $0.50
  • 2 stalks lemongrass, coarsely chopped $1
  • juice of 1 lemon $0.50
  • 1 tbsp honey Pantry
  • 2 tsp Asian chili sauce (or more to taste) $2 for 12 oz.
  • 2 tbsp Asian fish sauce $2.50 for 14 oz.
  • 2 1/2 tbsp (plus more to taste) soy sauce Pantry
  • freshly ground pepper Pantry
  • 1 lb rice vermicelli or shirataki noodles $1.50
  • optional garnishes: fresh cilantro, sliced jalapeño, sliced scallions, hoisin sauce, lemon wedges, mung bean sprouts

Recipe Serves 4

Directions

  1. Heat the oil in a large soup pot over medium-high heat.
  2. Add the Chinese-5 Spice and cook, stirring constantly for 1 minute.
  3. Add the chicken legs and brown on both sides, about 3 minutes each.
  4. Add the garlic, ginger, onion, lemongrass, lemon juice, honey, chili sauce, fish sauce, soy sauce, pepper and 2 1/2 quarts of water. 
  5. Cover, bring to a boil and then reduce to a simmer. Allow to simmer for 10-12 minutes, or until the chicken is cooked through.
  6. Once the chicken is fully-cooked, fish it out using tongs, and run under cold water to cool it down.
  7. Slide the skin off the chicken pieces, and use a fork or your fingers to slide the tender chicken meat off the bones, reserving the chicken bones, skin and gristle.
  8. Return the bones, skin and gristle to the pot, cover and simmer for another 45 minutes.
  9. Strain the broth and return to its pot. 
  10. Taste for seasoning and adjust as necessary.
  11. Increase heat to high and bring broth to a boil.
  12. Add the noodles and boil until cooked through, about 5 minutes. 
  13. To serve, use a ladle to portion broth into bowls. 
  14. Use tongs to add noodles to each bowl. 
  15. Divide the chicken pieces between the bowls, and serve immediatley. 
  16. If desired, garnish with any of the optional garnishes. 

Bangkok-Style Deviled Eggs

 Today, I decided to devil some of my favorite Southeast Asian flavors...

Deviling hard-boiled eggs are such a fantastic canvas for flavors. Want truffles and white pepper? Devil it up, baby! Red peppers and olive oil? You devil, you! Even whimsical green eggs and ham can be made palatable by way of the deviled egg (eating them in a box with a fox is, of course, totally optional).

So today, I decided to devil some of my favorite Southeast Asian flavors--spicy chili sauce, fresh cilantro, perky garlic and sliced scallions. The result was a fun, totally unique appetizer, unlike any deviled egg I've ever had before. 

I went the simple route of spooning the egg mixture into the whites, but feel free to get a little fancier with a pastry bag.

Ingredients

  • 6 eggs, hard-boiled, cooled and peeled (Need help with this? Click here.) $1.50 
  • 4 tbsp mayonnaise Pantry
  • juice and zest of 1 lime $0.50
  • 2 tbsp chopped fresh cilantro leaves $1 for a bunch
  • 1/2 tsp soy sauce Pantry
  • freshly-ground black pepper Pantry
  • 1 tsp (or more to taste) Asian chili sauce (like Sriracha or sambal) $1.50 for 8 oz.
  • 2 scallions, sliced, divided (reserve a few slices for garnish) $1 for a bunch
  • 1 clove garlic, smashed Pantry 
  • additional optional garnishes: julienned carrot (the pre-shredded kind is great to use here), julienned cucumber, thin slices of mint, ground, toasted peanuts, toasted sesame seeds (white or black), thin slices of jalapeño 

Recipe Serves 6

Directions

  1. Slice the cooled, peeled eggs in half lengthwise, and gently pop the yolks into a food processor or blender.
  2. Add the remaining ingredients (except for the zest and any optional garnishes you choose to use).
  3. Blend until smooth.
  4. To fill the empty egg white halves, either use a spoon to carefully fill each one, or scrape the yolk mixture into a plastic baggie (or pastry bag), snip a 1/2" hole at the bottom, and pipe the mixture decoratively into each egg white.
  5. Serve topped delicately with scallions and more chili sauce, plus any of the optional toppings, if you are so inclined. 

Sweet Potato-Andouille Hash

  • Prep Time 0:10
  • Cook Time 0:15
  • Estimated Cost $7.25
  • 43 Comments

This has quickly become one of my favorite breakfasts (or lunches dinners, for that matter). It’s a fast, flavorful, high-protein dish, with just enough of a kick from the spicy Andouille sausage and jalapeño. Serve some seared spinach or some steamed broccoli with lemon, and you’ll have an easy, healthy meal, that will keep you satisfied for hours.

If you’re in a rush and need to eat on the go, scramble your eggs right into the hash, and tuck it into whole wheat tortillas or pita pockets, for a unique take on the breakfast burrito.

Note: If you’re not a fan of Andouille, this hash will accommodate just about any other kind of sausage. I’ve enjoyed it with garlic-cilantro chicken sausages, kielbasa, and even vegetarian chorizo. Feel free to be creative.

Ingredients

  • 1 tbsp extra virgin olive oil Pantry
  • 1 large or 2 small sweet potatoes, scrubbed and diced into 1/2" pieces $1.50
  • 1/2 medium onion, diced $0.50 for a whole onion
  • 1 clove garlic, minced Pantry
  • 1 link Andouille sausage, diced $1.50 for a single link
  • 1/2 jalapeño, diced (remove the seeds and veins if you want to cut some of the spiciness) $0.25
  • salt and pepper to taste Pantry
  • 2 scallions, sliced $1 for a bunch
  • 1 handful fresh cilantro, chopped $1 for a bunch
  • 2 eggs, cooked as desired (I prefer poached or sunnyside-up) $1.50 for 6

Recipe Serves 2

Directions

  1. Heat the oil in a large frying pan over medium-high heat.
  2. Add the sweet potatoes and spread out so they cook evenly.
  3. Let cook, stirring occasionally, for 7-8 minutes, until they begin to soften and develop a bit of color.
  4. Add the onion, garlic, sausage and jalapeño and stir well.
  5. Let cook, stirring occasionally, until the sausage begins to brown and the onions become quite flavorful (this is a good time to start your eggs).
  6. Season hash with salt and pepper to taste.
  7. Stir the scallions and cilantro into the hash and remove from heat.
  8. Divide the hash between 2 plates and slide an egg on top of each.
  9. Serve immediately.

Category: Meals

Tags: , ,

Share this Recipe: Share on Facebook Tweet This! Pin it on Pinterest

If there's one thing that fills me with dread, year after year, like clockwork, it's that realization, oh, some time around December 15th (earlier, if Chanukah pops by right after Thanksgiving, as it is sometimes wont to do) that I still have 100% of my holiday shopping left to do--and approximately zero time left to do it.

Don't get me wrong--I get a lot of joy out of picking out special things for people I love. It's the mall crowds (kill me now), the decision-making (Would he rather have a green tie with blue stripes or a blue tie with green stripes? How long should the tie be? Does he even wear ties?! Aaahhhh!) and the ungodly amounts of hard-earned cash spent (on something the recipient may or may not return as soon as I'm not looking) that really bum me out.

Then, of course, there are the even more daunting people on your gift list who leave you utterly clueless in the gift department. Your sister's new boyfriend, about whom the only information you can glean from his Facebook page is that he really, really likes ferrets? What do you get that guy? Your cubicle-mate, whose YouTube acapella obsession is the reason you now dream in 5-part harmony? What do you get for her?

Well guess what: I have your solution. Does every single person on your gift list eat? Yeah, thought so. Do they, like you, like to save money? Do they want a really thoughful, special present?

Yes! They do! 

They need The BrokeAss Gourmet Cookbook. If you don't mind my bragging, it really is the definitive guide for life-long foodies, self-proclaimed gourmands, penny-pinching parents, dorm-living college students, tenacious teen cooks and everyone in between. It's loaded with great recipes (116 of them!) funny anecdotes and just enough hand-holding to help new cooks feel confident in the kitchen. 

Gabi signing books.

Fortunately for you, I am going to make your Chrisma-Chanu-Kwanza-Soltice shopping wildly easy this year, because  for a mere $20 plus shipping (usually $3-$5, depending on location), I will inscribe, sign, beautifully giftwrap and ship a copy of The BrokeAss Gourmet Cookbook anywhere in the United States (and maybe overseas--if that's something you'd like to do, let's talk).  

I'll be taking orders until December 14th (supplies permitting), so that the books arrive in time.

If you'd like to order a book, please send the following information to gabi@brokeassgourmet.com (I'll write back with the total cost after I calculate shipping):

  • Your name.
  • Your phone number.
  • Who the book is for (first and last names).
  • The full address of where you'd like the book sent (make sure to indicate if this is your home/workplace or the home/workplace of the recipient so I can address it correctly).
  • The phone number of the recipient (this is just for the delivery form--i won't call them).
  • Anything special you'd like me to write in the inscription. Is the book for your neice who just started college? Let me know and I'll direct her to my recipe for college nachos. For your vegetarian best friend? I'll tell her to try my veggie burger recipe. 
  • The date by which you'd like the book to arrive (ie: if it's a Chanukah present, let me know so I'll make sure to get it in the mail in early December). 

I'll be doing payments via PayPal, so if you need to set up a PayPal account (it's easy!) click here. 

I'm so excited to get started signing and wrapping! Let's make this the happiest, merriest, least-stressful holiday season ever!