BrokeAss Gourmet

BrokeAss Gourmet

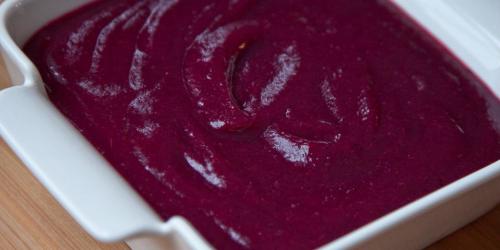
Raising Whitley and Blueberry Applesauce

  • Prep Time 10 minutes
  • Cook Time 35 minutes
  • Estimated Cost $7
  • 8 Comments

Last night, I had the incredible privilege to appear on my friend Kym Whitley's reality show, Raising Whitley on OWN, the Oprah Winfrey Network! Kym and I met in November at the taping for the Young & Hungry pilot (she stars as Yolanda, housekeeper extraordinaire). At the taping, Kym told me about her 2 1/2 year old son, Joshua and her struggle to find healthy, easy-to-cook recipes for the two of them to enjoy together. Joshua has a lot of allergies, and Kym doesn't have a lot of cooking experience, so she was faced with a challenge. A few weeks later, Kym called and asked me to come down to LA and give her a cooking lesson.


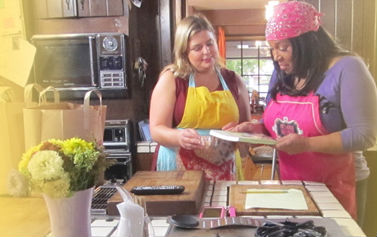
I arrived with groceries for some healthy, fun food, and copies of my books, The BrokeAss Gourmet Cookbook and Pizza Dough: 100 Delicious, Unexpected Recipes, to help Kym continue to cook after I left.

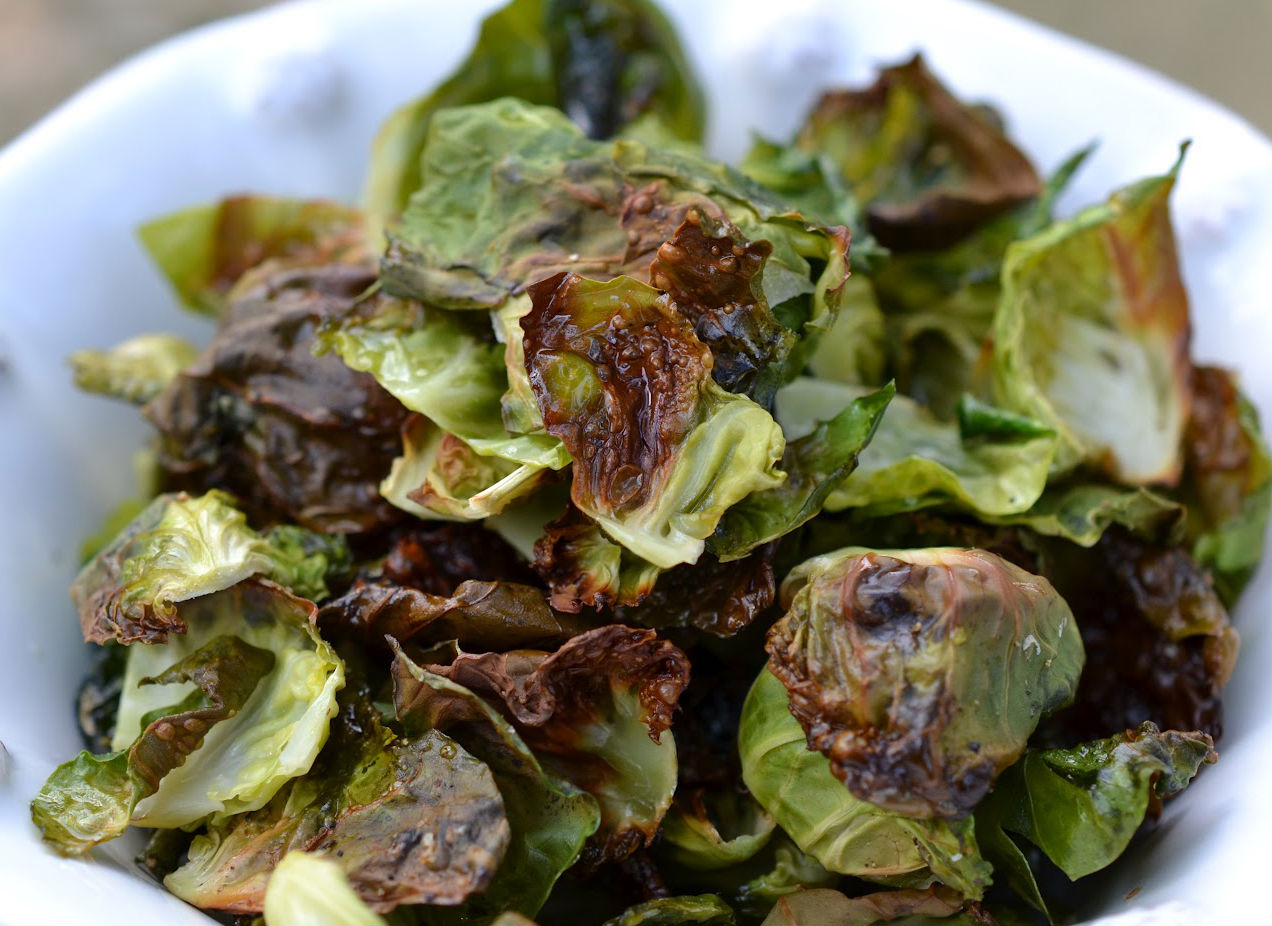
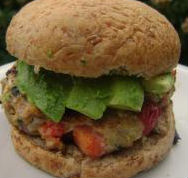
Together, we made three simple recipes: 

Crunchy, easy Brussels Sprouts Chips

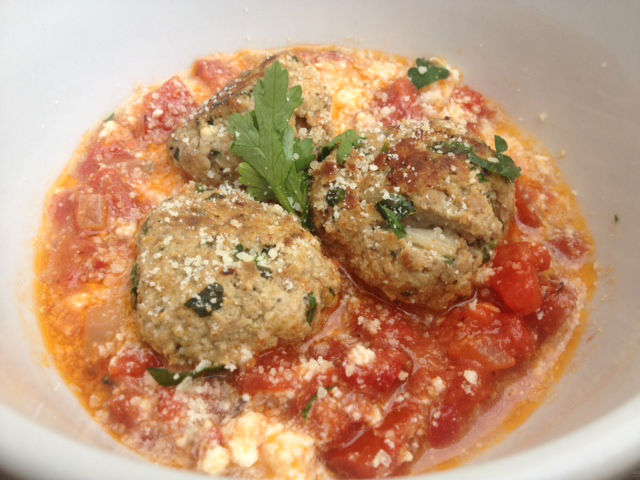
My Basil-Feta Turkey Burgers (minus the feta)

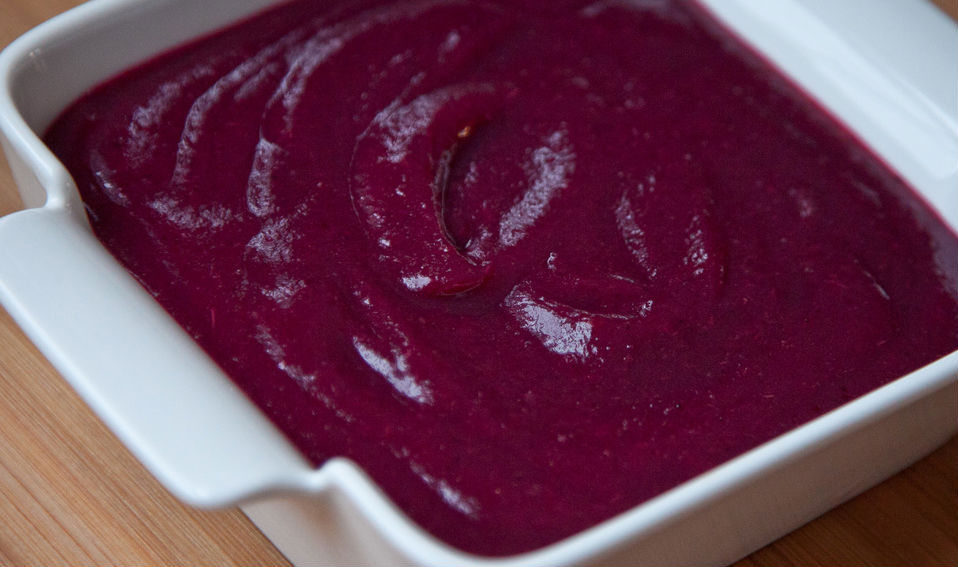
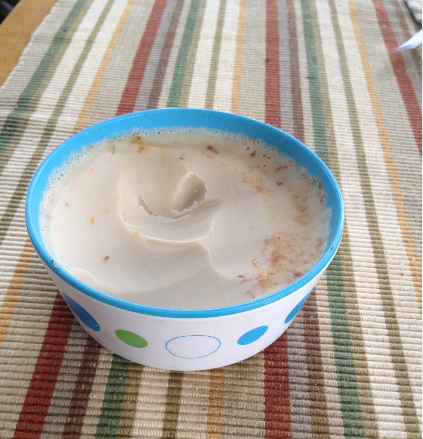
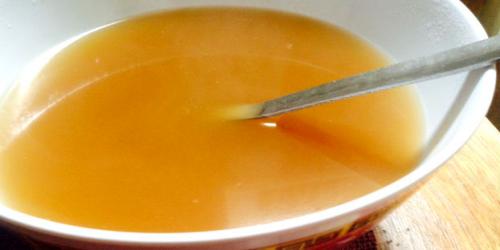
And this delicious applejuice-sweetened Blueberry Applesauce. (I'll get to the recipe shortly.)

It was incredibly fun! We made some delicious, simple food and I got to teach Kym the joys of the immersion blender (the best budget appliance a cook with little space and money can own!) Kym is one of most warm, generous, talented people I know, and she kept me laughing and smiling the whole time, as did Joshua.

Read on for the applesauce recipe (which, by the way, is just as delicious with pork loin and potato pancakes as it is on its own), and check out your local listings to tune into next week's season finale of Raising Whitley!

Ingredients

  • 2 pounds tart apples (like Granny Smith), peeled, cored and chopped $2
  • 1 pint fresh or frozen blueberries $3.50
  • 2 tablespoons unsweetened applejuiice $1.50 for 8 oz.
  • dash cinnamon Optional
  • dash salt Pantry

Recipe Serves 4

Directions

  1. Put all ingredients in a large, heavy-bottomed pot with 1/2 cup water. 
  2. Cook covered over medium-high heat, until mixture begins to bubble.
  3. Reduce to medium-low, and simmer for 20-25 minutes, until very soft.
  4. Puree using an immersion blender, regular blender or food processor, until only slightly chunky.
  5. Let cool, then serve or store in an airtight container. The applesauce will keep, airtight, in the fridge for about a week.

Today's Reuse Roundup post comes from Maria Lipkina of Santa Cruz, CA. Maria is a pastry chef and baker, but her culinary prowess clearly doesn't end with with bread and muffins. Read on for this truly kitchen-savvy reader's tips (that's right, plural tips--she had a lot of 'em!). Hopefully they will inspire you to send me your best kitchen tip(s) for waste minimizing--you could win a Google Nexus 7 tablet and signed copies of both of my cookbooks! Email tips to gabi@brokeassgourmet.com.

Maria says:

I saw your call for waste-reducing tips and tricks on Facebook, and thought I'd just use it as an opportunity to brag shamelessly about my waste-reduction projects. Yes, that would be plural. I can't pick just one! This is your official warning that this list is long. So hey, bear with me, and I hope you like some of these. :)

First off, here's my "umbrella" waste-reduction philosophy: If there's an ingredient sitting around in my house with no designated purpose, I'll think of a recipe that centers on that ingredient.

Here's a photo of some apricot thumbprint cookies I made because the apricot jam had spent a few too many weeks on the fridge door.

And here's a blueberry cheesecake, because what was the intended purpose of those frozen blueberries again?

I pretty much try to save whatever I can. I had a brunch party a few months ago, and we made a HUGE batch of bacon in the oven. It seemed like a big waste to throw away all the bacon grease, so I saved it in a little bowl. Now I use it to cook eggs or add richness to other dishes!

My passion for eliminating food waste even extends beyond my own kitchen. I currently work in a bakery as a bread and pastry baker, and I try to do everything I can to save the scraps that are sometimes left at the end of the day.

One way that this manifests is with croissant dough. As we put the sheets of dough through our roller, bits and scraps sometimes need to be cut off to make the sheets of dough more even. As the day goes on, I collect all the scraps in a pile and take them home. I use it to make super-easy cinnamon rolls with cream cheese frosting at home!

I try to take home whatever would be otherwise tossed at the busy bakeshop, and invent whatever I can feed to my friends, as long as the dough's not going in the trash!

Here are some broccoli/garlic/cheese hand pies that I made at home out of rescued galette dough scraps.

Alright, I think that's the end of my tirade! In general, I just hate seeing food go in the trash, and do whatever I can think of to make sure it goes into people's mouths instead. My grandmother, who grew up in the Soviet Union and can't STAND waste, is my inspiration for that. Here's one last photo-- my babushka's matzah balls!

Our first Reuse Roundup tip comes from Stefani Hutchinson of Conway, South Carolina! Rather than throw out the ends of celery, Stefani has found a way to actually re-grow them. How awesome is that!? Read on for her tip, and be sure to send me your best kitchen tip for waste minimizing--you could win a Google Nexus 7 tablet and signed copies of both of my cookbooks! Email tips to gabi@brokeassgourmet.com. 

Says Stefani:

You can grow your own celery from the ends leftover from the stalks you buy at the store. Cut the bottom off and place the piece in water. Change the water each day to keep it clean and before you know it there will be roots and new stalks. Plant the new celery plant in a nice pot or in your garden and there you are! Fresh, home grown celery from the remains of the one you bought at the store! Here you can see a new baby root just starting at the bottom of the stalk.

Category: Articles

Tags: ,

Share this Recipe: Share on Facebook Tweet This! Pin it on Pinterest

Chicken Broth & Nexus 7 Giveaway

  • Prep Time 5 minutes
  • Cook Time 6.5 hours
  • Estimated Cost $2.50
  • 2 Comments

If you've read this blog for awhile, you know how much I love a good roast chicken. Most weekends, it become the cornerstone of our meals. I'll make one on Friday night and serve it with homemade challah, roasted sweet potatoes and a green salad (usually kale). The next morning, I'll make a hash with leftover chicken thighs, chopped up challah, onions and whatever greens we have in the house, and top it with poached eggs and some crispy chicken skin (chicken bacon!).

On Sunday morning, I'll shred whatevever meat is left and cook the carcass (and the bones, which I always save) with skin-on cloves of smashed garlic, onion peels, carrot tops, any other vegetables we need to use up (particularly great for those that are starting to wither in the veggie bin), salt, pepper and water to cover. I'll let it simmer all day (along with the chicken innards that came with the bird, which I removed before roasting) and then put most of it in the fridge for later in the week.

To about a quart of broth, I add star anise, cinnamon, fish sauce, soy sauce, ginger and a touch of honey, simmer again, and then serve with rice noodles and the rest of the chicken meat or some pan-fried tofu. Sunday night pho is one of my most special meals of the week.

Throughout the week, I base meals around the yielded broth. A rich kale-white bean soup for lunch, risotto for dinner, couscous and quinoa, made miles more flavorful by its addition. Even a steaming cup of plain broth when it's too close to a mealtime for a snack, but my stomach is starting to rumble. 

It's widlly easy to make (I'll get to the recipe in a minute), and a great way to stretch the dollars I spent on the chicken. I feel good about putting every last scrap of chicken to good use. It's respectful to the animal, to the farmer who raised and slaughtered it, and to the earth. Food waste is a big problem, especially in the United States. It is estimated that Americans waste 33 million tons of food per year. In a country with an estimated 50 million people living in food-insecure households, that is simply not OK. 

There are many things we can do at home to help limit food waste. If you don't already compost, here's a great article about how to start. At the very least, reach out to your city's waste department about getting a compost disposal container (a large one for outside and a small one to keep in your kitchen). If you have room, keep the small one in your freezer or fridge to keep the smell down, or, do as I do, and empty it as soon as it gets full. 

I also recommend shopping like a European, if your schedule allows. The European grocery shopping style is to visit the market regularly—every few days—for smaller quantities of fresh ingredients. Kitchens are stocked with nonperishable basics like olive oil, salt, pepper, flour and sugar, but things like eggs, fresh vegetables, meats and fish get picked up in small quantities more frequently. If you have the time to shop this way, it can be a great way to make sure you don’t over-purchase fresh foods that go bad if you don’t use them. Buying only what you need is a great practice, and one I recommend beyond the kitchen as well.

So here is what I want to know: What are your favorite kitchen tricks for limiting waste? Do you throw a Parmesan rind into soup for added flavor? Do you re-grow scallions after you use the green parts? Do you cook with the odds and ends of vegetables

Email them to me [gabi@brokeassgourmet.com], along with your name, location, and a photo of your tip or trick, and I'll post it here, in a new series I'm calling Reuse Roundup. I'll accept entries today through March 7th, and post them on the blog, as they come in. The person with the best entry will win autographed and inscribed copies of my first book, The BrokeAss Gourmet Cookbook, my newest book, Pizza Dough: 100 Delicious, Unexpected Recipes, plus a completely awesome, brand-new Nexus 7 tablet (retails for $229), donated by Staples.  

So, send me your ideas, and check back here soon to see what others send in as well!

Oh, and read on for my chicken broth recipe. 

Ingredients

  • 3-4 pounds leftover chicken carcasses (basically whatever is left of your roast chicken after you eat it), plus the chicken innards, which usually come in a bag inside the chicken when you buy it
  • 1 large onion, quartered (with peel) $0.50
  • 4 carrots (leave the peel and stems on), quartered $1
  • large handful of whatever fresh herbs you have, with their stems $1 for a bunch
  • 2 bay leaves Optional
  • any vegetables you need to use up, chopped roughly Optional
  • 8 to 10 peppercorns Pantry
  • 4 whole cloves garlic smashed, (leave the peel intact) Pantry
  • 1 1/2 gallons water (22 cups)


Recipe Serves 10-12

Directions

  1. Place chicken, innards, vegetables, and herbs, peppercorns and bay leaves (if using) in a 12-quart pot. 
  2. Add water and cover. 
  3. Cover and cook over high heat, until the mixture starts to boil.
  4. Turn heat down to medium-low, cover and simmer for 6 hours.
  5. As the stock cooks, skim the fat that floats to the top of the pot from with a spoon or fine mesh strainer every 10 to 15 minutes, for the first hour of cooking and occasionally for following two hours. 
  6. Add a bit more water if needed during cooking to keep the chicken and vegetables submerged.
  7. Strain broth and salt to taste.
  8. Use immediately, or refrigerate in an airtight container.
  9. After refrigerating, more fat may rise to the top of the broth. You may either skim it off with a spoon, or stir it in for a richer broth.


Category:

Tags: , , , ,

Share this Recipe: Share on Facebook Tweet This! Pin it on Pinterest

Ricotta Meatballs

  • Prep Time 5 minutes
  • Cook Time 7 minutes
  • Estimated Cost $13.50
  • 5 Comments

It's easy to come up with excuses not to cook. Even I do it sometimes. I have a regular conversation with myself most days around 5:30 PM that I like to call "The Burrito Debate."

I happen to love burritos. In addition to being utterly delicious, they're everything one needs in a meal in one complete, monstrous sizable package. The downside, of course, is that they're full of refined carbs (rice, tortilla) and one burrito typically has enough calories to satisfy three linebackers. Which, alas, I am not. 

But man, at 5:30, after a day of working, sometimes cooking dinner is the last thing I want to do, and that's when The Burrito Debate gets started: 

PRO: My favorite taqueria is on the way home! They'll be so happy to make me a burrito!

CON: Eating one will make me uncomfortably full and probably lead me to pass out at 8 PM.

PRO: There's fiber in beans!

CON: Bean farts.

Sometimes I give in, of course. But when I don't, I like to make meatballs. Throwing these together is *almost* as easy as ordering a burrito, and the payoff is much greater. This interpretation comes together in minutes, and satisfies deeply. I like to serve them in tomato sauce with a few dollops of ricotta and eat them with a spoon so I can get lots of sauce and creamy ricotta in every bite. 

If you feel compelled to make this a complete meal, add some crusty bread and a crisp green salad. If, however, you prefer eating them out of a bowl in your pajamas on the couch, come sit by me. 

Ingredients

  • 1/2 lb ground beef (80/20 is ideal) $3 
  • 3 tbsp finely chopped onion (about 1/4 medium onion) $0.50 for a whole onion
  • 2 cloves garlic, minced Pantry
  • 3/4 cup ricotta (preferably whole milk) $3.50 for 14 oz.
  • 2 tbsp grated (not shredded) Parmesan cheese $3.50 for 10 ounces
  • 1 handful fresh parsley leaves, chopped finely $1 for a bunch
  • 1/4 tsp salt Pantry
  • 1/2 tsp ground pepper Pantry
  • dash red pepper flakes Optional
  • 1 egg yolk $1.50 for 6
  • 2 tbsp extra virgin olive oil, plus more as needed Pantry

Recipe Serves 2-3

Directions

  1. Combine all ingredients except olive oil in a mixing bowl.
  2. Use your hands to mix thoroughly. 
  3. Wet your hands slightly, and roll the meat mixture into 1-inch balls. Set the balls on a clean plate or baking sheet.
  4. Heat the olive oil in a large frying pan over medium-high heat.
  5. Cook the meatballs for 2-3 minutes on all sides, until browned and cooked through.
  6. Serve as they are, or in warm tomato sauce with a few dollops of ricotta and more parsley.