BrokeAss Gourmet

BrokeAss Gourmet

Soft Pretzels with IPA Cheese Sauce

  • Prep Time 15 minutes
  • Cook Time 30 minutes
  • Estimated Cost $11.50
  • 48 Comments

I'm not interested in diving too deeply into politics here. 

Not because I'm shy about them (if you know me in person or follow me on Twitter or Instagram or my personal Facebook page, you know I am extremely forthcoming about my beliefs), but because I'm guessing you're here because you're hoping to briefly think about something other than what's going on in the news. I know I'm here, posting on this blog I have so neglected over the past year (sorry about that, by the way) because I needed a little reprieve too. 

Of course, it's not as easy as simply changing the subject. Sure, I could tell you about what's new with me, how married life is going so far, about the books I have coming out this year, and the new season of Young & Hungry. But not only does that feel incredibly tone-deaf and insensitive, it's also not really reflective of how I feel on the inside right now, where I am completely distracted by what's going on in the world. 

Lately, I have been granting myself little breaks from worrying about absolutely everything. Cooking, of course, is an excellent stabilizer, and gives me an opportunity to nourish the souls and bodies at my dinner table with wholesome, satisfying food. My recently acquired running habit has become my favorite way to spend an hour not thinking about anything other than putting one step in front of the other and not getting hit by a car. When things get really bad, I'll treat myself to a half-hour episode of Sex and the City, where the worst thing I have to deal with is the utter lie that man-child Big could ever be an acceptable boyfriend for Carrie (don't even get me started on their eventual marriage in the movie versions). And this Sunday, I'll partake, extremely half-heartedly, in America's favorite form of distraction: the Superbowl. 

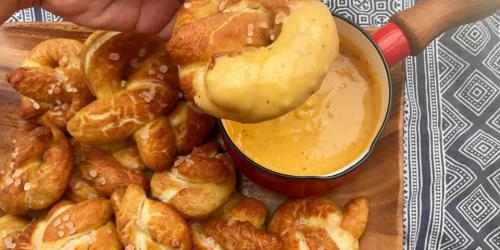
I can't contribute much football spirit to the game, so I'll be doing what I do best: making something good to eat while we watch grown men who make more money than the GNP of small countries beat each other up. More specifically: soft pretzels with decidedly decadent, gooey IPA cheese sauce for dipping. Here's what that looks like.

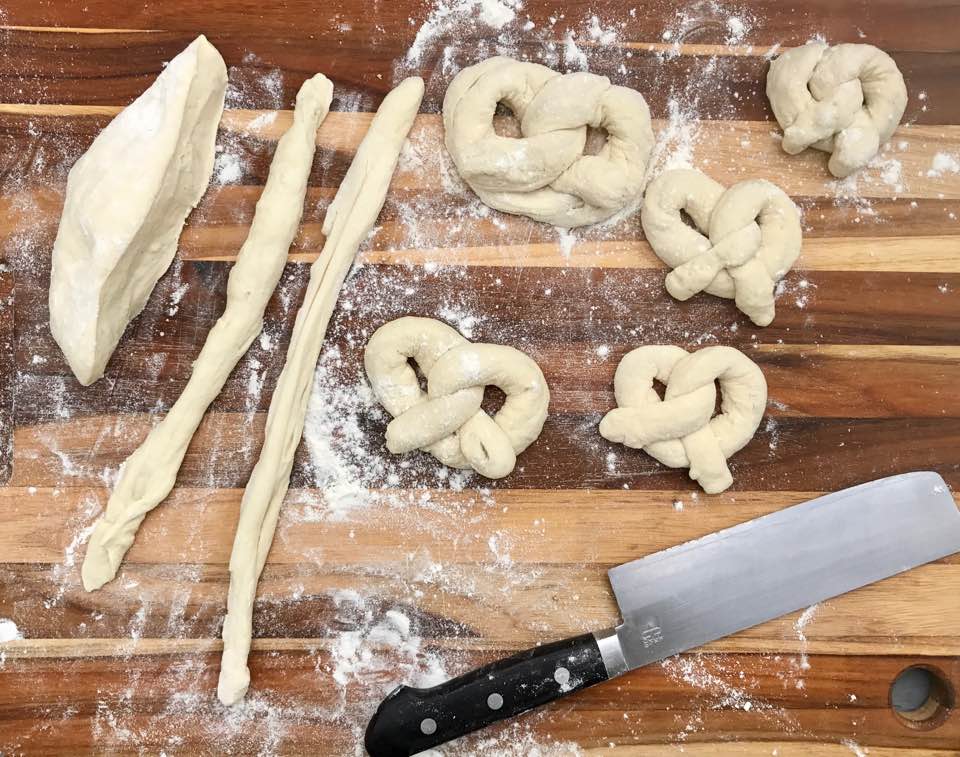
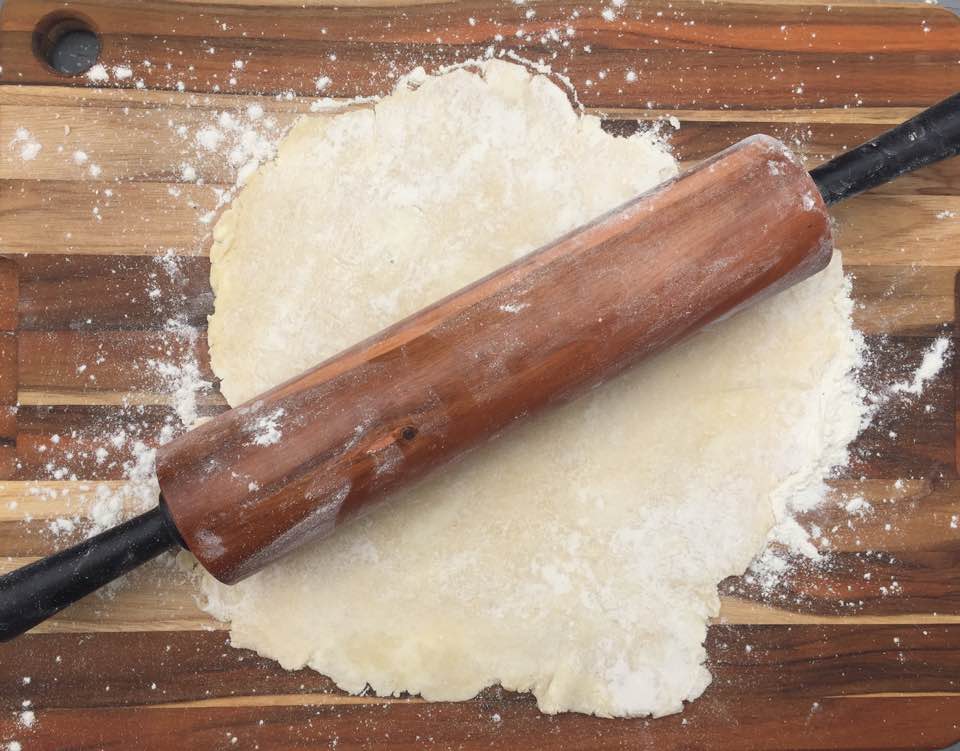
It starts with my favorite staple: pizza dough

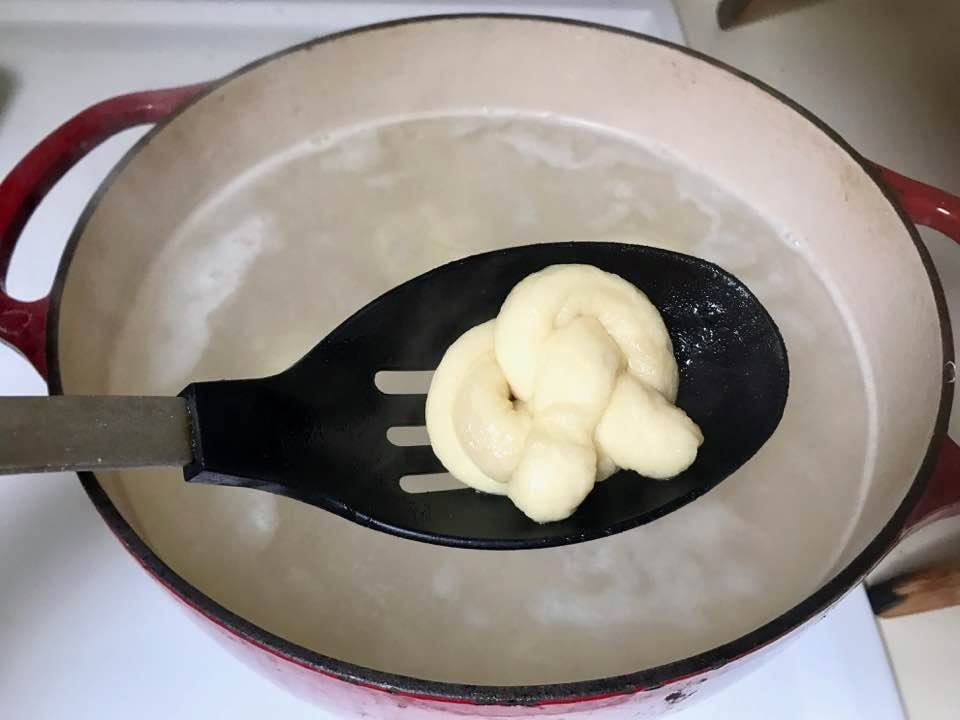
A bath of simmering water with baking soda helps turn them from plain old dough knots into shiny yellow pretzels when you bake them.

Onto a baking sheet they go, topped with a thick coat of melted butter. 

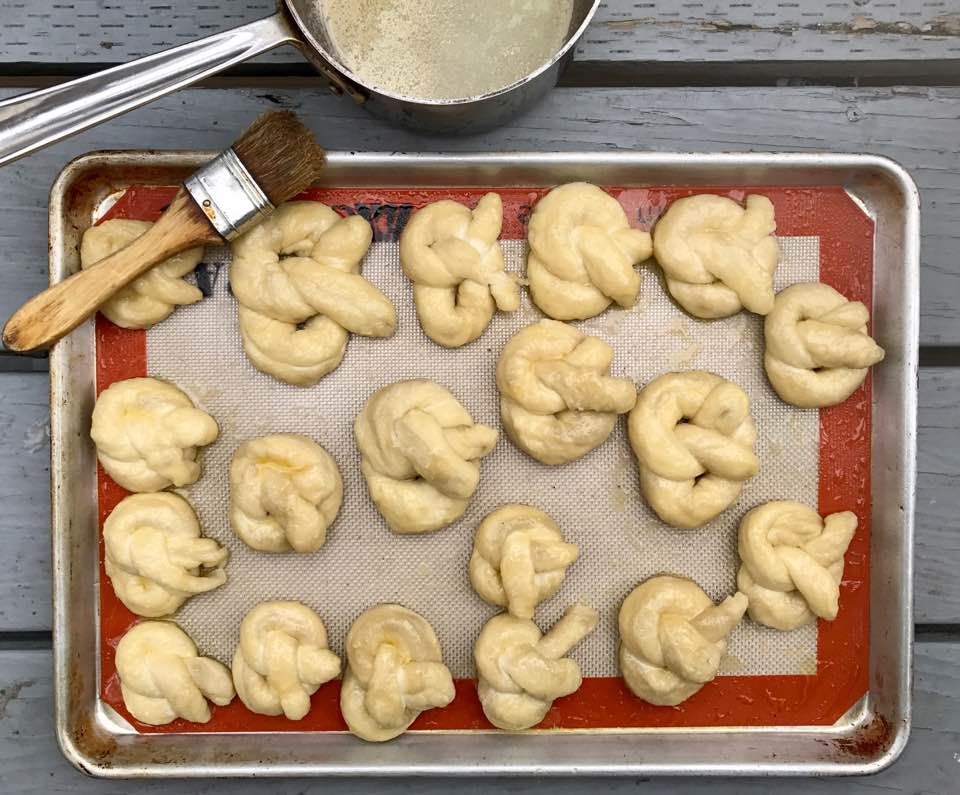
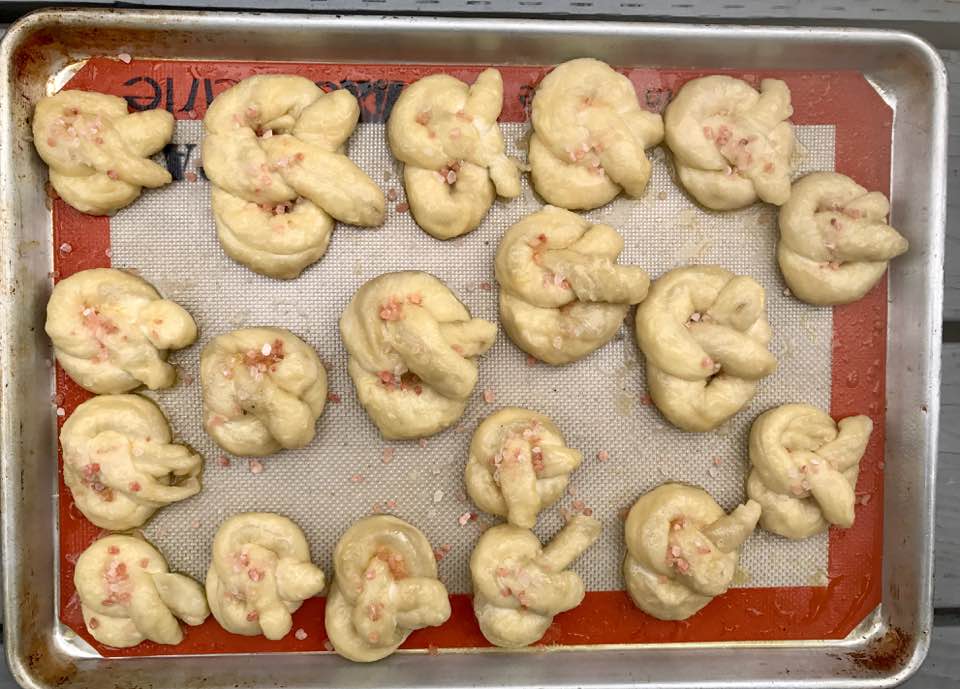
I added some coarse salt, but you're welcome to skip this part if you like.

And into the oven. 

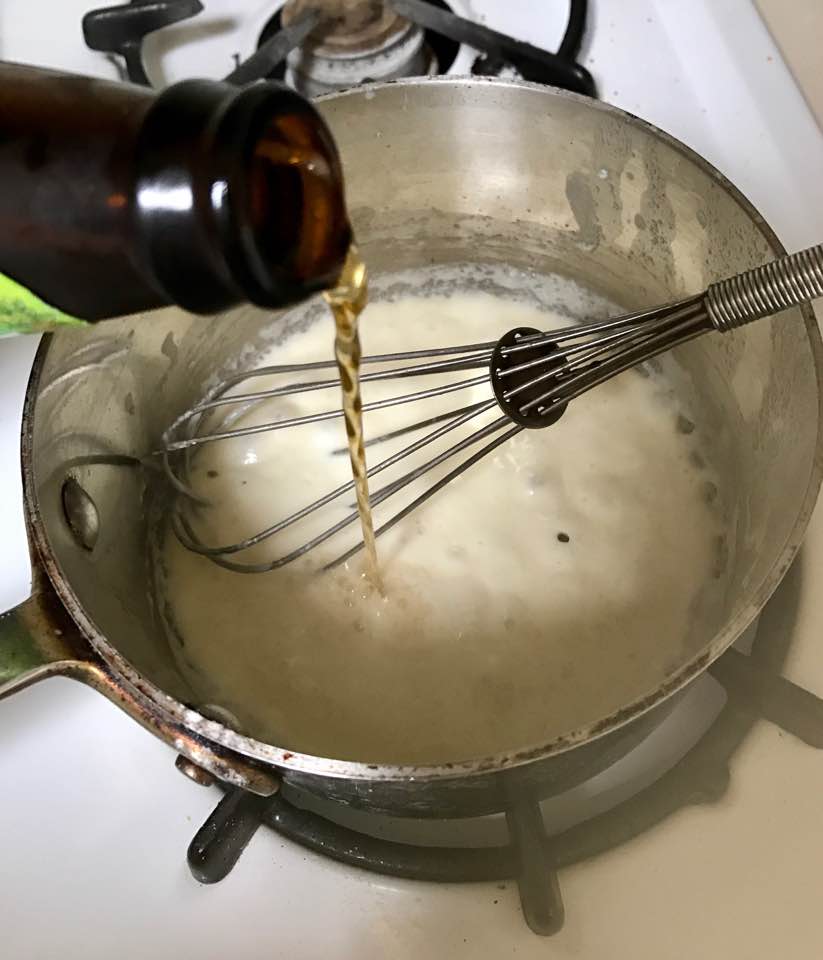
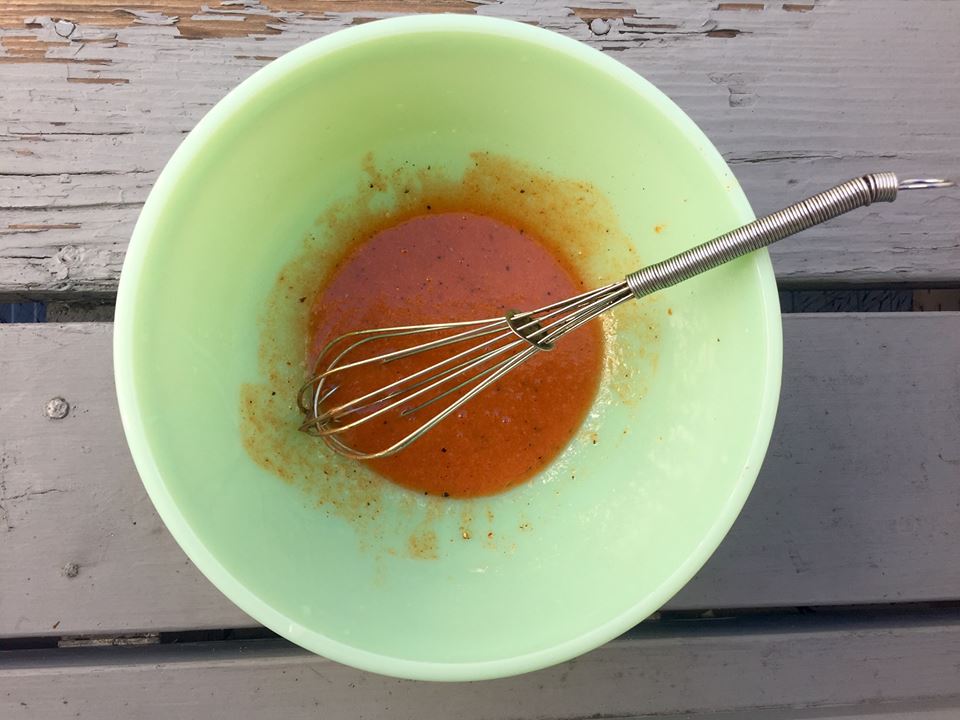
While they bake, the cheese and beer sauce comes together.

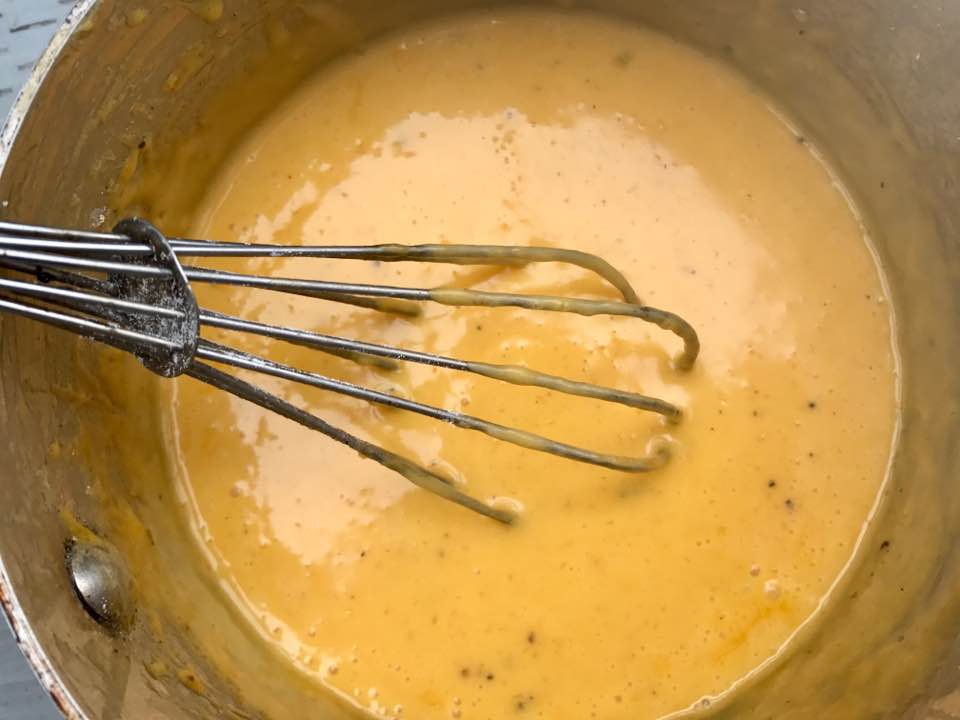
A lot of sharp cheddar makes it velvety.

After about 30 minutes, the pretzels are ready to eat. I like to keep the sauce warm by serving it in a metal pot.

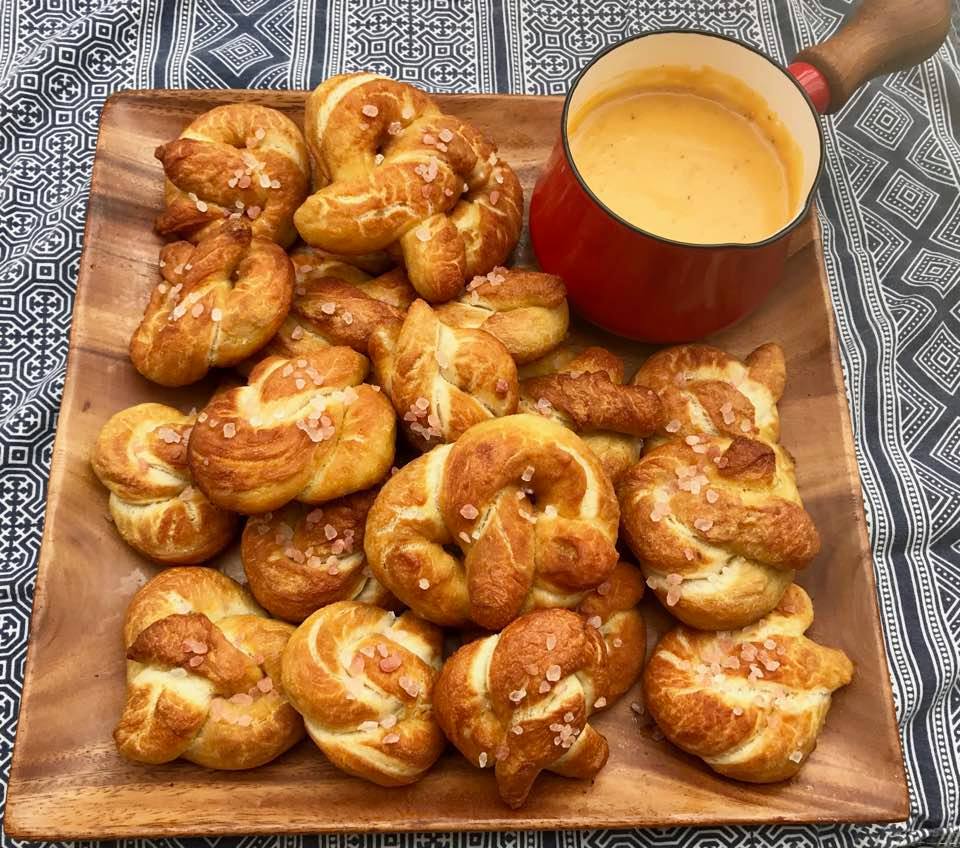
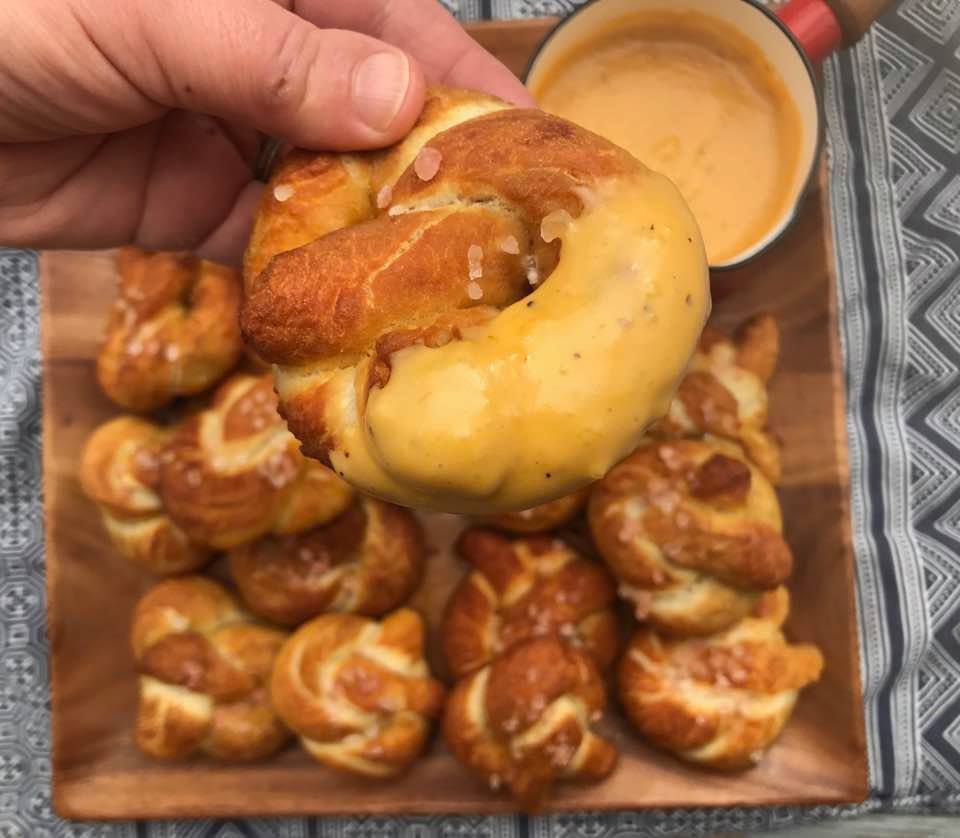
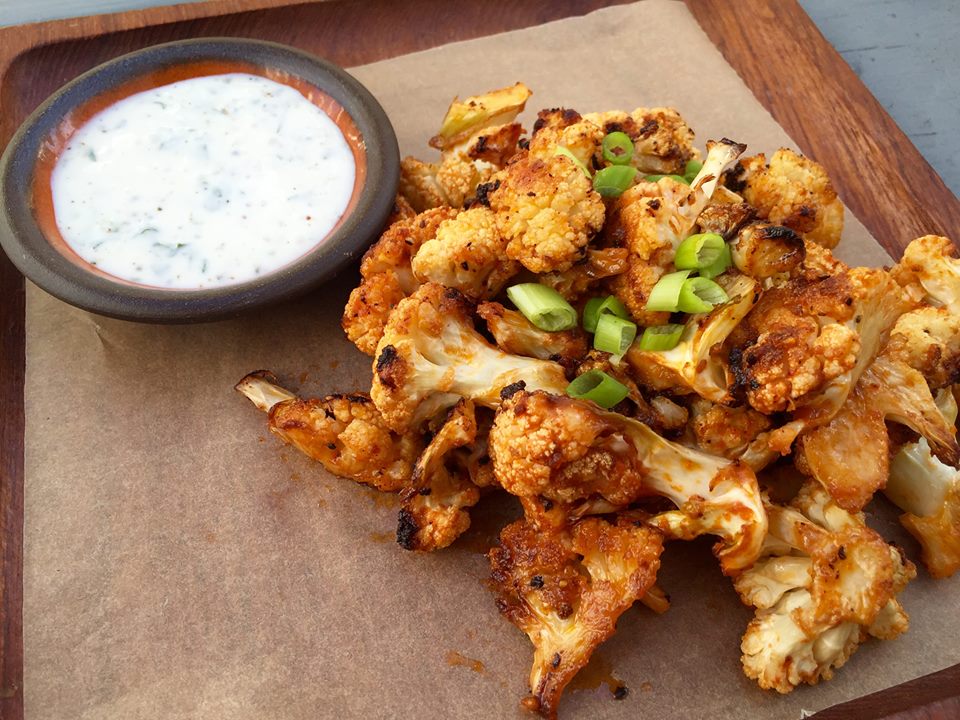
Dig in. Forget your cares for a few minutes.

 Then get back to the very important job of standing up for what you believe in.

Ingredients

  • flour Pantry
  • 2 pounds store-bought or homemade pizza dough $1.50
  • tablespoon baking soda Pantry
  • 2 tablespoons large-grain salt, like sea salt or coarse kosher salt Pantry
  • 5 tablespoons unsalted butter, melted, divided
  • 1/4 cup milk $1.50 for a pint
  • 1/2 cup IPA $2.50 for a 12-ounce can or bottle
  • 2 cups shredded sharp cheddar cheese $3.50 
  • 1 tablespoon spicy brown or dijon mustard optional
  • regular salt, to taste Pantry
  • ground black pepper, to taste Pantry


Recipe Serves 8-10

Directions

  1. Preheat the oven to 400°F.
  2. Lightly grease (or line with parchment paper or a silpat) 1 large or 2 medium baking sheets.
  3. Set a large pot of water on the stove and whisk in the baking soda. Bring water to a light boil.
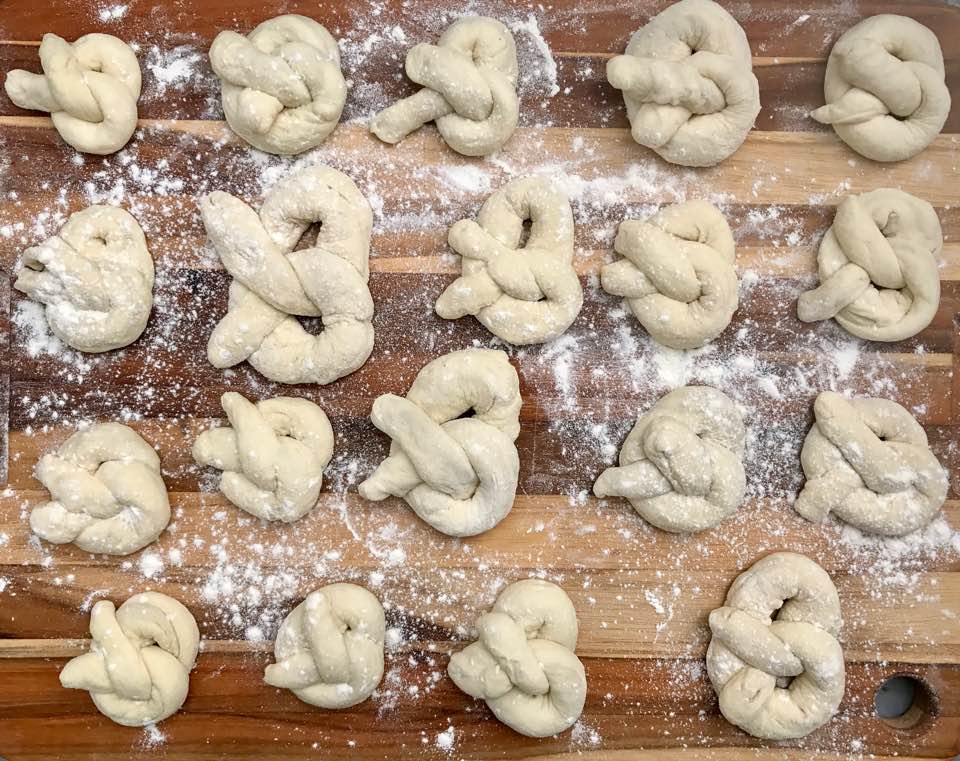
  4. On a lightly floured surface, oll the dough out into 20 10-inch ropes and fold each rope into a pretzel shape (or other desired shape).
  5. Drop each piece of dough into the water, boil for 10-15 seconds each, until they float, and then transfer to the prepared baking sheet(s).
  6. Use a pastry brush to lightly brush the tops of the pretzels with the 4 tablespoons of melted butter.
  7. Sprinkle with the coarse salt. 
  8. Bake for 25-30 minutes or until pretzels are golden brown. 
  9. While the pretzels bake, make the cheese sauce. Place the remaining tablespoon of butter in a medium pot on the stove over medium heat.
  10. Add a tablespoon of flour and whisk until a sticky dough forms.
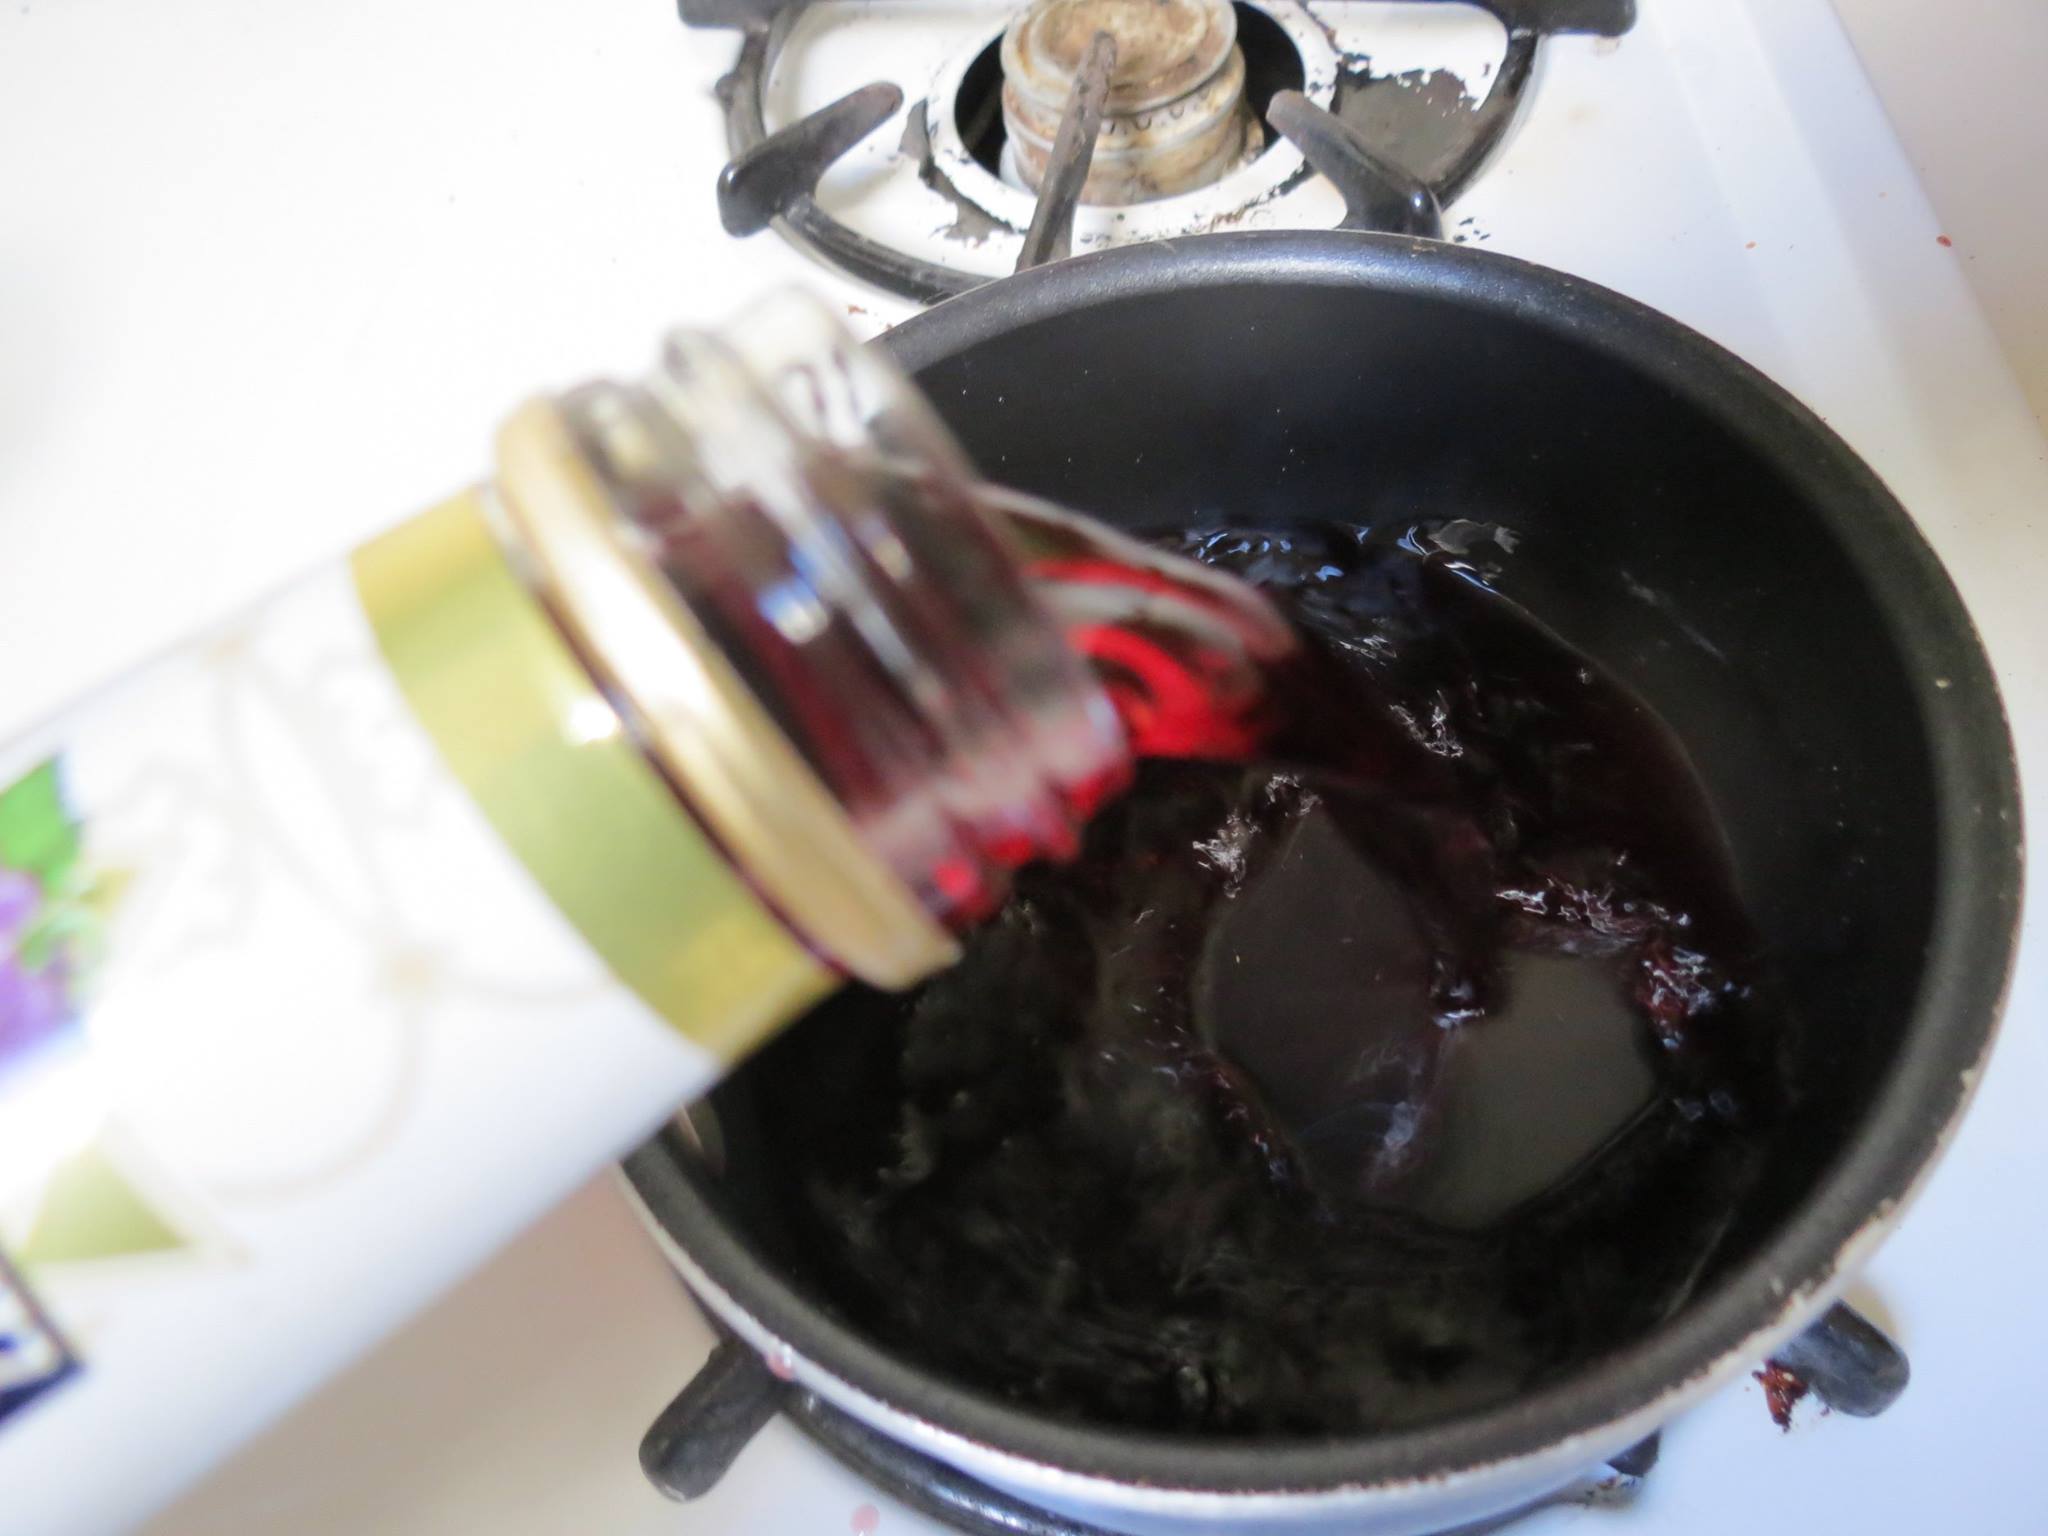
  11. Add the milk and beer, continuing to whisk until a smooth and creamy sauce forms.
  12. Stir in the cheese, whisking constantly to avoid lumps. 
  13. Add the mustard, if using, plus the salt and pepper to taste and whisk until incorporated.
  14. Continue cooking for about 5 minutes, whisking occasionally.
  15. To serve, transfer the finished, warm pretzels to a serving plate and serve with the hot cheese sauce (I like to serve it in a cute metal pot, to keep it hot), for dipping.


Mazel Tov Cocktail

  • Prep Time 3 minutes
  • Cook Time 15 minutes
  • Estimated Cost $14
  • 101 Comments

I don't normally break this recipe out until Passover (you may recognize it from the time I shared it on my dear friend Tori Avey's website), but, in case you haven't been online yet today, Trump surrogate Scottie Nell Hughes referred to the the Molotov cocktails in the Jay-Z and Kanye West video, "No Church in the Wild" as "Mazel Tov cocktails," and, well, I couldn't help myself. 

I won't comment much on the election here (if you follow me on Twitter, Instagram, or my personal Facebook page, you know exactly where I stand), but I think we can all agree that, regardless of what happens tomorrow, we're all going to need a big icy cup (or three) of what I am now officially dubbing the "Mazel Tov Cocktail." 

Tip: make the syrup today (a nice reprieve from refreshing political polls all day), and you'll be ready to make a big batch of these on election night.

Start by reducing some classic Concord Grape Manischewitz in a small pot over medium-high heat.

We're making a syrup here. Yep, that's right: we're making cloyingly sweet Manischewitz even sweeter (trust me).

Next, we need to get out our cocktail shaker and fill it with 2 teaspoons of the syrup, plus blood orange juice (you can use any kind of orange juice you like -- have fun with the symbolism), and vodka. 

Then shake that sucker up, strain it, and serve it in a pretty glass.

L'Chaim!

Oh, and in case you haven't done so yet, MAKE A PLAN TO VOTE! 


Ingredients

  • 1 cup Concord Grape Manischewitz wine $5 for 24 ounces
  • 2 oz vodka $8 for 12 ounces
  • 1 blood orange (or regular orange) (half juiced, half sliced) $1
  • Ice


Directions

To Make the Syrup

  1. Pour the Manischewitz into a small saucepan and place over medium-high heat.
  2. Bring to a boil, then reduce heat and let cook until thickened and syrupy, about fifteen minutes.
  3. Let syrup cool completely.


To Make the Cocktail

  1. Fill a cocktail shaker with ice, then add the Manischewitz syrup, vodka, and blood orange juice.
  2. Shake well until mixed and well-chilled.
  3. Strain into a glass and garnish with the blood orange slice.
  4. Serve immediately.

Cast Iron Bibimbap + Wedding Pics

  • Prep Time 45 minutes
  • Cook Time 20 minutes
  • Estimated Cost $14
  • 15 Comments

One of the weirdest questions I was asked multiple times during the year I spent planning my wedding was whether I would be doing the food myself.

My response was similar to how I felt when my grandmother, confused as to how I managed to book a plane ticket for a trip we were going on together without using her travel agent, asked me how I had "hacked into the Alaska Airlines ticket system."

In both cases, I was a little shocked to be asked such a question, but utterly flattered that the asker thought I was capable of executing such a feat. I know some people cater their own weddings, and I tip my veil to them because that is incredibly impressive. But I am a mere mortal and so hired a catering company. (I also did not hack into the Alaska Airlines backend, in case you were still wondering).

Park Avenue Catering and Patisserie Angelica in Sonoma County did the food, cake, and desserts at my wedding, and they both did a phenomenal job.

Oh yeah. Sorry to bury the lede, here. I'm thrilled to tell you that Evan and I got married this summer.

It was wonderful. We held the wedding at Kunde Family Winery in Kenwood, CA on July 3rd, atop a hill overlooking the entire Sonoma Valley. If you're the wedding stalker type, and want to see the whole album, here it is. Meanwhile, here are a few highlights.

Our ceremony was held under a chuppah constructed using poles made of wood from Camp Tawonga, my childhood summer camp, and a talis (prayer shawl) that Evan bought in Jerusalem last summer.

We have a special place in our heart for sunflowers (Evan brings me a bouquet of them every week--I know, we're nauseating), and we wanted them to be the only flowers at the wedding. Everyone thought this idea sounded crazy, but our wedding planner Ali Diluvio and Anita from Wine Country Flowers made it work perfectly, by pairing the sunflowers with blue glassware and rustic yet refined decor.

As I said, I didn't do the food, but it was delicious and beautiful. Obviously, I asked for lots of photos of food, and our wedding photographer, Jennifer Bagwell delivered big time.


I know everyone says this, but it was truly the best day of our lives.

Another reason why you haven't heard from me is that after the wedding, we went to Maui, where we ate all the poké on the island and drank more mai tais than we should have.

I cooked a little on Maui, in the oceanside condo we rented (so much better than staying in a hotel, as far as I'm concerned), but I was mostly making grilled fish with fruit. Seriously, we each ate at least one mango, guava, or dragonfruit per day. There is no fruit like ripe, local tropical fruit.

But now we're back. And there are books to write (I have 2 coming out in 2017! More on that soon), a schoolyear to dive into (for Evan), and, of course, cooking to be done. We're slowly readjusting to our real life and new matrimony. And of course, I'm back in the kitchen.

I've alway loved Bibimbap, a Korean dish of rice, meat, and vegetables, typically served in a stone pot, which serves to keep it hot and also to crisp the rice. I had never made it at home before, because I assumed I needed an actual stone pot. But a few weeks ago, as I was garnishing a panful of crispy roasted chicken legs, it occurred to me that my cast iron frying pan could probably produce the same results. I am so happy to tell you that was right. 

The not-so-secret ingredient to a good bibimbap is gochujang, a Korean fermented chili paste. Look for it at Asian specialty grocery stores, or in well-stocked supermarkets.

This particular variety is too thick to pour, so it needs to be diluted a little bit with water.

Classic bibimbap recipes call for bulgogi (Korean barbecued beef), but I didn't have any beef, so I used chicken breasts, which I marinated half of the gochujang. You could also use chicken thighs, tofu, or some really meaty mushrooms.


This dish works well with leftover rice, but if you don't have any, now is a good time to make some. You will need about 3 cups of cooked rice. Pretty much any grain will work. I have also used quinoa and millet with great results.

I made some garlicky spinach with sesame seeds as one of the components. You could also use raw kale salad, pickled Asian pear, or just about any vegetable lingering in your produce bin.

I should say that you could probably make this dish using a regular nonstick frying pan, but since cast iron gets very hot all over, and is similar to a stone pot in that respect, I think it's better. Also, why don't you have a cast iron pan? They last forever and are very affordable. This one is my favorite

I topped my bibimbap with a variety of vegetables, kimchi, and a couple of eggs. You'll want to gather everything up and have it completely preppred before serving.

Regarding the eggs, I like them fried with a runny middle, as the yolk adds lovely richness to the whole dish. But cook them however you like your eggs.

Once your pan is nice and hot, you add a litle oil and then use wet hands to carefully pat the cooked, cooled rice into the pan.

Let it cook until the rice begins to brown and get crisp, then top the rice with your toppings. and drizzle on the sauce.

Stir it all together, spoon it into bowls, and top each bowl with an egg.

Smash that yolk, stir it all together, and dig in. Note: Gochujang stains like a mofo. Do not eat while wearing white.

Ingredients

  • 1/3 cup gojuchang paste $3.50 for 16 ounces
  • salt and pepper Pantry
  • 2 boneless, skinless chicken breasts or 4 boneless, skinless chicken thighs $4 
  • 3 cups cooked brown rice (about 1 cup uncooked) $1.50 
  • 5 tablespoons coconut or vegetable oil divided Pantry
  • 1/2 pound frozen spinach $1.50 for a 16-ounce bag
  • 4 cloves garlic, peeled and chopped Pantry
  • 2 eggs (or more, depending on how hungry you are) $2.50 for 6
  • 1 tablespoon sesame seeds, optional
  • 6 green onions, white and green parts, chopped $1 for a bunch
  • 2 carrots, sliced with a peeler or shredded, optional
  • kimchi to taste, optional 

Recipe Serves 2

Directions

  1. Mix the gochujang paste with enough water to make it pourable (3-4 tablespoons should do the trick.
  2. Pour half of the gochujang mixture into a gallon-size plastic zip-top bag. Reserve the second half for serving.
  3. Season the chicken with a big pinch of both salt and pepper, add the sesoned chickend to the bag, and mix well to coat. 
  4. Marinate for at least 30 minutes (or as long as overnight).
  5. Heat a cast iron pan over medium-high heat and add 1 tablespoon of the oil. 
  6. Cook the chicken for 5 minutes per side, until cooked through and slightly charred on the outside.
  7. Remove from the pan and let rest.
  8. Wipe the pan out using a paper towel.
  9. Add a second tablespoon of oil to the pan over medium-high heat, and add the spinach and garlic. Stir well to combine and cook just until the spinach is hot and the garlic is softened, about 5 minutes. Season with salt and pepper.
  10. Scrape the spinach into a bowl and set aside.
  11. Heat a third tablespoon of oil in the cast iron pan. Fry the eggs to your desired doneness.
  12. Add the remaining 2 tablespoons of oil to the pan over medium-high heat.
  13. With wet hands, carefully pat the rice into the hot pan, being careful not to touch the pan itself with your hands.
  14. Let the rice cook for 4-5 minutes, just until it begins to get crispy.
  15. While the rice cooks, slice the chicken into strips.
  16. Remove the pan from heat and top with all the toppings. Drizzle on the reserved sauce.

Personal Peach Pies

  • Prep Time 30 minutes
  • Cook Time 25-30 minutes
  • Estimated Cost $9
  • 26 Comments

Everyone tells you the month leading up to your wedding will be crazy. There will be RSVPs to wrangle, seating charts to sweat over, a million little details to communicate to a large group of people, many of whom live far away. You don't eat enough because you are stressed, but your dress has been tailored exactly to your body's current state, and you've been told that if you lose more weight, it won't fit. For the first time in your life, you worry that you will lose weight, instead of worrying that you won't. 

But nobody tells you that, in the midst of everything, you may feel compelled to comb through your life thus far with a fine-toothed comb. You try to determine if you are actually qualified to get married, as if that were a thing possible to determine. You wonder if you are you smart enough? Successful enough? Beautiful enough? Nobody tells you about the self-doubt. You find yourself wondering if any of your previous boyfriends know or care that you are getting married, and should you maybe reach out and tell them just in case? (Answers: maybe, no, and definitely not). 

But then, in the midst of this, you remember, of all things, a pie. A rustic, palm-sized peach pie you bought at a bakery somewhere in the East Village ten years ago, when you were twenty-four, just before you left the East Coast for San Francisco. You were about to uproot a five-year existence in Boston, to move back to your home state for a new job and an apartment you rented without visiting, when your best friend insisted you at least see New York City once before you go. So you loaded up a borrowed car and hit the road. You got bagels and slices of pizza (and you finally understood what the big deal was), and you even managed to run into someone you knew in high school (surely that was some sort of omen). But it was that peach pie, procured just before you drove back to Boston, and eaten in the car, that stayed with you the most.

You had been ridden with anxiety throughout the trip, and were scared and excited about the start of the next chapter. But for just a moment, your heart palpitations slowed when you bit into that pie. It was sweet like summer, encased in a crust that was buttery and flaky, but still sturdy enough that you could eat it without a plate or fork. All of its flavors were familiar and identifiable, and yet the combination tasted unlike anything you had ever eaten before. 

Now that you have this recipe, you can eat these pies whenever you need a little taste of the sweetness ahead. Or, you can top them with a scoop of vanilla ice cream or freshly whipped cream, and eat them simply because there is nothing more perfect on a hot summer day.

Ingredients

  • 1 pound sliced fresh white or yellow peaches (about 4 peaches -- leave the skin on) $4
  • juice of 1 lemon $0.50 for a whole lemon
  • 4 tablespoons sugar, divided Pantry
  • pinch of salt Pantry
  • 1 recipe Perfect Pie Crust, or 1 store-bought piecrust (make sure you buy the kind that comes rolled up in a cylinder, not the kind already pressed into a pie tin). $3
  • 1 egg, lightly beaten $1.50 for 6 

Recipe Serves 4-6

Directions

  1. Preheat the oven to 375 degrees F.
  2. Line a baking sheet with parchment paper, a silpat, or a light sprinkling of flour, and set aside.
  3. Combine the peaches, lemon juice, sugar and salt in a bowl. Stir gently to combine and let sit for 20 minutes.
  4. Roll the piecrust out on until it is about 1/6 inch thick, a floured surface.
  5. Use a 6-inch bowl to punch out 4-6 circles. If necessary, re-roll the scraps and punch again.
  6. Arrange 1/4 of the peaches in the center of a dough round, leaving a 2-inch border.
  7. Gently fold the border of dough over the peaches to make a loosely decorative edge. 
  8. Transfer the pie to the prepared baking sheet.
  9. Repeat with the rest of the dough and peaches. 
  10. Use a pastry brush to lightly coat each pie's crust with egg.
  11. Sprinkle the top and edges of each pie with the sugar.
  12. Bake the pies for 25-30 minutes, or until the crust is golden-brown and the peach filling is bubbly.
  13. Let cool slightly, then serve plain, with whipped cream or a scoop of vanilla ice cream.

Buffalo Cauliflower

  • Prep Time 10 minutes
  • Cook Time 21 minutes
  • 36 Comments

I've been thinking a lot about adaptation lately. And also about cauliflower. But...I am pretty much always thinking about cauliflower.

Anyone who follows my blog or knows me in person is familiar with my tendency to rhapsodize about the magical transformative abilities of humble cauliflower. From pizza to rice to tortillas to this layered lasagna thing I make every week (which I promise to eventually write about here) lower-carb, cauliflower-ified versions of high-carb starchy foods are my jam (and usually, my dinner). 

The thing about cauliflower transformation is that, even as a chewy tortilla, or in crispy-edged pizza form, its true flavor and texture never actually, truly disappears. No cauliflower creation ever ceases to truly be cauliflower...it's just presented in a different, gussied-up form. Sort of like when I have my hair and makeup done: the results are different, fancified, maybe prettier, but at the core, essentially the same as before.

Or maybe like when I get married in just six weeks? I'll be transformed to an extent then, right? I'll wear a special dress, have my hair and makeup done. Put on a ring made especially for me? And then, in front of friends and family, Evan and I will make our union legal. After the wedding, as he and I have been doing for the past four years, we'll continue to adapt. To married life, to permanent love.

But underneath it all, after the ketubah and marriage license have been signed, after my dress, with its intense boob-securing infrastructure (I have been promised several times that the dress won't require a bra. I am suspicious of this.), has been exchanged for a pair of jeans and a t-shirt, and Evan's dapper suit has been replaced by a more casual (but still extremely dapper) get-up, we'll find that, at our respective cores, we are still the same as before. Transformed, adapted--maybe with a few new ingredients added, as it were--but essentially the same as we've always been.

Kind of like this Buffalo Cauliflower: decorated, adapted, transformed...but at its heart, still cauliflower. 


Ingredients

  • 1 medium cauliflower, cored and cut into florets $2.50
  • 2 tablespoons extra virgin olive oil Pantry
  • 1/4 teaspoon kosher Pantry
  • 1/4 cup hot sauce, such as Tabasco, Frank's or Crystal $2.50 for 12 ounces
  • 2 tablespoons butter, melted $1 for a stick
  • juice of half a lemon $0.50 for a whole lemon
  • freshly ground black pepper, to taste Pantry
  • ranch or blue cheese dressing, for serving optional

Directions

  1. Preheat the oven to 450 degrees F.
  2. In a mixing bowl, toss the cauliflower florets with the oil and salt.
  3. Spread in an even layer on a rimmed, greased baking pan, and roast until they start to brown, about 15 minutes.
  4. While the cauliflower roasts, whisk together the hot sauce, butter, lemon juice, and black pepper.
  5. Remove the cauliflower from the oven, but leave the oven on.
  6. Using a spatula, scrape the roasted cauliflower into the hot sauce mixture, stir well to coat, then scrape the whole thing, sauce and all, onto the pan.
  7. Return to the oven and roast for an additional 15 minutes, then remove from oven and transfer to a serving platter.
  8. Serve with blue cheese dressing or ranch dressing