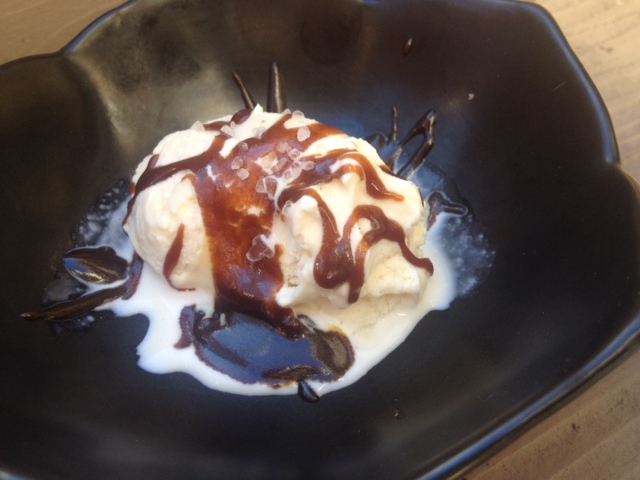
I enjoyed this over a scoop of really good vanilla ice cream with a tiny pinch of flaky sea salt on top.
Everyone knows about salted caramel, but I'm going to let you in on a BrokeAss kitchen secret: to achieve an even more decadent flavor, use brown sugar. Brown sugar, with its rich, molasses-y flavor, has--at least in my book--much more depth and clout than regular sugar. It's tastier in nearly everything. Seriously, try putting it in your coffee.
The same goes for its sisters, palm and coconut sugars, and, while a bit more expensive, both work well here. When they melt down, their toasty flavors permeate your caramel. You need only to add butter, half-and-half (you could use cream, but I rarely have it on hand, whereas I always have half-and-half) for body and richness, and a little salt.
I enjoyed this over a scoop of really good vanilla ice cream with a tiny pinch of flaky sea salt on top, but it would also be incredible swirled into a bread pudding, over sauteed bananas or pears, or even over Greek yogurt
It's dessert simplicity at its best--and it only costs $2.50 to make.
Ingredients
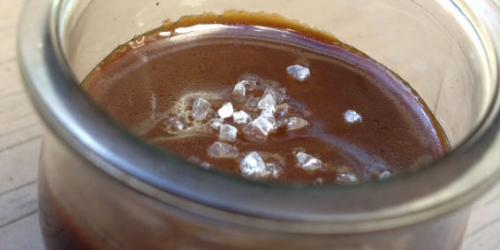
- 1 cup (packed) brown, palm or coconut sugar Pantry
- 1/2 cup half-and-half $1.50 for a pint
- 4 tbsp unsalted butter $1 for a stick
- 1 generous pinch of salt Pantry
Recipe Serves 6-8
Directions
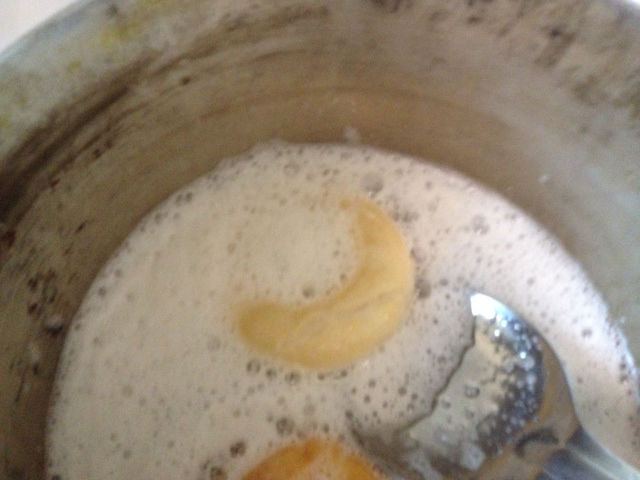
- Mix the sugar, half-and-half, butter and salt in a saucepan over medium-low heat. Cook while whisking gently for 5 to 7 minutes, until the mixture melts and begins to bubble.
- Turn off the heat and cool slightly. Add more salt, if desired.
- Pour the sauce into a jar.
- Once the sauce is completely cooled, screw the lid on tightly.
- Store in the refrigerator until ready to use.
- To reheat refrigerated sauce, place the opened jar into a small pot of gently simmering water. Heat for 4-5 minutes, or until the sauce is warm.
- For a quick dessert, serve the warmed sauce over ice cream.


