BrokeAss Gourmet

BrokeAss Gourmet

If you eat mushrooms you find, you are doing so at your own risk. While every effort has been made to ensure that the information contained in this site is correct, the author and editors of BrokeAss Gourmet caution against the use of the information in any particular application and accept no responsibility or liability for errors, omissions or representations, expressed or implied, contained herein.

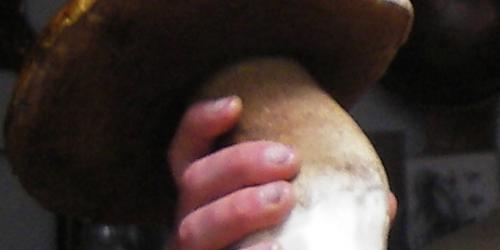
Agaricus augustus. Lepiota rachodes. Boletus edulis. Lactarius deliciosus. Clitocybe nuda. These are a few of my favorite things. Beautiful, a tad bit freakish, technically illegal to possess in most public places, and delicious, these are wild fungi. By learning to collect your own, you attain access to an arcane world of delicacies – for free. And on the kitchen end of the matter, preparation is minimal. Don’t be mistaken: You can – and should – wash mushrooms, though some chefs claim it’s a sin. And you needn’t make soufflĆ©s or risottos; in fact, you’ll best taste your wild mushrooms through simpler techniques – and no mushroom recipe beats a hot pan, olive oil, salt and pepper, white wine, and 10 to 20 minutes at the stove.

Before we go on, I must address poisonous mushrooms. This is not a matter to be taken lightly. People die painful, violent deaths almost every year from eating mushrooms of the Amanita genus, usually the Death Cap (A. phalloides). First, they may marvel at the wonderful taste and texture of this attractive mushroom. After an hour come stomach pain and nausea. This passes, however, and they are granted about 24 hours of relief. They are not in the clear, however, for all this while the amanitins – the deadly compounds in the mushroom – are maneuvering for a spirited assault on the liver. Amanitins are an effective army, and the besieged liver stands no chance. It melts, and without a transplant, you die, and if there’s one thing a broke-ass gourmand can’t afford, it’s a liver transplant. Thus, the moral of this story before it’s even begun is, do not eat wild mushrooms if you do not have a clear understanding of what you’re doing. Amanitas grow worldwide. They are a clear and present danger, year-round.

Mushrooms are a fast-growing, abundant, and truly sustainable food source. Those that cannot be cultivated encourage us to leave the beaten path and stalk through the forest. Better yet, many mushrooms only grow among particular trees and thus indirectly encourage environmental conservation, even among the most unlikely, arrogant, ignorant circles of urban food snobs.

Category:

Share this Recipe: Share on Facebook Tweet This! Pin it on Pinterest

Black Bean Puree Soup with Quesadillas

  • Prep Time 0:10
  • Cook Time 0:15
  • Estimated Cost $13.75
  • 6 Comments

This simple soup has all of the bean-y, spicy, onion-y flavors of a hearty vegetarian chili, but the smooth, elegant presentation of a puree soup. We love to use an immersion blender to puree the soup right in the pot (though a food processor or blender will do just fine). Serve the quesadillas alongside to dip into the soup.

Ingredients

  • olive oil Pantry
  • 1 small white onion, chopped $1
  • 2 cloves garlic, minced Pantry
  • 2 15-oz. cans black beans, drained and rinsed $3
  • 1 small bunch cilantro, chopped, stems reserved and cleaned $1
  • 1 small jalapeno, seeded and chopped $0.50
  • salt and pepper to taste Pantry
  • 1 Roma tomato, seeded and chopped $0.50
  • sour cream $1.25 for 8 oz.
  • 4 flour tortillas $3 for a package of 8
  • 6 oz. cheddar or jack cheese, shredded $3.50

Directions

  1. In a large saucepan, heat 1 tbsp olive oil over medium heat. Add onion and allow to cook for 2-3 minutes, until soft. Add garlic, stir, and allow to cook for another minute.
  2. Add beans, jalapeno, cilantro stems and 1 cup of water. Stir to combine and cook for 10 minutes uncovered. Puree until smooth using either an immersion blender, a food processor, or a regular blender. Add salt and pepper to taste and thin out using a little water if necessary.
  3. Keep the soup covered over a low flame to stay warm while you make the quesadillas. To serve, ladle into bowls and garnish with sour cream, cilantro and tomato.
  4. To make the quesadillas, heat 1 tbsp of olive oil in a medium frying pan over high heat. Sprinkle half of the shredded cheese onto one tortilla and cover with a second tortilla. Fry for 1-2 minutes on each side or until the tortillas are golden brown and the cheese has melted. Repeat with the remaining tortillas and cheese. Cut quesadillas into wedges and serve alongside the soup.

Category: Meals

Tags: , ,

Share this Recipe: Share on Facebook Tweet This! Pin it on Pinterest

So, it’s been about 2-and-a-half weeks since our February 5th launch and we’re thrilled to say things are going pretty darn well. We were STOKED this morning to see that the MSN Money blog, Smart Spending had good things to say about us, and have been loving all of your comments and feedback.

Of course we’re hoping that BrokeAss Gourmet will continue to thrive and grow, but we’re on a bigger mission than that.

Over the past year as the economy has headed south, we’ve seen many of our friends lose their jobs, get passed over for raises and bonuses and watch their stocks plummet. As a result, their lifestyles have changed and they find themselves cutting out luxuries like expensive meals and drinks out.

We’ve also noticed that being jobless and/or broke can take a toll on self esteem. Sure, it’s not your fault that the tech start-up you work for folded but that doesn’t mean you feel good about it—and it’s hard to work your mojo when you’re not feeling good. Well, BrokeAss Gourmet aims to offer a solution to both monetary and mojo-related woes:

cooking delicious, innovative meals at home + saving money by learning about inexpensive but quality ingredients + impressing your dining companion with your prowess in the kitchen = MOJO RETURNED

Thanks for reading, guys. We’re hard at work on how to bring the good life to you for little-to-no money, so please check back soon.

Category:

Share this Recipe: Share on Facebook Tweet This! Pin it on Pinterest

$5 Dessert: Sweet Crepes With Strawberries and Black Pepper

  • Prep Time 0:25
  • Cook Time 0:10
  • Estimated Cost $5.00
  • 3 Comments

It may sound funny for dessert, but strawberries and black pepper are actually a match made in heaven. This unpretentious yet impressive dessert is the perfect ending to a special meal when you don’t want to slave away in the kitchen. It is quickly whipped up and features a nice amount of pantry ingredients.

Ingredients

  • 1/2 cup flour Pantry
  • 1 egg, lightly beaten $1.50 for 1/2 dozen
  • 1 dash salt Pantry
  • 6 large strawberries, sliced $2
  • 1/3 cup whole milk $1.50 for a half-pint
  • 2 tbsp vegetable oil, divided Pantry
  • 4 tbsp sugar, divided Pantry
  • black pepper to taste Pantry

Directions

  1. Whisk together flour, egg, salt, milk, 1tbsp of the vegetable oil and 2 tbsp of the sugar until it resembles very thin pancake batter. Allow to rest for 15 minutes.
  2. Heat a small frying pan over medium heat and add the remaining 2 tbsp sugar, and 2 tbsp water. Gently stir until the sugars melt into a thin syrup. Add a few grinds of black pepper and the strawberries and stir gently. Remove from heat and set aside.
  3. Heat the remaining tbsp vegetable oil in an 8" skillet over high heat. Pour in half of the crepe batter and use a spatula to ensure it is evenly distributed. Allow to cook for 1-2 minutes or until the top has mostly dried. Very carefully flip the crepe over (it should be thin--you might need 2 spatulas for this) and allow it to cook for about a minute on the other side.
  4. Once the crepe is cooked, repeat with the remaining batter and transfer each crepe to its own plate. Add half of the strawberry mixture, reserving a little of the syrup to drizzle over the top. Roll the crepe and cut in half if desired. Garnish with additional black pepper and a bit of the strawberry syrup left in the pan.


Category: Meals

Tags: ,

Share this Recipe: Share on Facebook Tweet This! Pin it on Pinterest

Real Mac and Cheese

  • Prep Time 0:05
  • Cook Time 0:30
  • Estimated Cost $12.50
  • 10 Comments

When the weather is crappy (as it was in San Francisco this weekend), what could be better than hot, creamy macaroni and cheese? But don’t reach for that crap in the box. We think that for a few dollars more and a little bit of effort (but not much), you can do WAY better. The best thing about this very classic macaroni and cheese recipe is that it is based almost entirely on pantry and fridge basics, so it’s cheap and easy.

Ingredients

  • 1/2 lb. macaroni elbows, boccoli, or small penne pasta $2
  • 3 tbsp butter $1.50 for a stick
  • 1 cup shredded sharp cheddar $3.50 for 12 oz
  • 1/4 cup flour (do not substitute whole wheat) Pantry
  • 1 cup half-and-half $1.50
  • salt and pepper to taste Pantry
  • sprinkle of nutmeg $2 for 1 oz.
  • 1/4 cup unseasoned bread crumbs $2 for 15 oz.
  • vegetable oil for greasing pan Pantry

Directions

  1. Preheat oven to 400 degrees F. Cook pasta according to directions in salted water. While the pasta is cooking, melt the butter in a small pot over medium heat. Once it has melted, sprinkle in the flour, whisking until it forms a sticky dough (this is called making a "roux":http://en.wikipedia.org/wiki/Roux). Once the dough has formed, add the half-and-half a little bit at a time, whisking throughout, until you have a smooth, creamy sauce. Add more half-and-half to thin it slightly if necessary (it shouldn't be).
  2. Sprinkle in your cheese and stir until it melts into the sauce. Keep whisking. Add salt and pepper to taste and a little sprinkle of nutmeg. Stir until smooth and then remove from heat.
  3. When your pasta is done cooking, drain it and immediately return it to the pot you cooked it in. Toss with the cheese sauce until all the pasta is coated.
  4. Lightly grease the bottom and sides of an 8" pie pan or a 6x8" rectangular pan with vegetable oil. Pour in your cheesy pasta and use a spatula to pat it down so it fills every edge of the pan. Sprinkle with the bread crumbs.
  5. Bake for 20 minutes. Serve hot with a green salad or on its own.