BrokeAss Gourmet

BrokeAss Gourmet

Much of what I have to say here is a condensation of Mark Bittman’s Herb Lexicon. If you have not yet discovered Mark’s wonderful books (everyone should own How to Cook Everything) or if you are not a regular reader of his column (he is the New York Times food editor), I urge you to become acquainted with his work.

Though I prefer to use fresh herbs whenever I can, there are a number of herbs that I buy dried and keep for use in particular recipes. The danger of dried herbs is that they often sit in their jars in your cupboards for years, disintegrating into bitter bits. Do a purge every year and replace any dried herbs that have lost their color or have an “off” odor.

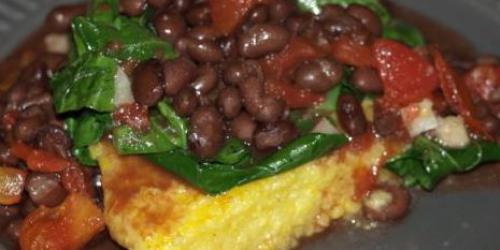
Dried Bay leaves are a pantry essential for me. I can’t make chicken stock or soups without Bay leaves, and they contribute complexity and depth to roasted vegetables. I also tend to buy dried Marjoram. Marjoram is a natural with vegetables, salads, and vinaigrettes. Light foods like eggs and tomatoes really come to life with a sprinkle of Marjoram. Thyme is one of those herbs that can be great fresh, but I often use dried, because the intensity of flavor is a bit muted with dried Thyme. It is important not to go overboard with Thyme, as it can easily overwhelm a dish, which is why it is so frequently added to long-cooking dishes where the flavors blend and soften. Bittman likes to pair thyme with olive oil and garlic in a saute. I like to use thyme in chicken or fish stews or with braised vegetables. Oregano is a versatile dried herb with a bright, piquant flavor, and is most noted for its presence in Mediterranean cooking—Italian, Greek, and Spanish dishes. I prefer fresh Oregano, but dried is acceptable. Oregano is wonderful in sauces, as anyone who has made an Italian red sauce knows, or in a vinaigrette, but my favorite use for Oregano—like Marjoram, is sprinkled on simple foods to brighten the flavors: tomatoes, eggs, or cheese. Sage is often found in stuffing seasoning for a good reason: It is wonderful with starches like pastas, beans, or breads or biscuits: Parmesan-sage biscuits are a little piece of heaven.

Category:

Tags: , ,

Share this Recipe: Share on Facebook Tweet This! Pin it on Pinterest

Fact: Nutritional yeast is good on EVERYTHING. Fact: If you have never tried nutritional yeast before it will initially scare the hell out of you. Fact: There is nothing to fear but fear itself. Fact: Nutritional yeast is delicious. Related Fact: Nutritional yeast is also nutritious.

OK, seriously though— this shit is good!! It is an essential food, or maybe I should say—an essential condiment for vegans and vegetarians alike. Unfortunately, because of it’s oh-so-so mysterious nature (a quality we love in romance, but not so much in our food) everyone is initially extremely reluctant to try this invaluable treat, but they end up asking for seconds and thirds and …..So, in an effort to reassure any novices out there, here is a bit of background information on those freaky little yellow flakes:

Nutritional yeast is deactivated yeast grown on mineral-enriched molasses. It is sold in a powdered form, or in larger flakes, usually found in the bulk foods section of health food stores. With it’s high complete protein content and impressive wealth of B-complex vitamins, nutritional yeast is a very valuable supplement to all types of diets. It is also often enriched with B12, a vitamin essential to red blood cell production and nervous system function. Having a savory, slightly nutty/cheesy taste makes it a popular substitute for Parmesan and other cheeses in vegan dishes .

Ingredients

  • 1 cube vegan boullion $1
  • 1 bunch collard greens $2
  • 1 ½ cups yellow cornmeal $1.50
  • 2 cloves garlic Pantry
  • 1 can black beans $1
  • 1 15-oz. can diced tomatoes $1
  • 7 tablespoons nutritional yeast (optional) $8/lb
  • olive oil for frying Pantry

Note: Collards can be substituted with any other green, if desired.

Recipe Serves 6

Directions

  1. Polenta Part One Bring 7 cups water to a boil, then add one cube of vegan boullion, let dissolve, and then slowly add 1 ½ cups yellow corn meal, lower to medium heat stirring continuously for 15 minutes, or until polenta is thickened. After polenta is thoroughly cooked, stir in 7 tablespoons of nutritional yeast (if desired) and pour into a 10-inch circular (or equivalent) oiled pan, spread evenly, approximately ½ inch thick. Place in refrigerator and let polenta solidify (about an hour.)
  2. Black Bean Sauce Simply mix one can of black beans (with juice) and one can of diced tomatoes together over medium heat, add in one teaspoon of cayenne pepper and stir occasionally until hot. Let sit, covered, on low heat while you prep the collards and polenta cakes.
  3. Collards Chop one bunch of collard greens and mince two cloves garlic. Sauté over medium heat in lightly oiled saucepan until collards are tender.
  4. Polenta Part Two Cut polenta into 6 slices, remove from pan and fry in lightly oiled saucepan over medium heat until each side is golden brown.
  5. Serve hot, with collard greens and black bean sauce.

Category: Meals

Tags: , ,

Share this Recipe: Share on Facebook Tweet This! Pin it on Pinterest

Convenience Store Coffee Cake

  • Prep Time 0:10
  • Cook Time 0:22
  • Estimated Cost $14.00
  • 3 Comments

I’m in on vacation in Boston this week, visiting Ryan, one of my best friends from college. After a fabulous and very late evening last night at a fundraiser, I should have done what one typically does on vacation: sleep in and nurse a hangover with coffee and a greasy breakfast. Instead I woke up at 6 AM, compelled to bake coffee cake.

Ryan rarely cooks and therefore didn’t have much in the way of coffee cake ingredients, so early this morning I wandered down to the nearby convenience store and found everything I needed for this easy, satisfying recipe. Normally I’m not much of a fan of baking mix, but it includes flour, baking soda and baking powder in one box so it’s actually a pretty good deal.

Ingredients

  • 2 cups baking mix $4
  • 1 cup milk $1.50 for 1 pint
  • 1/8 cup (1/2 stick) butter, melted, plus more for greasing pan $1.50 for a stick
  • 1/4 cup white sugar Pantry
  • 1 apple, coarsely chopped $1
  • 1/4 cup walnuts, chopped $3 for a 2-oz can
  • 1/2 cup brown sugar Pantry
  • 2 tsp cinnamon $1.50 for 1 oz.
  • 2 tsp ground ginger $1.50 for 1 oz.

Recipe Serves 4-6

Directions

  1. Preheat oven to 375 degrees F. Grease an 8x8 square pan or an 8" pie plate.
  2. Whisk together baking mix, milk, white sugar, and melted butter. Stir in apple, walnuts, cinnamon and ginger.
  3. Sprinkle brown sugar over the top and bake for 18-22 minutes or until a fork inserted into the center comes out clean.

Category: Meals

Share this Recipe: Share on Facebook Tweet This! Pin it on Pinterest

Ginger-Molasses Bread Pudding with Blueberries

  • Prep Time 0:10
  • Cook Time 0:22
  • Estimated Cost $13.50
  • 5 Comments

True confession: last Friday I bought a fresh whole-wheat baguette to have with dinner. True confession: today I remembered that half of it remained, still in its brown paper bag. Unsurprisingly, it was rock-hard. Rather than throw it away, I did what any true BrokeAss would do: I made bread pudding. Waste not, want not.

Ingredients

  • 1/2 baguette (ideally stale), cut into cubes $2
  • 1 1/2 cups milk $1.50 for 1 pint
  • 2 eggs $1.50 for 6
  • 1 small piece ginger, peeled and minced $1
  • 1/3 cup sugar Pantry
  • 1/8 cup blackstrap molasses $3 for 10 oz.
  • 1/2 cup fresh blueberries $2
  • 2 tbsp unsalted butter, plus more to grease the pan. $1 for a stick
  • powdered sugar for garnish $1.50

Recipe Serves 6

Directions

  1. Preheat oven to 400 degrees F. Grease an 8" pie plate with butter.
  2. In a medium bowl, whisk together milk, eggs, and molasses. Gently stir in sugar and ginger until well-incorporated. Add bread and allow to soak for 5-10 minutes, until most of the liquid has been absorbed.
  3. Use a spatula to scrape the bread mixture into the greased pie plate. Sprinkle with the blueberries and dot with butter. Bake for 20-22 minutes or until crisp on the outside and soft on the inside.
  4. Allow to cool for 5-10 minutes before dusting with powdered sugar and serving.

Category: Meals

Tags:

Share this Recipe: Share on Facebook Tweet This! Pin it on Pinterest