BrokeAss Gourmet

BrokeAss Gourmet

Hummus from Scratch

  • Prep Time 1 hour 15 minutes
  • Cook Time 1 hour 15 minutes
  • Estimated Cost $6
  • 45 Comments

I remember the first time I had real hummus. Not the goopy stuff that comes in a tub. You know that stuff: it's more mealy than creamy, and it never doesn't taste like the refrigerator it's stored in after being opened. Sometimes it comes in flavors like jalapeño or cilantro, but no amount of flavoring is enough to make up for its lack of freshness and lousy texture. 

The real stuff, which I tasted for the first time as an eighteen-year-old in Tel Aviv, is ethereally creamy, rich with olive oil, redolent of fresh lemon, lots of garlic, and good tahini, plus just enough salt to make it pop. It was revolutionary to me just how good it was, scooped onto a warm piece of hot-out-of-the-oven pita (which was also massively different than the bagged kind my mother bought at the grocery store back in the states). The hummus was somehow fuffy and luxurious at the same time, and much more flavorful than its off-white appearance let on. 

Though many countries claim hummus as their own, the chickpea-tahini-olive oil-lemon-garlic preparation of hummus is Egyptian in origin. Its complete name, ḥummuṣ bi ṭaḥīna means "chickpeas with tahini" in Arabic. And while, yes, it is available in plastic containers at your local grocery store, hummus made from scratch us in its own category. I order it regularly at my favorite neighborhood Middle Eastern restaurant, Old Jerusalem, but making it from scratch is a very close second. Here's how:

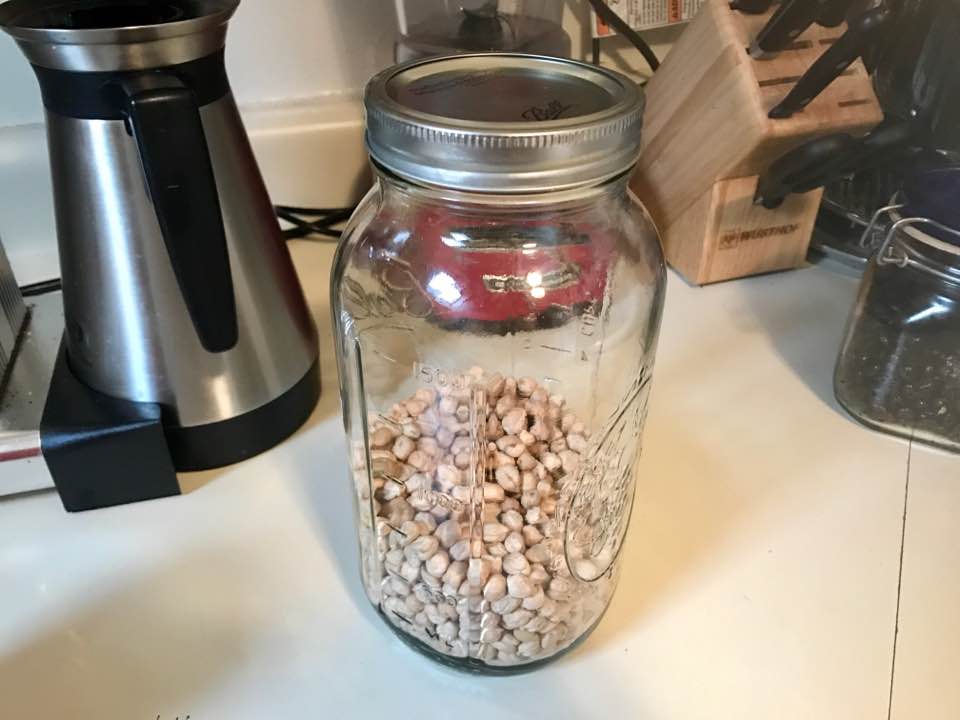
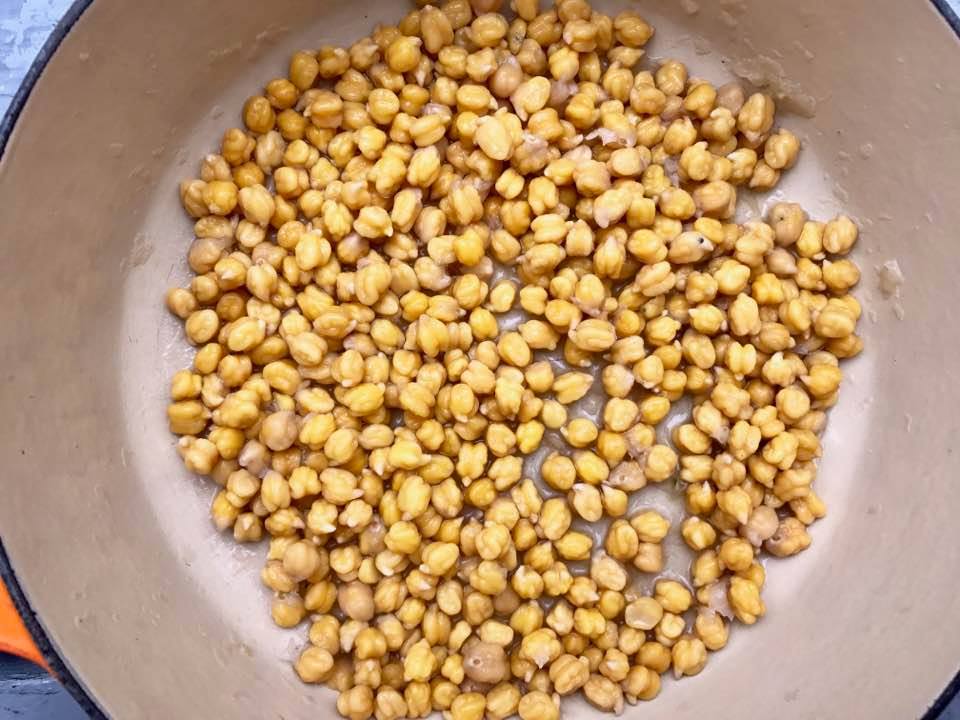
Start with dry chickpeas. Don't give in to the desire to use canned--they're really not as good. Besides, $5 worth of dry chickpeas will last you a whole lot longer than $5 worth of canned beans.

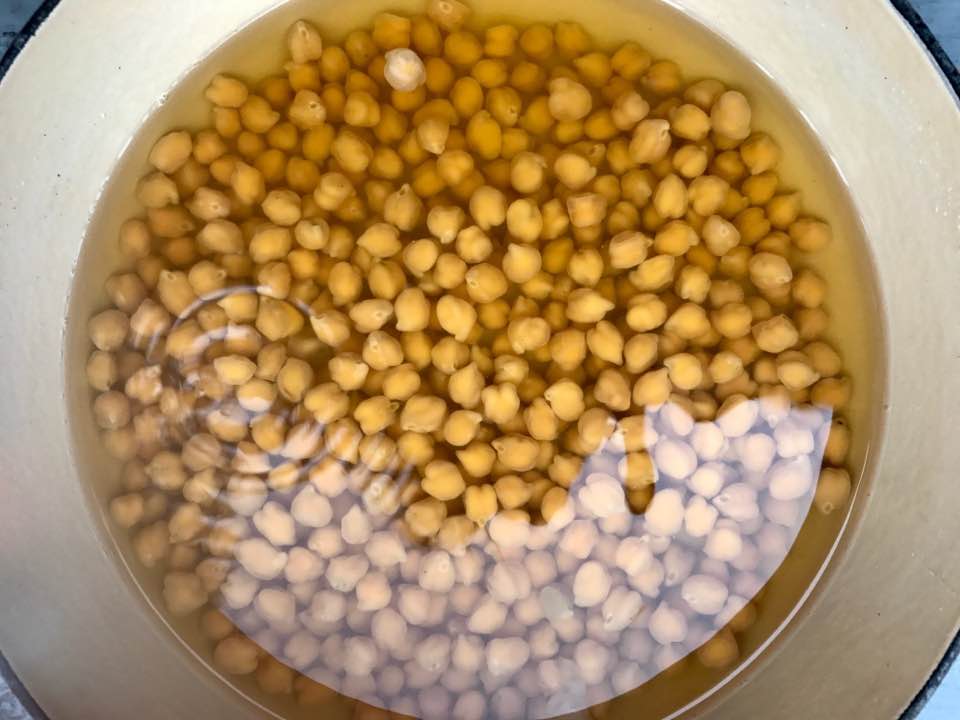
 If you have the time, soak them overnight, with some baking soda. If, like me, you are less patient, do the quick soaking method and stir some baking soda into the chickpeas and water, simmer for a few minutes, then cover for 10 minutes. This helps loosen the peels, and as you will find, this is the key to the smoothest, creamiest hummus.

 See how easily they come off? This process takes a little time, but trust me it's worth it. 

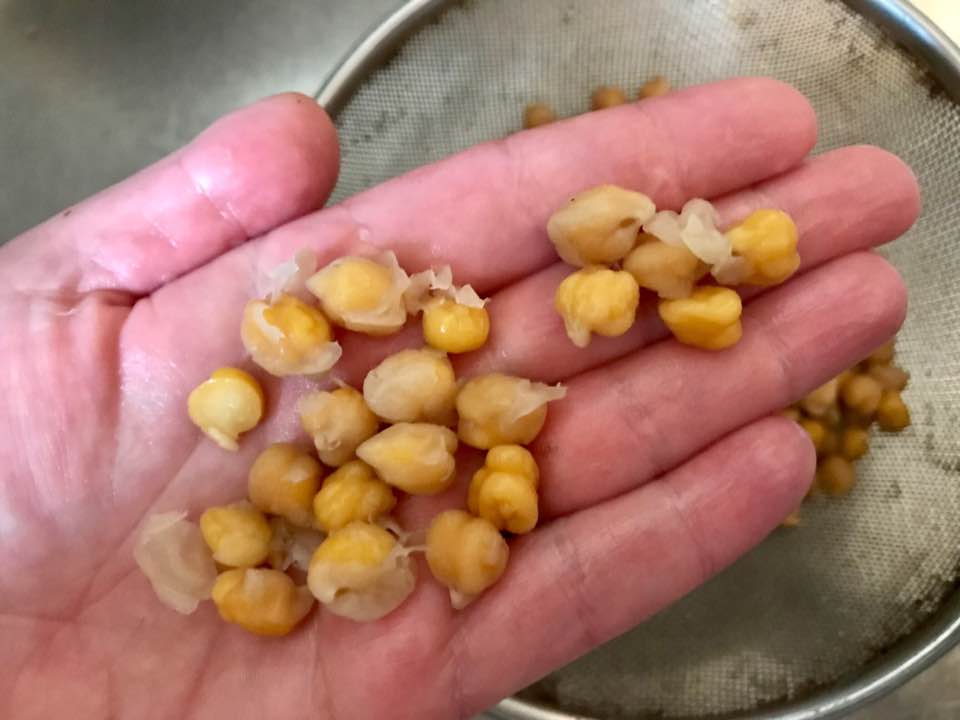
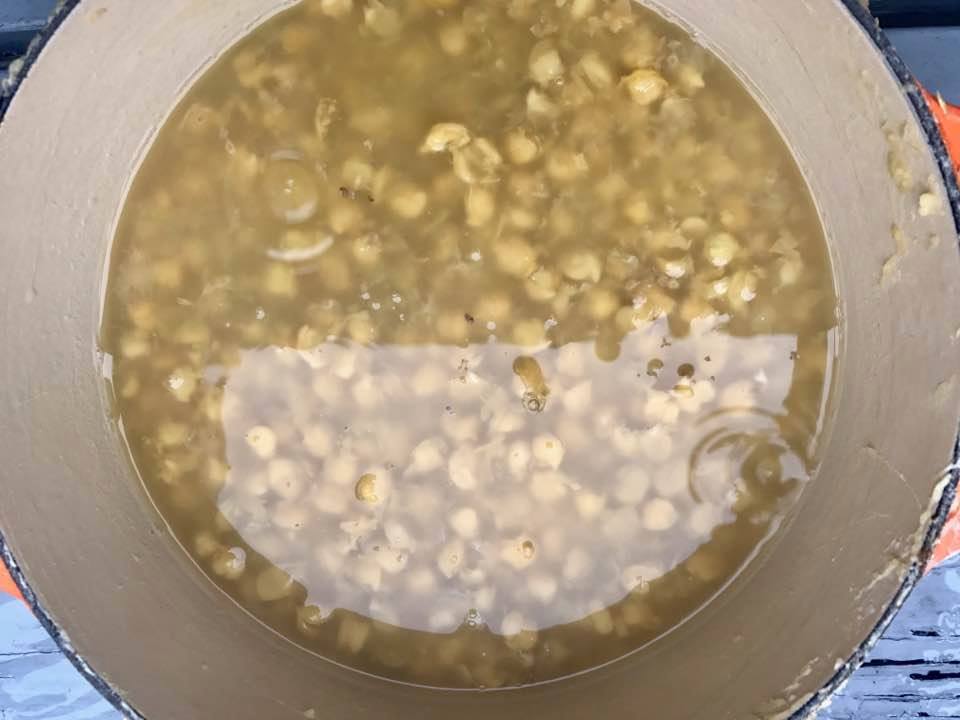
As you can see, a few peels remain. This is okay, the majority of the rest will float up during cooking.

The beans cook low and slow. Don't worry about them getting too mushy--they're just going to be pureed.


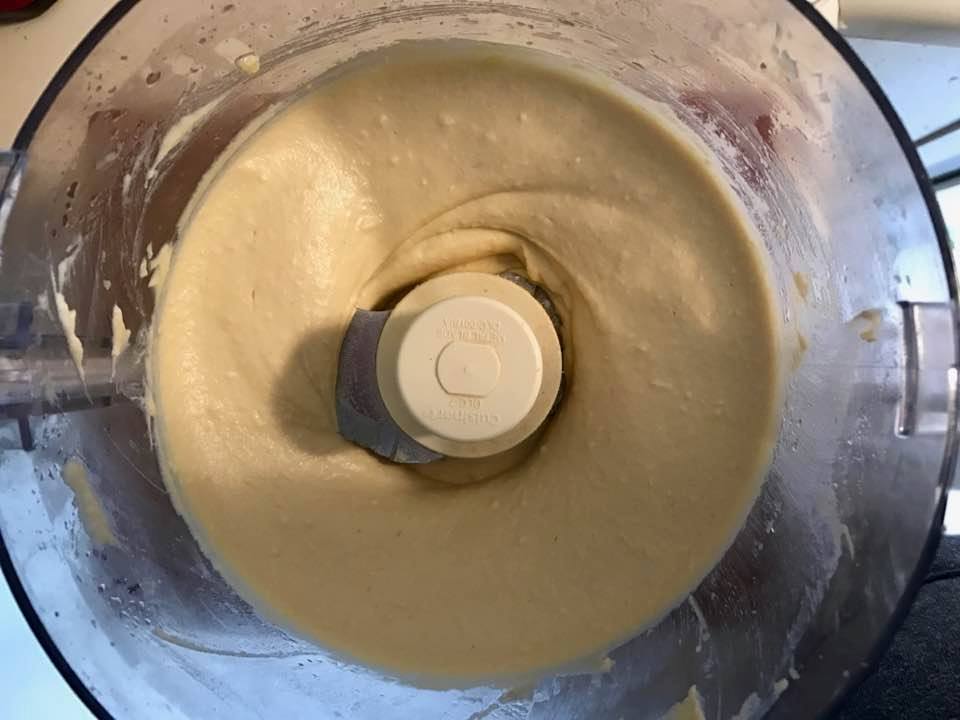
After cooking for a long time, it's into the food processor with tahini, olive oil, lemon, garlic, and salt.

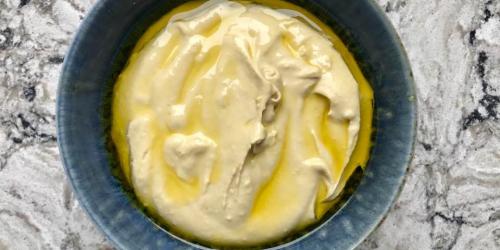
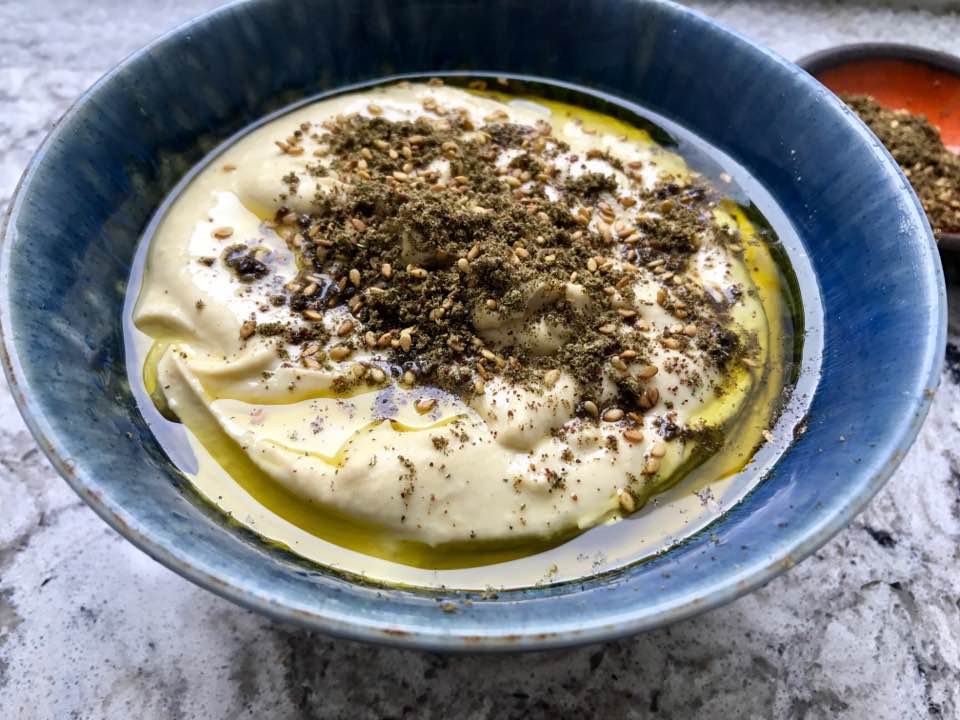
Don't forget the extra olive oil to garnish. No, this is not a low-fat food. Don't ever bother with a hummus that claims to be low-fat!

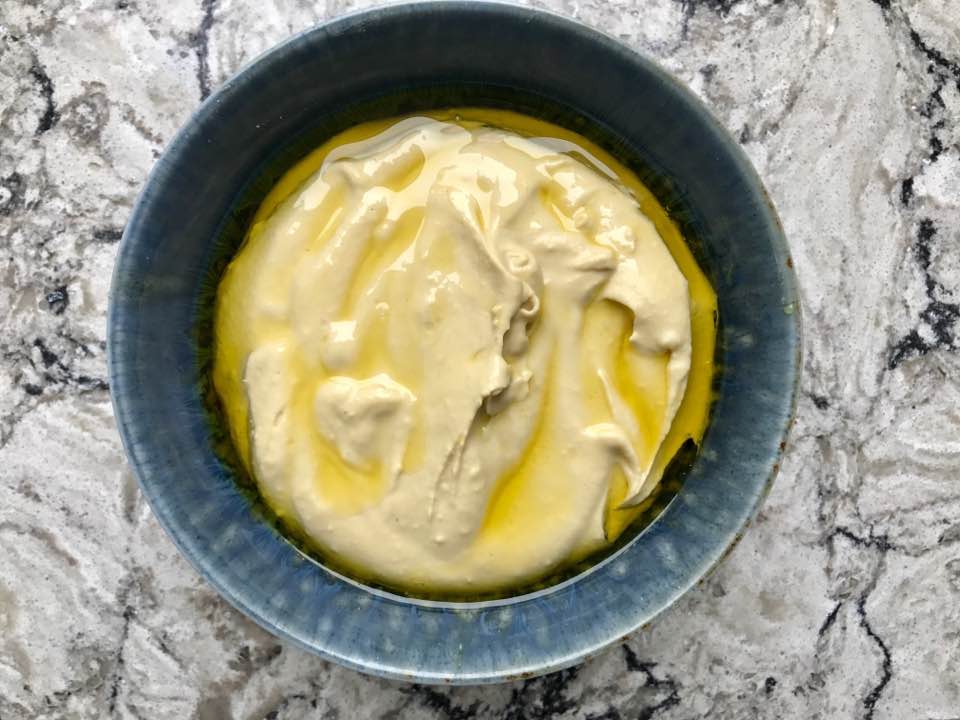
I like to top mine with zaatar, an oregano-based herb blend spice-and-herb blend. If you can't find zaatar, sumac, paprika, chopped parsley or cilantro, or even just  freshly ground black pepper works nicely.

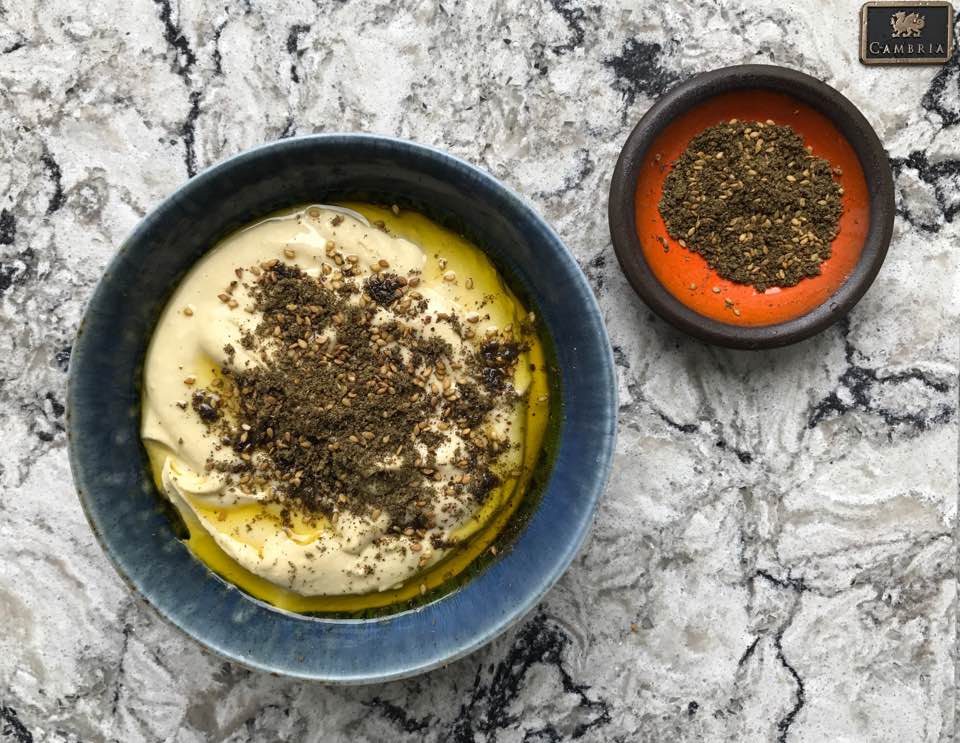
Don't you just want to dive in with a hot piece of pita?

Ingredients

  • 2 cups dried chickpeas $1.50 (buy in the bulk section for the best price)
  • 3 tablespoons baking soda Pantry
  • 1/4 cup extra virgin olive oil, plus more to garnish Pantry
  • 1/4 cup tahini $4 for 8 ounces
  • juice of 1 lemon $0.50 
  • 3 cloves garlic, roughly chopped Pantry
  • 2 teaspoons salt (more or less to taste) Pantry
  • zaatar Optional 

Recipe Serves 8-10

Directions

  1. Pick over the dried chickpeas and remove any that are still green.
  2. Put the chickpeas in a large heavy-bottomed pot, and add enough water so the chickpeas are under about 2 inches of water.
  3. Stir in the baking soda.
  4. Cover the pot and bring to a boil over high heat.
  5. Reduce the temperature to medium and let simmer for 5 minutes. 
  6. Let the chickpeas sit in the pot, covered for 10 minutes. 
  7. Turn off the heat and drain the chickpeas in a colander or strainer.
  8. Run cold water over the chickpeas until they are cool to the touch.
  9. Working in small batches, rub a handful of chickpeas between your hands to remove the peels. 
  10. Repeat until most of the peels have been removed from the chickpeas.
  11. Place the peeled chickpeas back in the pot and cover with 2-3 inches of water. Cover the pot with the lid.
  12. Bring to a boil, then reduce heat to medium-low.
  13. Let the pot simmer for 1 hour and 15 minutes.
  14. Once the chickpeas have finished cooking, lift the lid and use a slotted spoon to remove any peels that floated to the top during cooking.
  15. Drain the chickpeas in a colander or strainer and run cold water over them to bring them to room temperature.
  16. Place the chickpeas in the bowl of a food processor. Run the machine until all lumps disappear and the chickpeas are very smooth 
  17. With the machine running, stream in the olive oil.
  18. Add the tahini, lemon juice, garlic, and salt and blend until the hummus is completely smooth.
  19. Scrape the hummus into a serving bowl, and garnish with a heavy sprinkle of zaatar and a generous drizzle of olive oil.
  20. Serve with fresh vegetables, pita, pita chips, kebabs, or anything else you like.

Spaghetti with Short Rib Ragu

  • Prep Time 10 minutes
  • Cook Time 3 hours, 15 minutes
  • Estimated Cost $17.50
  • 34 Comments

For so many years of my life, Valentine's Day served as this horrible life marker, wherein I would be merrily rolling along through my nice, fun life and then, all of a sudden, it was February 14th and, in the absence of a romantic relationship, suddenly my life felt like it lacked meaning. It was as if everyone I saw was blissfully in love, and proving it to the world with candy hearts, boxes of chocolate, bouquets delivered to the office, and reservations at romantic restaurants while I was completely alone in the world. 

And it wasn't just limited to Valentine"s Days when I was single. If I happened to have a boyfriend (or a sort-of boyfriend/guy-who-didn't-realize-I-thought-of-him-as-my-sort-of-boyfriend as the case usually was) on V-day, the anxiety over whether he would demonstrate his affection for me in a quantifiable way, per every Valentine's Day trope I had seen or heard of, was even worse than how I felt when I didn't have a partner. Because of course he wouldn't, and of course I wouldn't be able to overcome the disappointment, live in the moment, and enjoy whatever the day brought my way. In the end, the feeling was always the same: I wanted more love than I felt was available to me and it sucked hard.

When I met Evan, romance was the last thing I was looking for in life. I had just started earning a living as a full-time writer and I was so career-happy I didn't even know what to do with myself. My life-long dream of publishing a book was about to come true, and I genuinely looked forward to every day. My social life was just peachy, and for the first time in a long while (perhaps thanks to a string of romantic failures the year before and subsequent therapy and self-reflection), I had zero interest in seeking out any form of serious romance.

Then, of course, things changed. Once Evan came into my life, I quickly realized I never wanted him to go, and he found he didn't want to either. Things were a little clunky in the beginning, as they tend to be when two people who are not used to having to answer to anyone decide to meld pieces of their lives. It took us a little while to figure out exactly what love would look like for us, but we did it, and now, five years later, we're here.

And while he is the king of my heart, and will be celebrated tonight with a romantic home-cooked dinner (more on that in a minute), I'd like to time travel for a moment and send a message to my younger self, the smart, cute, funny girl who is stuck in an alternate dimension in the 90's or mid-00's, feeling sad because some dumb boy didn't give her flowers or take her out to dinner on an arbitrary corporate greeting card holiday: You are fine. Love is weird and creeps into life unexpectedly. Candy hearts are not a measure of how much you are loved. Go out and have fun. 

Meanwhile, here in 2017, let's make some short rib ragu, perfect for your Valentine, Galentine, BFF, or #1, AKA yourself.

I'm starting by searing about a pound of boneless short ribs (the kind with bones in are fine too, just double it to 2 pounds) in a little olive oil in a Dutch oven.

Let's take them out. Look how beautiful they are.

Next, like any ragu, we're going to cook some vegetables. Here, we're going with aromatics: onion, lots of parsley, and garlic.

Next up is broth, to deglaze the pan, and some chopped tomatoes. This is going to be our braising liquid and eventual sauce.

In go the short ribs, settling in for a 3 hour bath.

3 hours later, the sauce is cooked down and the short ribs are falling apart, and out they come. These are so tender, you barely have to pull the forks into the meat.


Back into the pot, where you can see everything has completely cooked down.

Spaghetti, meet short rib ragu. I'm sensing a real love connection. 


Ingredients

  • 2 tablespoons extra virgin olive oil Pantry
  • salt and pepper Pantry
  • 1 pound boneless short ribs $8
  • 1 medium yellow onion, diced $1
  • 1 large handful fresh flat-leaf parsley, plus more for garnish $1 for a bunch
  • 3 cloves garlic, chopped Pantry
  • 2 15-ounce cans beef broth, warmed on the stove $3 
  • 2 15-ounce can chopped tomatoes $3
  • 8 ounces dried spaghetti (or any other thin, long-strand pasta) $1.50 for 16 ounces

Recipe Serves 4

Directions

  1. Heat the oil in a large dutch oven or heavy-bottomed pot (with a fitted lid) over medium-high heat.
  2. Lightly salt and pepper the short ribs on both sides.
  3. Brown the short ribs in the hot oil for 2-3 minutes on each side, until a thick crust forms.
  4. Remove the short ribs from the pan and set aside. 
  5. Add the onions, parsley, and garlic to the pan and brown well, for 3-4 minutes.
  6. Deglaze the pan by pouring in the warm broth and scraping the bottom of the pan with a wooden spoon to loosen any stuck bits.
  7. Add the tomatoes and season with 1/2 teaspoon each of salt and pepper.
  8. Return the short ribs to the pot.
  9. Turn the heat up and bring to a boil, then reduce heat to medium-low.
  10. Simmer for about 3 hours, until the sauce has greatly reduced and the short ribs are very tender.
  11. Remove the short ribs and transfer them to a cutting board.
  12. Use 2 forks to shred the meat, then return it to the pot and stir well.
  13. Taste for seasoning and, if necessary, add a little more salt.
  14. Reduce the heat to low so it continues to simmer.
  15. Bring a pot of salted water to a boil and cook the spaghetti according to package instructions. Be sure to reseve 1/2 cup cooking water.
  16. Transfer the cooked pasta (without rinsing), plus 1/2 cup reserved cooking water to the simmering ragu and let cook together for 2-3 minutes.
  17. Serve the pasta in bowls, garnished with a little more chopped parsley.

Soft Pretzels with IPA Cheese Sauce

  • Prep Time 15 minutes
  • Cook Time 30 minutes
  • Estimated Cost $11.50
  • 48 Comments

I'm not interested in diving too deeply into politics here. 

Not because I'm shy about them (if you know me in person or follow me on Twitter or Instagram or my personal Facebook page, you know I am extremely forthcoming about my beliefs), but because I'm guessing you're here because you're hoping to briefly think about something other than what's going on in the news. I know I'm here, posting on this blog I have so neglected over the past year (sorry about that, by the way) because I needed a little reprieve too. 

Of course, it's not as easy as simply changing the subject. Sure, I could tell you about what's new with me, how married life is going so far, about the books I have coming out this year, and the new season of Young & Hungry. But not only does that feel incredibly tone-deaf and insensitive, it's also not really reflective of how I feel on the inside right now, where I am completely distracted by what's going on in the world. 

Lately, I have been granting myself little breaks from worrying about absolutely everything. Cooking, of course, is an excellent stabilizer, and gives me an opportunity to nourish the souls and bodies at my dinner table with wholesome, satisfying food. My recently acquired running habit has become my favorite way to spend an hour not thinking about anything other than putting one step in front of the other and not getting hit by a car. When things get really bad, I'll treat myself to a half-hour episode of Sex and the City, where the worst thing I have to deal with is the utter lie that man-child Big could ever be an acceptable boyfriend for Carrie (don't even get me started on their eventual marriage in the movie versions). And this Sunday, I'll partake, extremely half-heartedly, in America's favorite form of distraction: the Superbowl. 

I can't contribute much football spirit to the game, so I'll be doing what I do best: making something good to eat while we watch grown men who make more money than the GNP of small countries beat each other up. More specifically: soft pretzels with decidedly decadent, gooey IPA cheese sauce for dipping. Here's what that looks like.

It starts with my favorite staple: pizza dough

A bath of simmering water with baking soda helps turn them from plain old dough knots into shiny yellow pretzels when you bake them.

Onto a baking sheet they go, topped with a thick coat of melted butter. 

I added some coarse salt, but you're welcome to skip this part if you like.

And into the oven. 

While they bake, the cheese and beer sauce comes together.

A lot of sharp cheddar makes it velvety.

After about 30 minutes, the pretzels are ready to eat. I like to keep the sauce warm by serving it in a metal pot.

Dig in. Forget your cares for a few minutes.

 Then get back to the very important job of standing up for what you believe in.

Ingredients

  • flour Pantry
  • 2 pounds store-bought or homemade pizza dough $1.50
  • tablespoon baking soda Pantry
  • 2 tablespoons large-grain salt, like sea salt or coarse kosher salt Pantry
  • 5 tablespoons unsalted butter, melted, divided
  • 1/4 cup milk $1.50 for a pint
  • 1/2 cup IPA $2.50 for a 12-ounce can or bottle
  • 2 cups shredded sharp cheddar cheese $3.50 
  • 1 tablespoon spicy brown or dijon mustard optional
  • regular salt, to taste Pantry
  • ground black pepper, to taste Pantry


Recipe Serves 8-10

Directions

  1. Preheat the oven to 400°F.
  2. Lightly grease (or line with parchment paper or a silpat) 1 large or 2 medium baking sheets.
  3. Set a large pot of water on the stove and whisk in the baking soda. Bring water to a light boil.
  4. On a lightly floured surface, oll the dough out into 20 10-inch ropes and fold each rope into a pretzel shape (or other desired shape).
  5. Drop each piece of dough into the water, boil for 10-15 seconds each, until they float, and then transfer to the prepared baking sheet(s).
  6. Use a pastry brush to lightly brush the tops of the pretzels with the 4 tablespoons of melted butter.
  7. Sprinkle with the coarse salt. 
  8. Bake for 25-30 minutes or until pretzels are golden brown. 
  9. While the pretzels bake, make the cheese sauce. Place the remaining tablespoon of butter in a medium pot on the stove over medium heat.
  10. Add a tablespoon of flour and whisk until a sticky dough forms.
  11. Add the milk and beer, continuing to whisk until a smooth and creamy sauce forms.
  12. Stir in the cheese, whisking constantly to avoid lumps. 
  13. Add the mustard, if using, plus the salt and pepper to taste and whisk until incorporated.
  14. Continue cooking for about 5 minutes, whisking occasionally.
  15. To serve, transfer the finished, warm pretzels to a serving plate and serve with the hot cheese sauce (I like to serve it in a cute metal pot, to keep it hot), for dipping.


Cast Iron Bibimbap + Wedding Pics

  • Prep Time 45 minutes
  • Cook Time 20 minutes
  • Estimated Cost $14
  • 15 Comments

One of the weirdest questions I was asked multiple times during the year I spent planning my wedding was whether I would be doing the food myself.

My response was similar to how I felt when my grandmother, confused as to how I managed to book a plane ticket for a trip we were going on together without using her travel agent, asked me how I had "hacked into the Alaska Airlines ticket system."

In both cases, I was a little shocked to be asked such a question, but utterly flattered that the asker thought I was capable of executing such a feat. I know some people cater their own weddings, and I tip my veil to them because that is incredibly impressive. But I am a mere mortal and so hired a catering company. (I also did not hack into the Alaska Airlines backend, in case you were still wondering).

Park Avenue Catering and Patisserie Angelica in Sonoma County did the food, cake, and desserts at my wedding, and they both did a phenomenal job.

Oh yeah. Sorry to bury the lede, here. I'm thrilled to tell you that Evan and I got married this summer.

It was wonderful. We held the wedding at Kunde Family Winery in Kenwood, CA on July 3rd, atop a hill overlooking the entire Sonoma Valley. If you're the wedding stalker type, and want to see the whole album, here it is. Meanwhile, here are a few highlights.

Our ceremony was held under a chuppah constructed using poles made of wood from Camp Tawonga, my childhood summer camp, and a talis (prayer shawl) that Evan bought in Jerusalem last summer.

We have a special place in our heart for sunflowers (Evan brings me a bouquet of them every week--I know, we're nauseating), and we wanted them to be the only flowers at the wedding. Everyone thought this idea sounded crazy, but our wedding planner Ali Diluvio and Anita from Wine Country Flowers made it work perfectly, by pairing the sunflowers with blue glassware and rustic yet refined decor.

As I said, I didn't do the food, but it was delicious and beautiful. Obviously, I asked for lots of photos of food, and our wedding photographer, Jennifer Bagwell delivered big time.


I know everyone says this, but it was truly the best day of our lives.

Another reason why you haven't heard from me is that after the wedding, we went to Maui, where we ate all the poké on the island and drank more mai tais than we should have.

I cooked a little on Maui, in the oceanside condo we rented (so much better than staying in a hotel, as far as I'm concerned), but I was mostly making grilled fish with fruit. Seriously, we each ate at least one mango, guava, or dragonfruit per day. There is no fruit like ripe, local tropical fruit.

But now we're back. And there are books to write (I have 2 coming out in 2017! More on that soon), a schoolyear to dive into (for Evan), and, of course, cooking to be done. We're slowly readjusting to our real life and new matrimony. And of course, I'm back in the kitchen.

I've alway loved Bibimbap, a Korean dish of rice, meat, and vegetables, typically served in a stone pot, which serves to keep it hot and also to crisp the rice. I had never made it at home before, because I assumed I needed an actual stone pot. But a few weeks ago, as I was garnishing a panful of crispy roasted chicken legs, it occurred to me that my cast iron frying pan could probably produce the same results. I am so happy to tell you that was right. 

The not-so-secret ingredient to a good bibimbap is gochujang, a Korean fermented chili paste. Look for it at Asian specialty grocery stores, or in well-stocked supermarkets.

This particular variety is too thick to pour, so it needs to be diluted a little bit with water.

Classic bibimbap recipes call for bulgogi (Korean barbecued beef), but I didn't have any beef, so I used chicken breasts, which I marinated half of the gochujang. You could also use chicken thighs, tofu, or some really meaty mushrooms.


This dish works well with leftover rice, but if you don't have any, now is a good time to make some. You will need about 3 cups of cooked rice. Pretty much any grain will work. I have also used quinoa and millet with great results.

I made some garlicky spinach with sesame seeds as one of the components. You could also use raw kale salad, pickled Asian pear, or just about any vegetable lingering in your produce bin.

I should say that you could probably make this dish using a regular nonstick frying pan, but since cast iron gets very hot all over, and is similar to a stone pot in that respect, I think it's better. Also, why don't you have a cast iron pan? They last forever and are very affordable. This one is my favorite

I topped my bibimbap with a variety of vegetables, kimchi, and a couple of eggs. You'll want to gather everything up and have it completely preppred before serving.

Regarding the eggs, I like them fried with a runny middle, as the yolk adds lovely richness to the whole dish. But cook them however you like your eggs.

Once your pan is nice and hot, you add a litle oil and then use wet hands to carefully pat the cooked, cooled rice into the pan.

Let it cook until the rice begins to brown and get crisp, then top the rice with your toppings. and drizzle on the sauce.

Stir it all together, spoon it into bowls, and top each bowl with an egg.

Smash that yolk, stir it all together, and dig in. Note: Gochujang stains like a mofo. Do not eat while wearing white.

Ingredients

  • 1/3 cup gojuchang paste $3.50 for 16 ounces
  • salt and pepper Pantry
  • 2 boneless, skinless chicken breasts or 4 boneless, skinless chicken thighs $4 
  • 3 cups cooked brown rice (about 1 cup uncooked) $1.50 
  • 5 tablespoons coconut or vegetable oil divided Pantry
  • 1/2 pound frozen spinach $1.50 for a 16-ounce bag
  • 4 cloves garlic, peeled and chopped Pantry
  • 2 eggs (or more, depending on how hungry you are) $2.50 for 6
  • 1 tablespoon sesame seeds, optional
  • 6 green onions, white and green parts, chopped $1 for a bunch
  • 2 carrots, sliced with a peeler or shredded, optional
  • kimchi to taste, optional 

Recipe Serves 2

Directions

  1. Mix the gochujang paste with enough water to make it pourable (3-4 tablespoons should do the trick.
  2. Pour half of the gochujang mixture into a gallon-size plastic zip-top bag. Reserve the second half for serving.
  3. Season the chicken with a big pinch of both salt and pepper, add the sesoned chickend to the bag, and mix well to coat. 
  4. Marinate for at least 30 minutes (or as long as overnight).
  5. Heat a cast iron pan over medium-high heat and add 1 tablespoon of the oil. 
  6. Cook the chicken for 5 minutes per side, until cooked through and slightly charred on the outside.
  7. Remove from the pan and let rest.
  8. Wipe the pan out using a paper towel.
  9. Add a second tablespoon of oil to the pan over medium-high heat, and add the spinach and garlic. Stir well to combine and cook just until the spinach is hot and the garlic is softened, about 5 minutes. Season with salt and pepper.
  10. Scrape the spinach into a bowl and set aside.
  11. Heat a third tablespoon of oil in the cast iron pan. Fry the eggs to your desired doneness.
  12. Add the remaining 2 tablespoons of oil to the pan over medium-high heat.
  13. With wet hands, carefully pat the rice into the hot pan, being careful not to touch the pan itself with your hands.
  14. Let the rice cook for 4-5 minutes, just until it begins to get crispy.
  15. While the rice cooks, slice the chicken into strips.
  16. Remove the pan from heat and top with all the toppings. Drizzle on the reserved sauce.

Personal Peach Pies

  • Prep Time 30 minutes
  • Cook Time 25-30 minutes
  • Estimated Cost $9
  • 26 Comments

Everyone tells you the month leading up to your wedding will be crazy. There will be RSVPs to wrangle, seating charts to sweat over, a million little details to communicate to a large group of people, many of whom live far away. You don't eat enough because you are stressed, but your dress has been tailored exactly to your body's current state, and you've been told that if you lose more weight, it won't fit. For the first time in your life, you worry that you will lose weight, instead of worrying that you won't. 

But nobody tells you that, in the midst of everything, you may feel compelled to comb through your life thus far with a fine-toothed comb. You try to determine if you are actually qualified to get married, as if that were a thing possible to determine. You wonder if you are you smart enough? Successful enough? Beautiful enough? Nobody tells you about the self-doubt. You find yourself wondering if any of your previous boyfriends know or care that you are getting married, and should you maybe reach out and tell them just in case? (Answers: maybe, no, and definitely not). 

But then, in the midst of this, you remember, of all things, a pie. A rustic, palm-sized peach pie you bought at a bakery somewhere in the East Village ten years ago, when you were twenty-four, just before you left the East Coast for San Francisco. You were about to uproot a five-year existence in Boston, to move back to your home state for a new job and an apartment you rented without visiting, when your best friend insisted you at least see New York City once before you go. So you loaded up a borrowed car and hit the road. You got bagels and slices of pizza (and you finally understood what the big deal was), and you even managed to run into someone you knew in high school (surely that was some sort of omen). But it was that peach pie, procured just before you drove back to Boston, and eaten in the car, that stayed with you the most.

You had been ridden with anxiety throughout the trip, and were scared and excited about the start of the next chapter. But for just a moment, your heart palpitations slowed when you bit into that pie. It was sweet like summer, encased in a crust that was buttery and flaky, but still sturdy enough that you could eat it without a plate or fork. All of its flavors were familiar and identifiable, and yet the combination tasted unlike anything you had ever eaten before. 

Now that you have this recipe, you can eat these pies whenever you need a little taste of the sweetness ahead. Or, you can top them with a scoop of vanilla ice cream or freshly whipped cream, and eat them simply because there is nothing more perfect on a hot summer day.

Ingredients

  • 1 pound sliced fresh white or yellow peaches (about 4 peaches -- leave the skin on) $4
  • juice of 1 lemon $0.50 for a whole lemon
  • 4 tablespoons sugar, divided Pantry
  • pinch of salt Pantry
  • 1 recipe Perfect Pie Crust, or 1 store-bought piecrust (make sure you buy the kind that comes rolled up in a cylinder, not the kind already pressed into a pie tin). $3
  • 1 egg, lightly beaten $1.50 for 6 

Recipe Serves 4-6

Directions

  1. Preheat the oven to 375 degrees F.
  2. Line a baking sheet with parchment paper, a silpat, or a light sprinkling of flour, and set aside.
  3. Combine the peaches, lemon juice, sugar and salt in a bowl. Stir gently to combine and let sit for 20 minutes.
  4. Roll the piecrust out on until it is about 1/6 inch thick, a floured surface.
  5. Use a 6-inch bowl to punch out 4-6 circles. If necessary, re-roll the scraps and punch again.
  6. Arrange 1/4 of the peaches in the center of a dough round, leaving a 2-inch border.
  7. Gently fold the border of dough over the peaches to make a loosely decorative edge. 
  8. Transfer the pie to the prepared baking sheet.
  9. Repeat with the rest of the dough and peaches. 
  10. Use a pastry brush to lightly coat each pie's crust with egg.
  11. Sprinkle the top and edges of each pie with the sugar.
  12. Bake the pies for 25-30 minutes, or until the crust is golden-brown and the peach filling is bubbly.
  13. Let cool slightly, then serve plain, with whipped cream or a scoop of vanilla ice cream.